
morgan girvin
illustrator, maker and hermitinfo
about
contact
shop
illustrated work
wimmelbilder
film postersalbum art
maps
general illustrations
crafted work
hand crafted projects
big things
film boxsets

morgan girvin
illustrator, maker and hermit
![]()
![]()
![]()
![]()
![]()
WOODEN A2 DRAWING BOARD
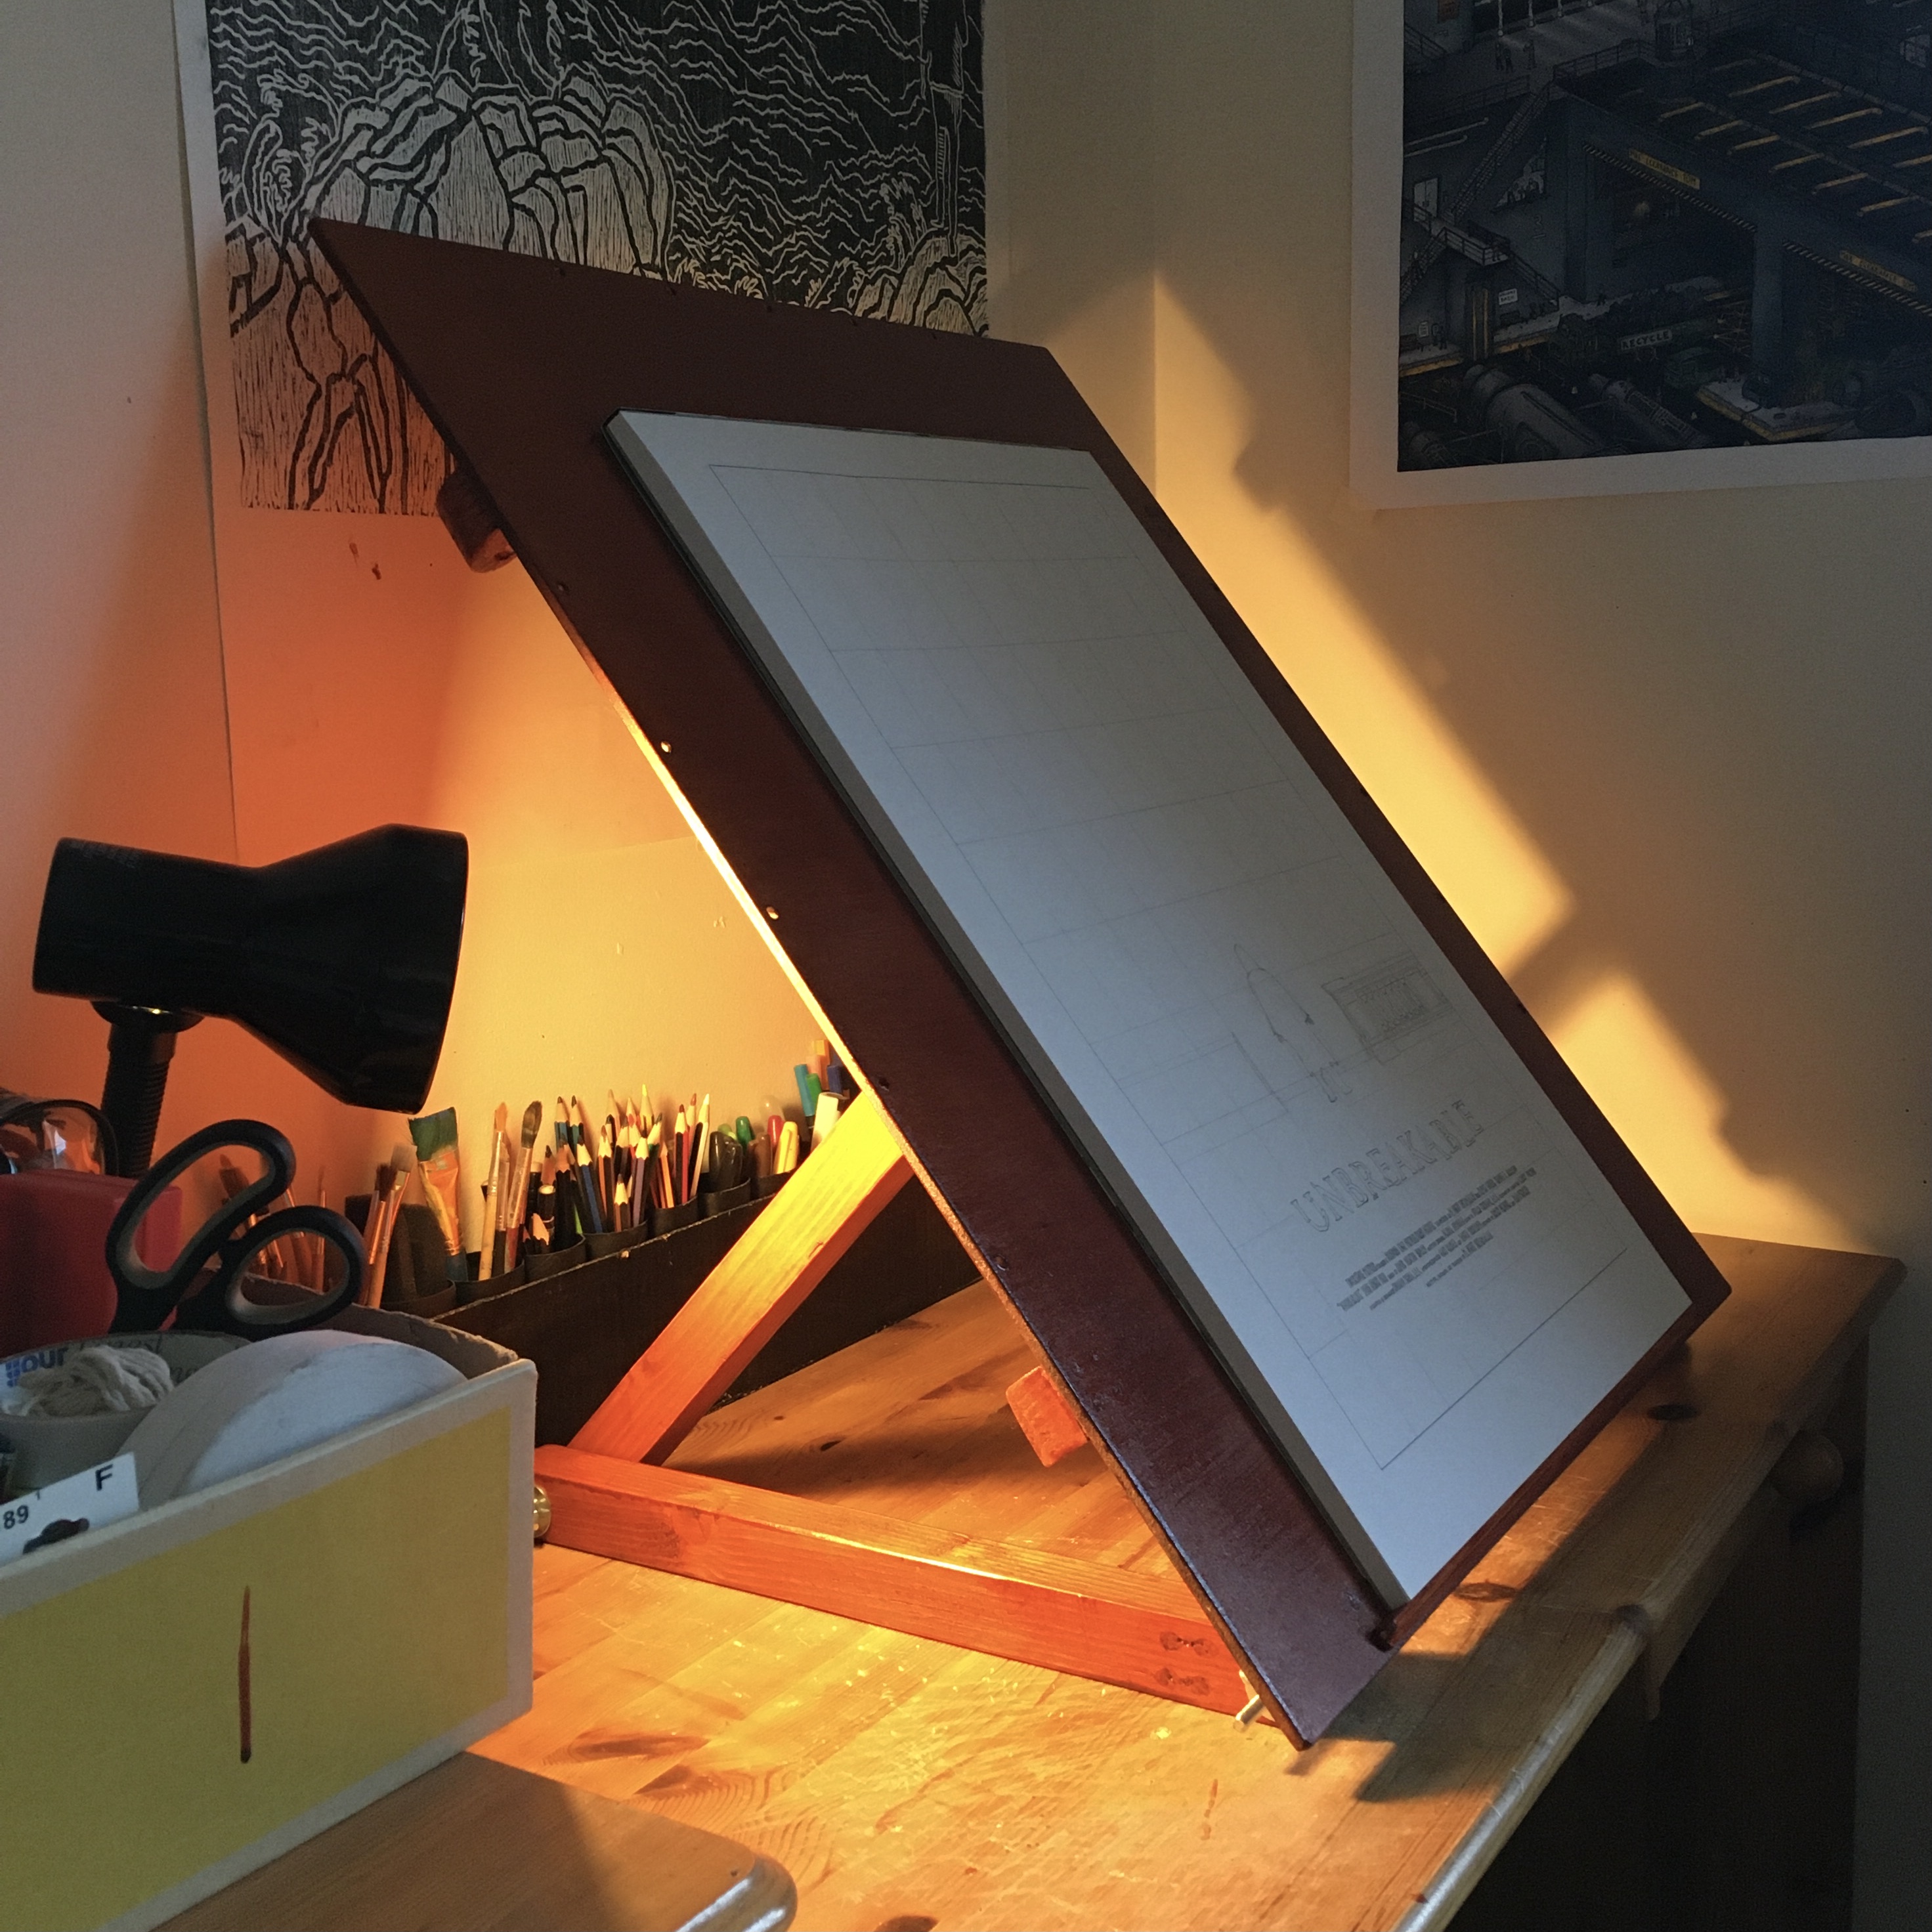

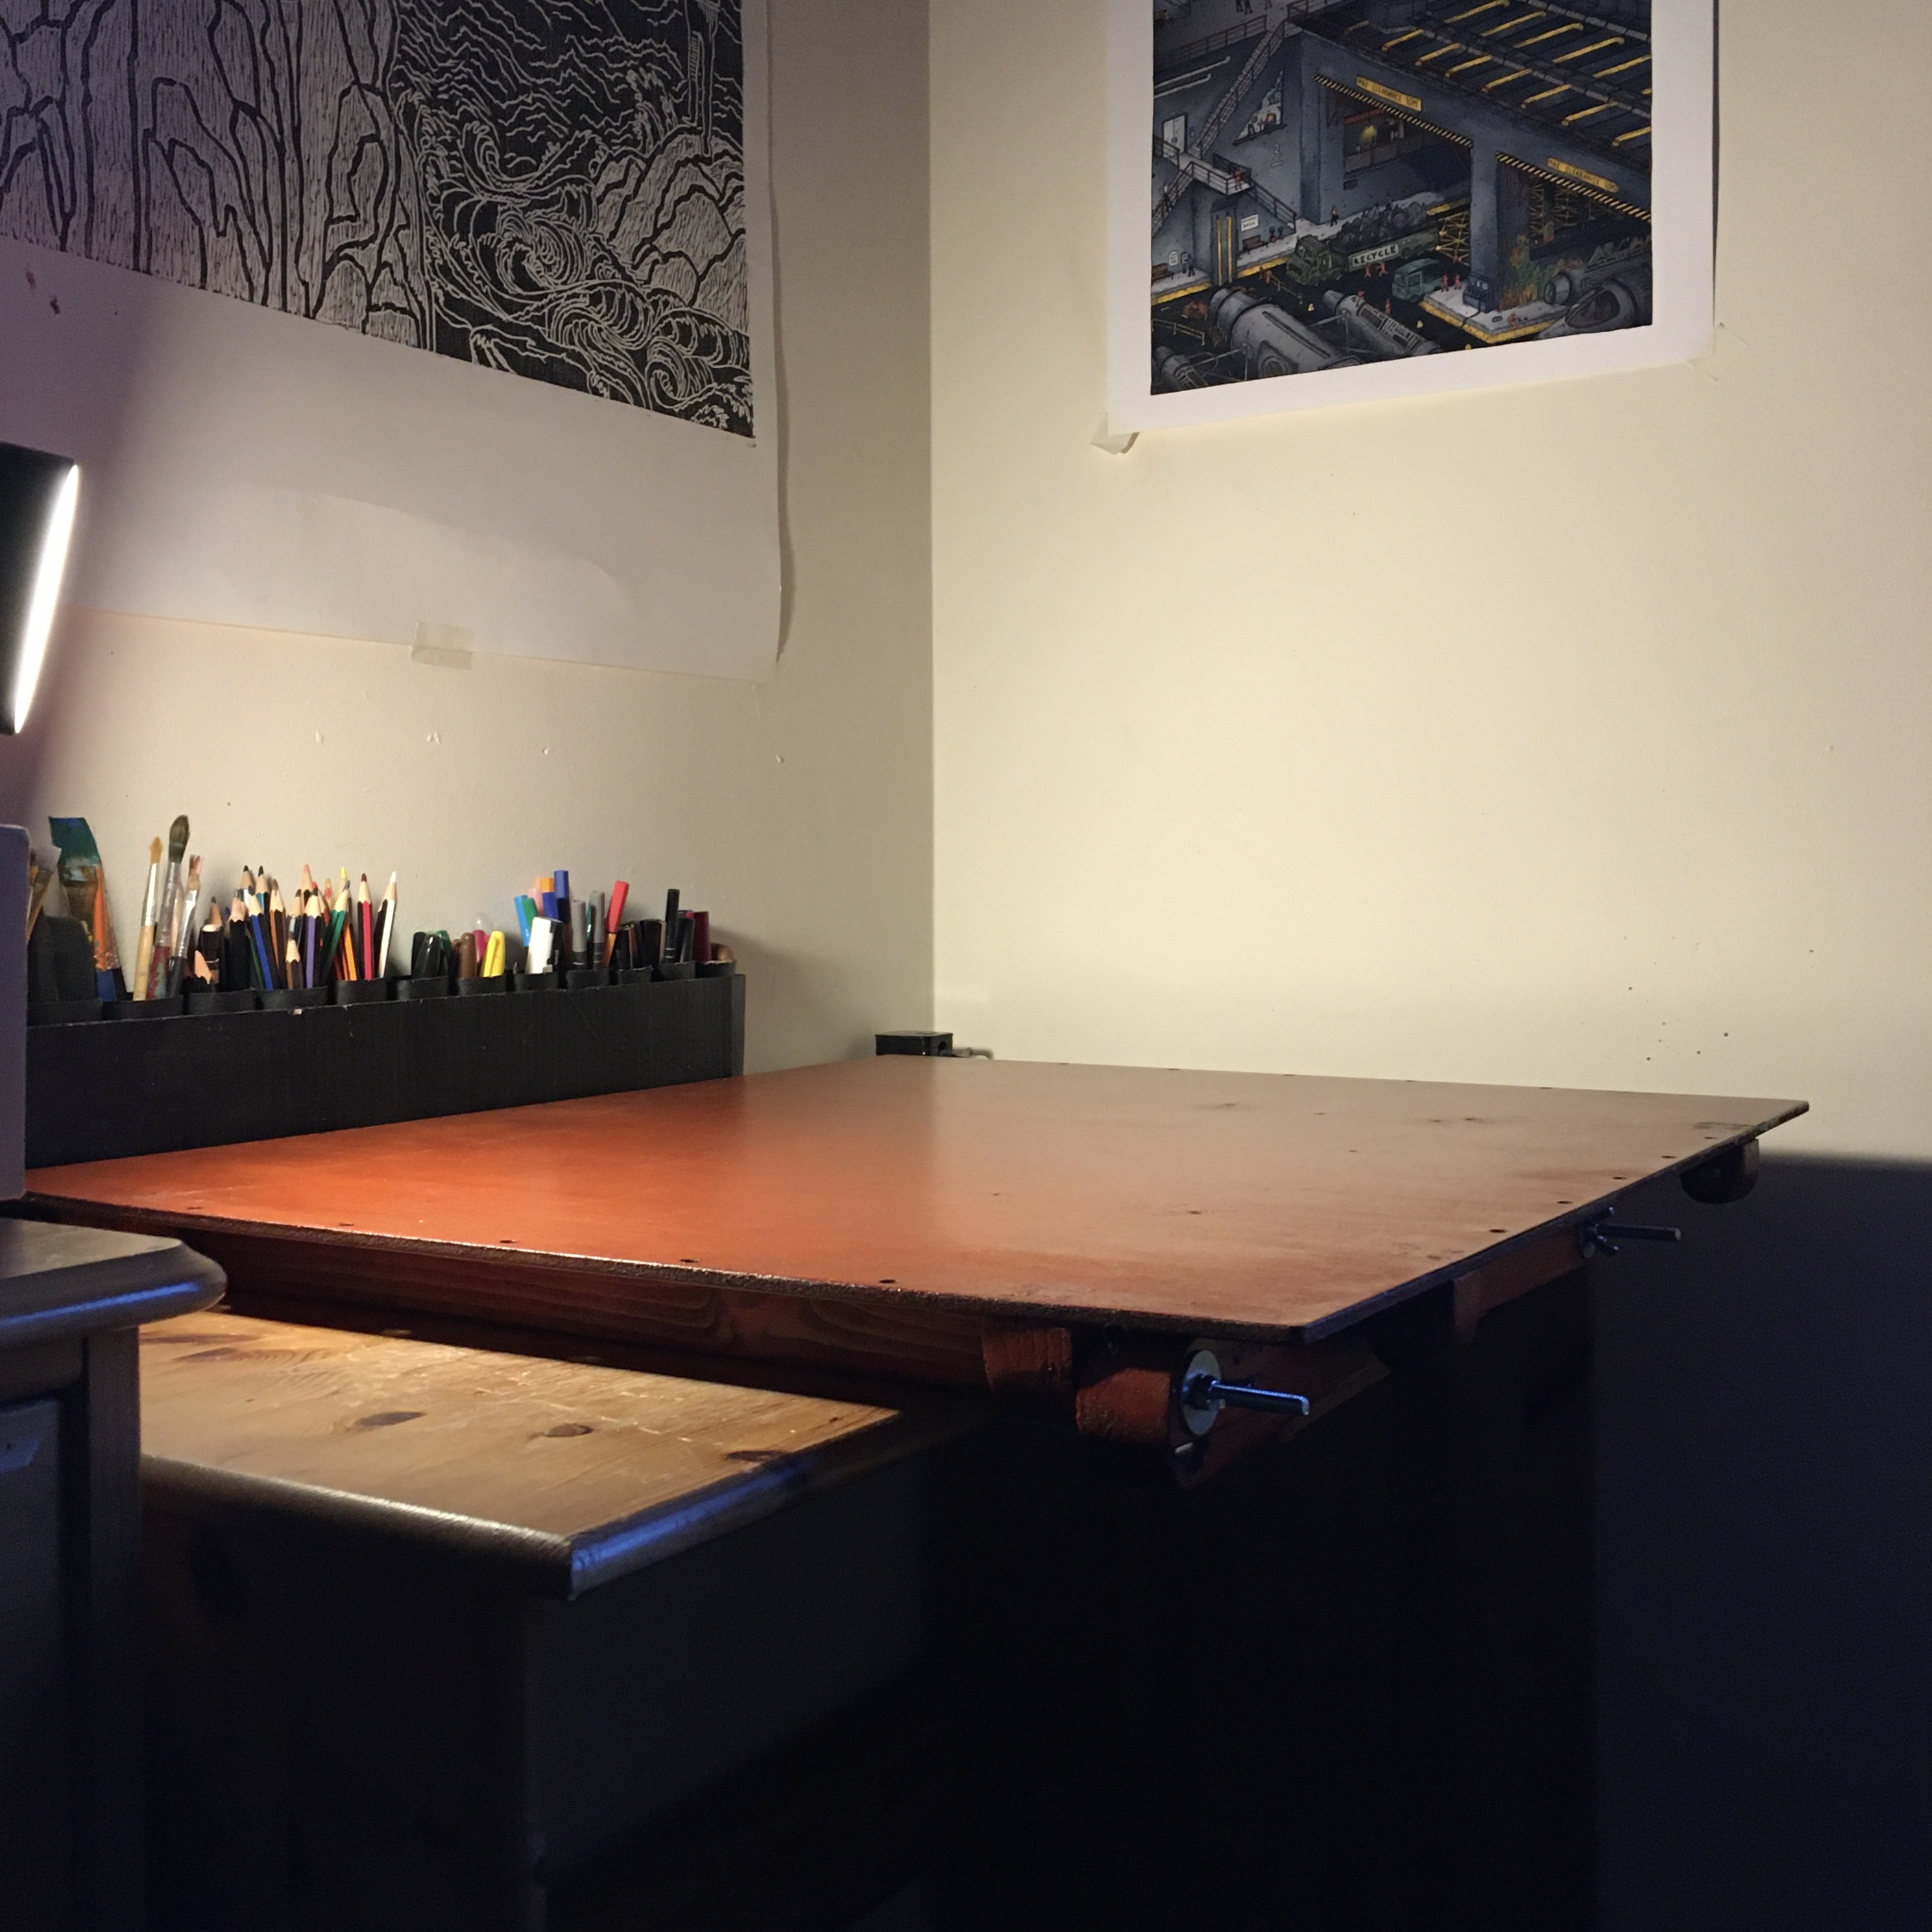
Clearly I enjoyed making a wooden laptop stand so much I decided to do it again - 3 times bigger! All jokes aside, this was made mostly for the same reason, posture. It wasn’t doing me any favours having to slouch over a desk, especially when sometimes I have my head right next to the paper, so I decided that I was going to make myself a drawing board to solve the issue. I’d never used one before, so I had no idea just how marvellous it would be when I finally put it together and got to use it.
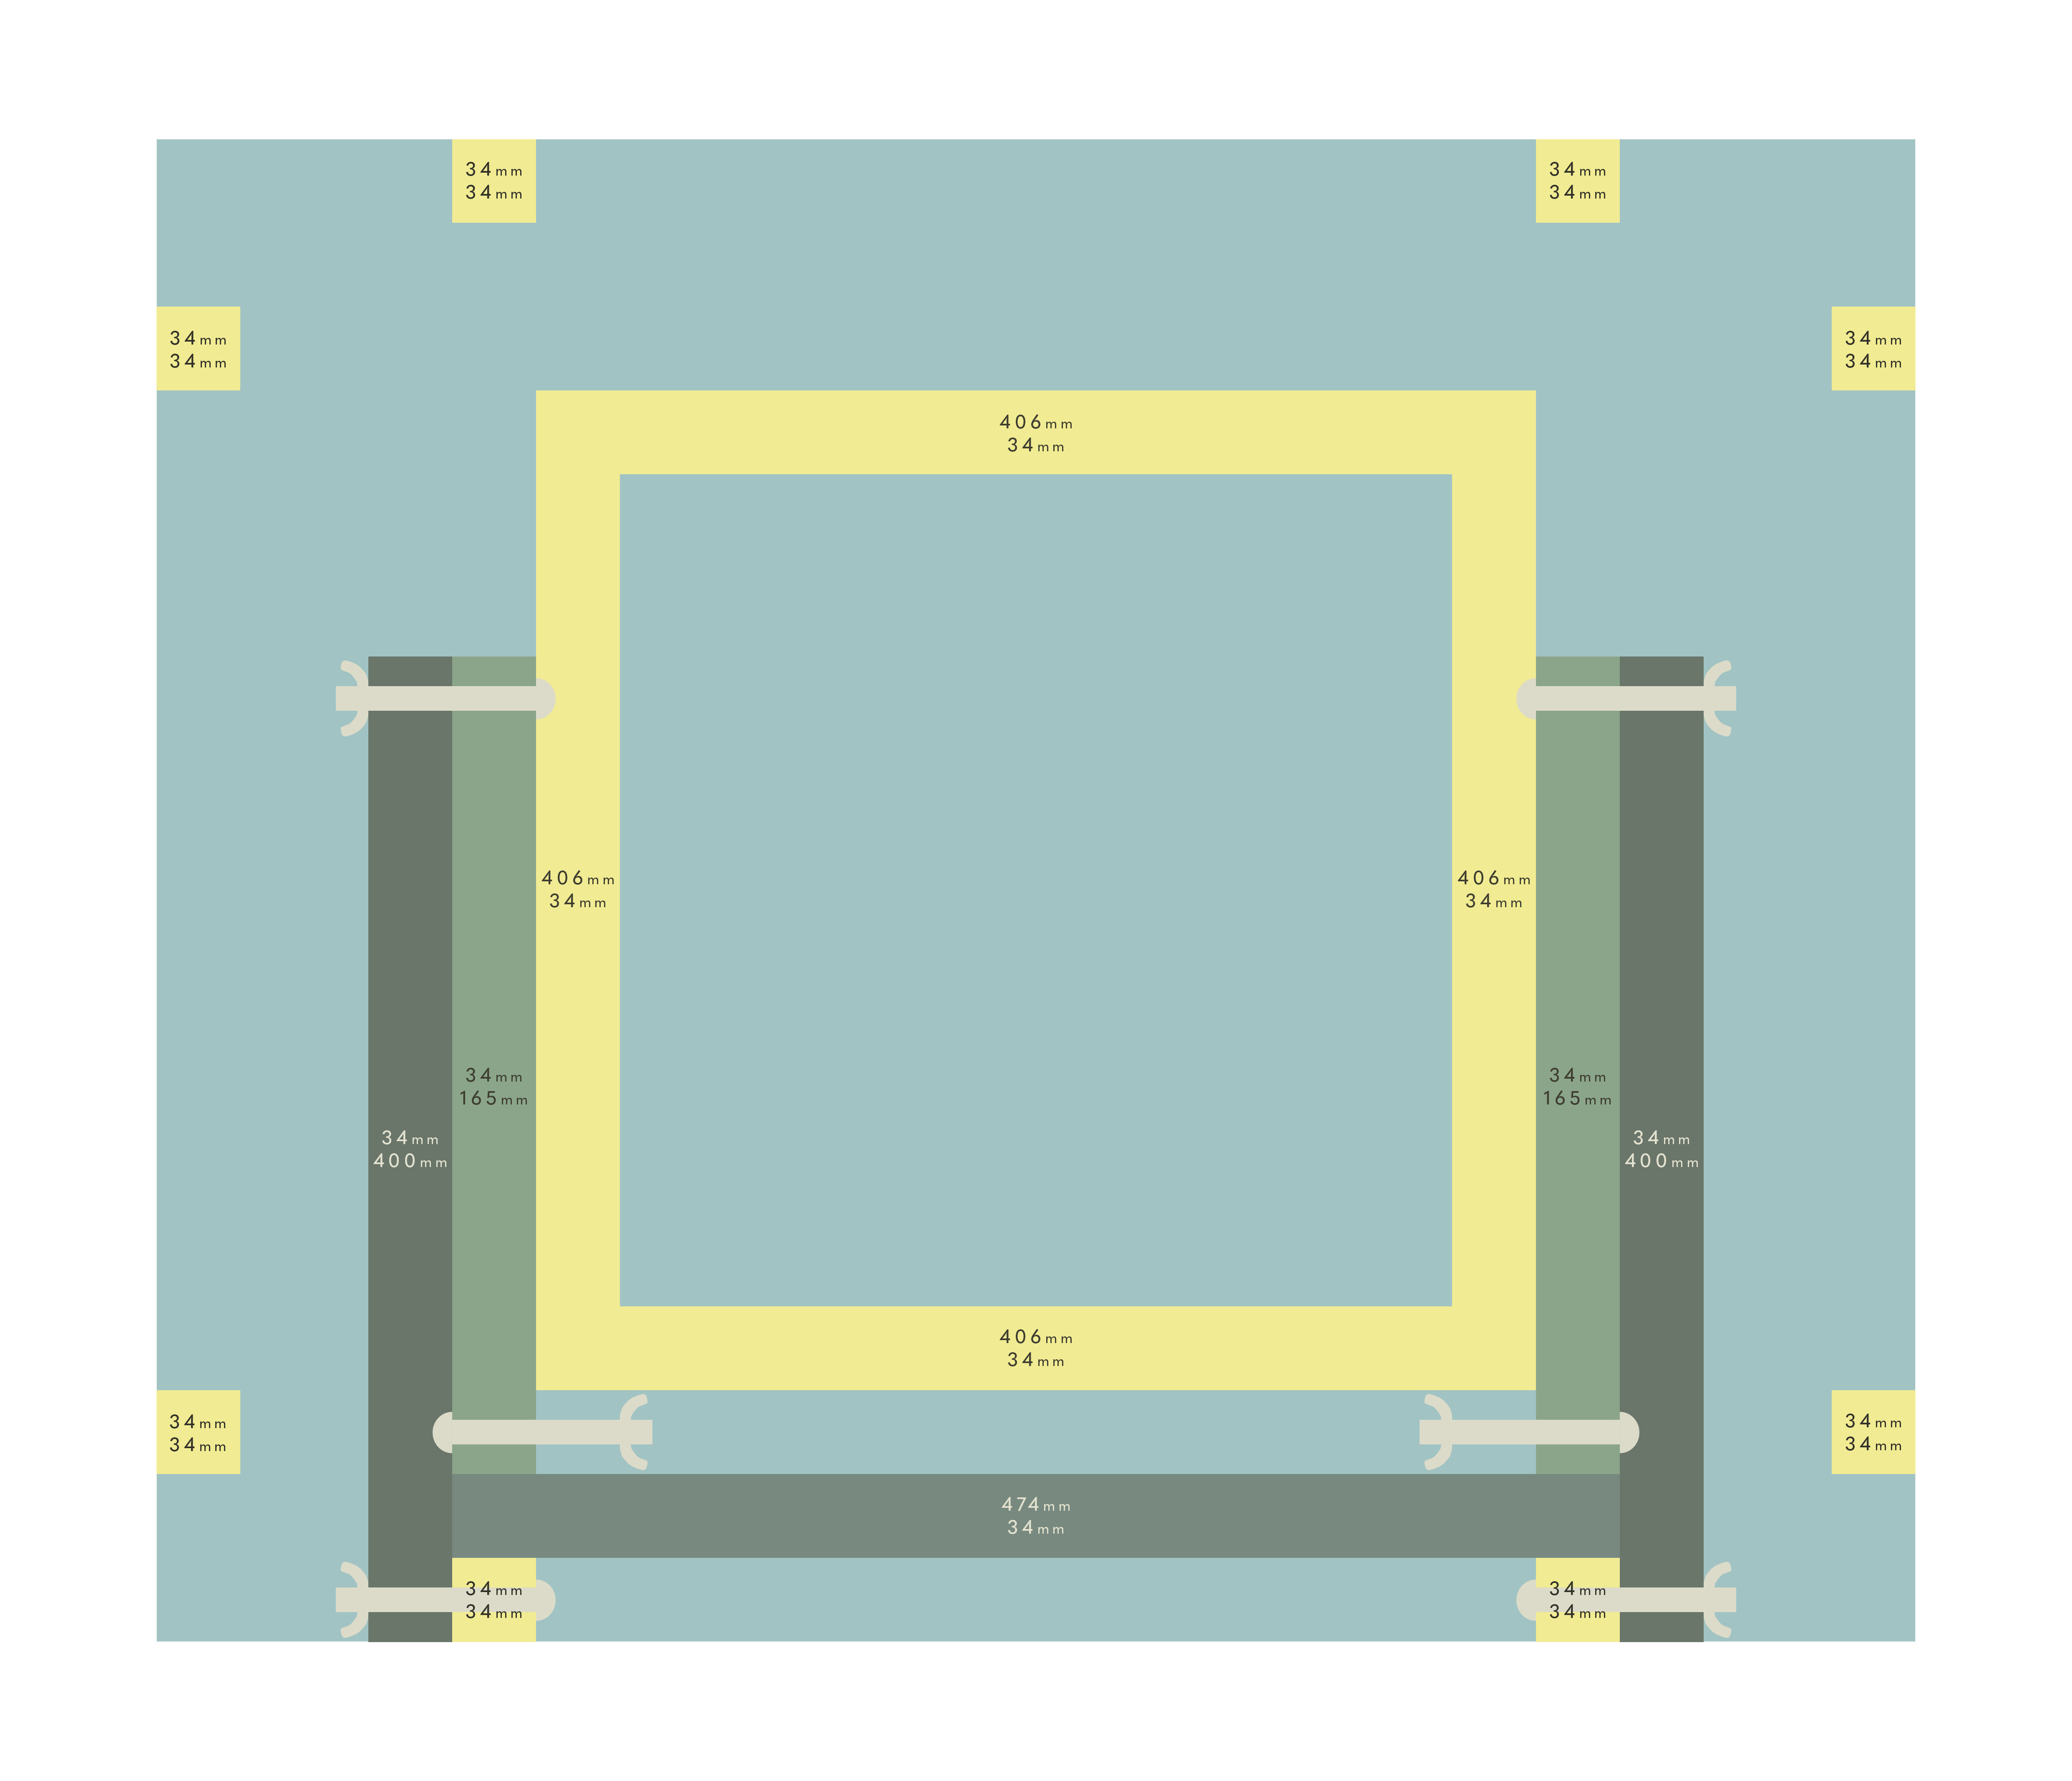
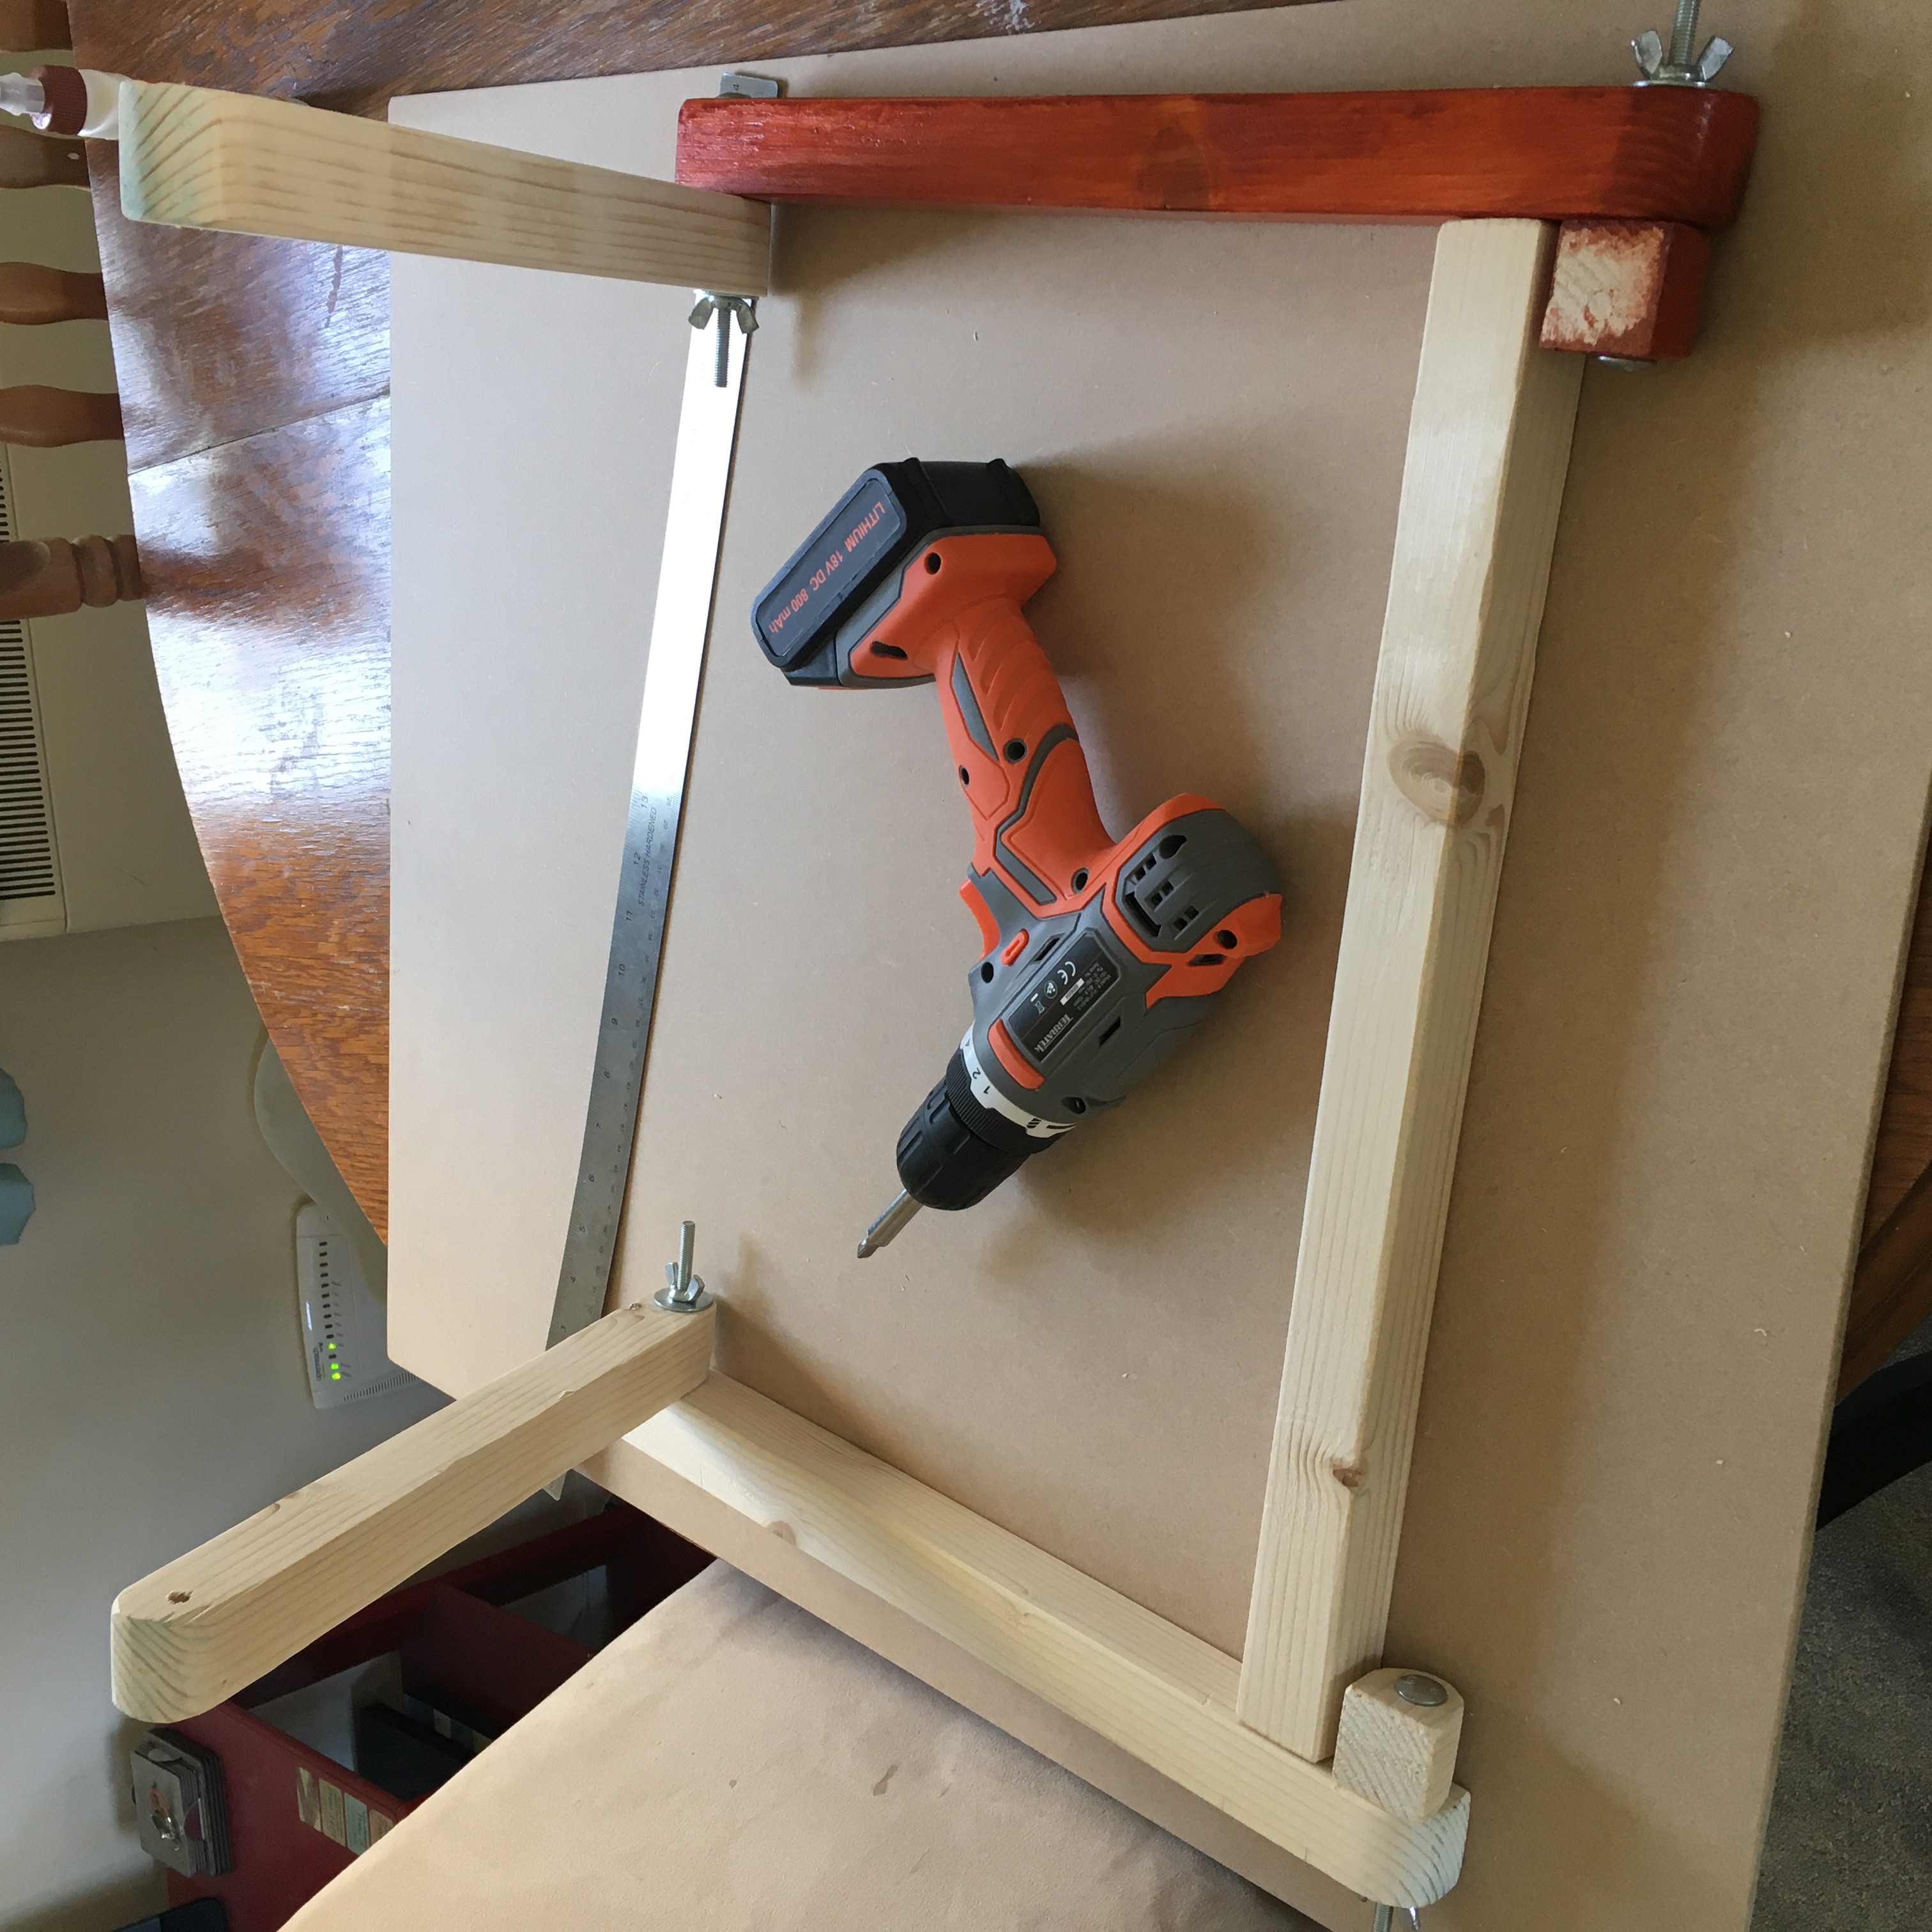
![]() When it came to planning it and making it, I was a bit more confident this time around since I sort of knew what I was doing. It was similar to my laptop stand, except this time it was bigger and I wanted it to be adjustable. I’d been planning on making this for quite a while before I actually got around to it so I had a fair amount of time to mull over different ideas in my head. Initially I was going to use wooden dowels as the adjustable bit, however I’d learnt my lesson from the laptop stand and I didn’t want to attempt to cut grooves into the wood again since that was a nightmare to get neat. Instead I decided I’d just use a selection of holes and have a screw that would run through and connect the supports to the board. Bish Bash Bosh.
When it came to planning it and making it, I was a bit more confident this time around since I sort of knew what I was doing. It was similar to my laptop stand, except this time it was bigger and I wanted it to be adjustable. I’d been planning on making this for quite a while before I actually got around to it so I had a fair amount of time to mull over different ideas in my head. Initially I was going to use wooden dowels as the adjustable bit, however I’d learnt my lesson from the laptop stand and I didn’t want to attempt to cut grooves into the wood again since that was a nightmare to get neat. Instead I decided I’d just use a selection of holes and have a screw that would run through and connect the supports to the board. Bish Bash Bosh.
![]()
![]()
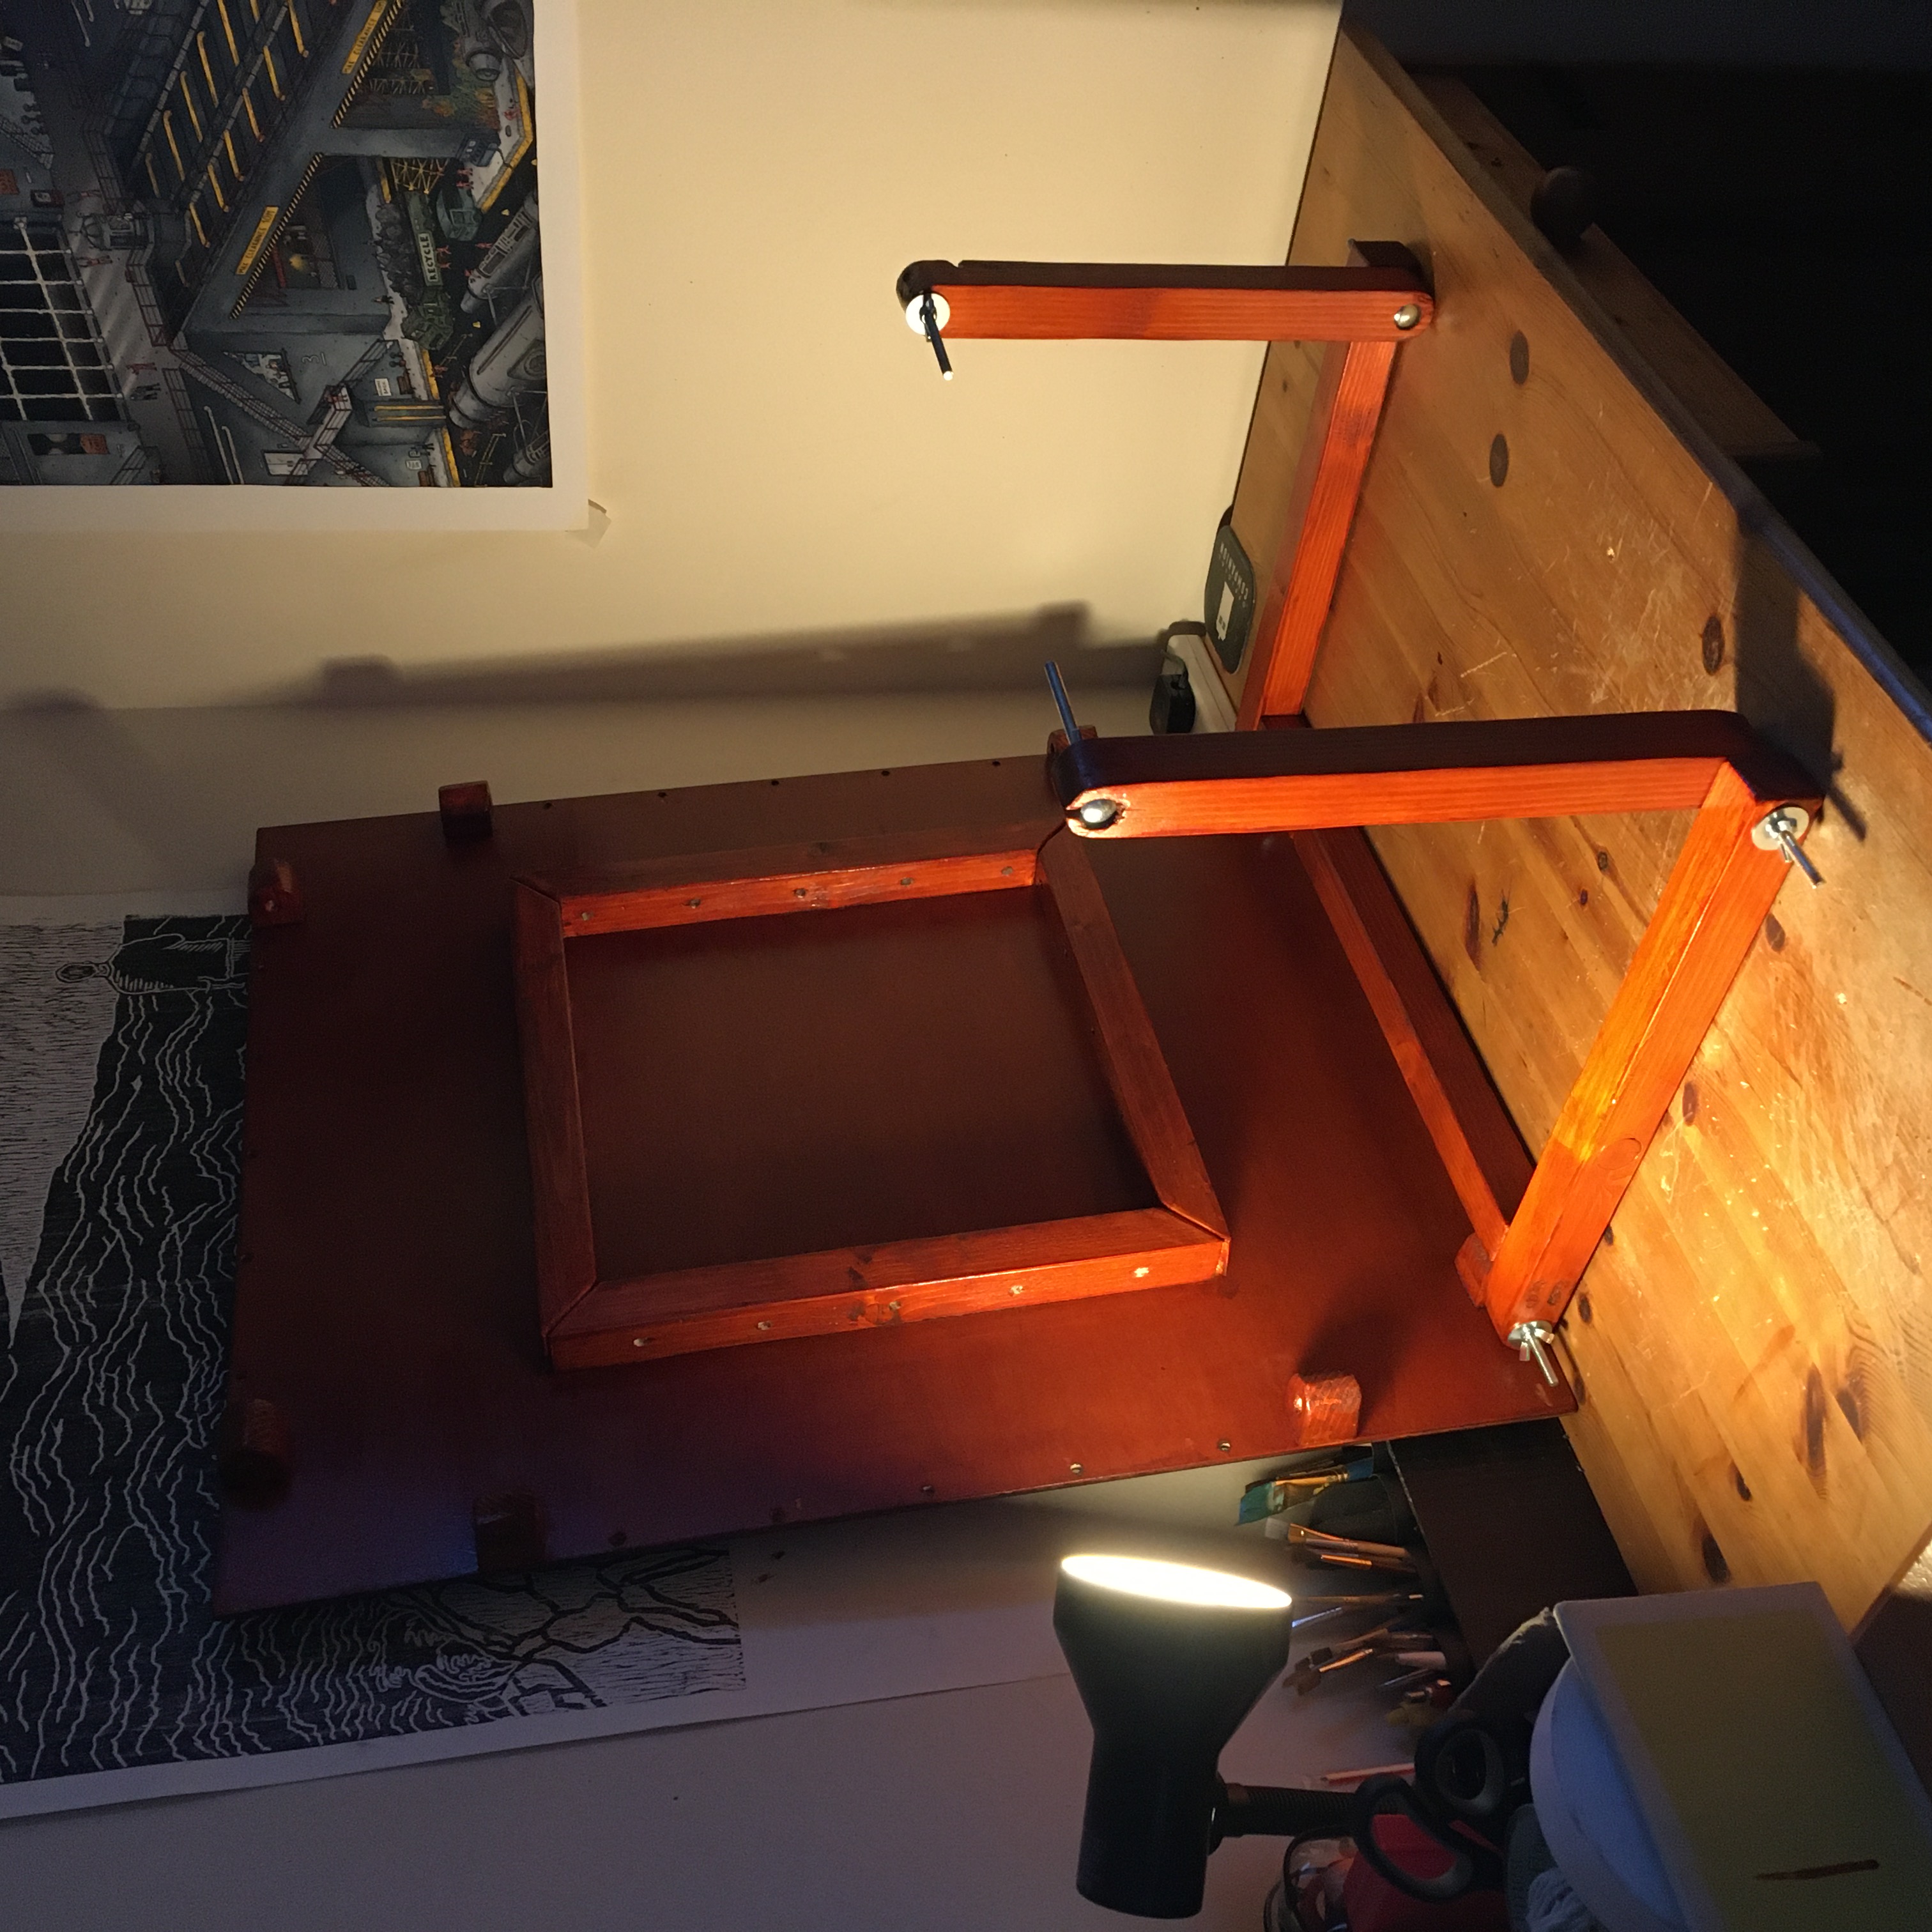
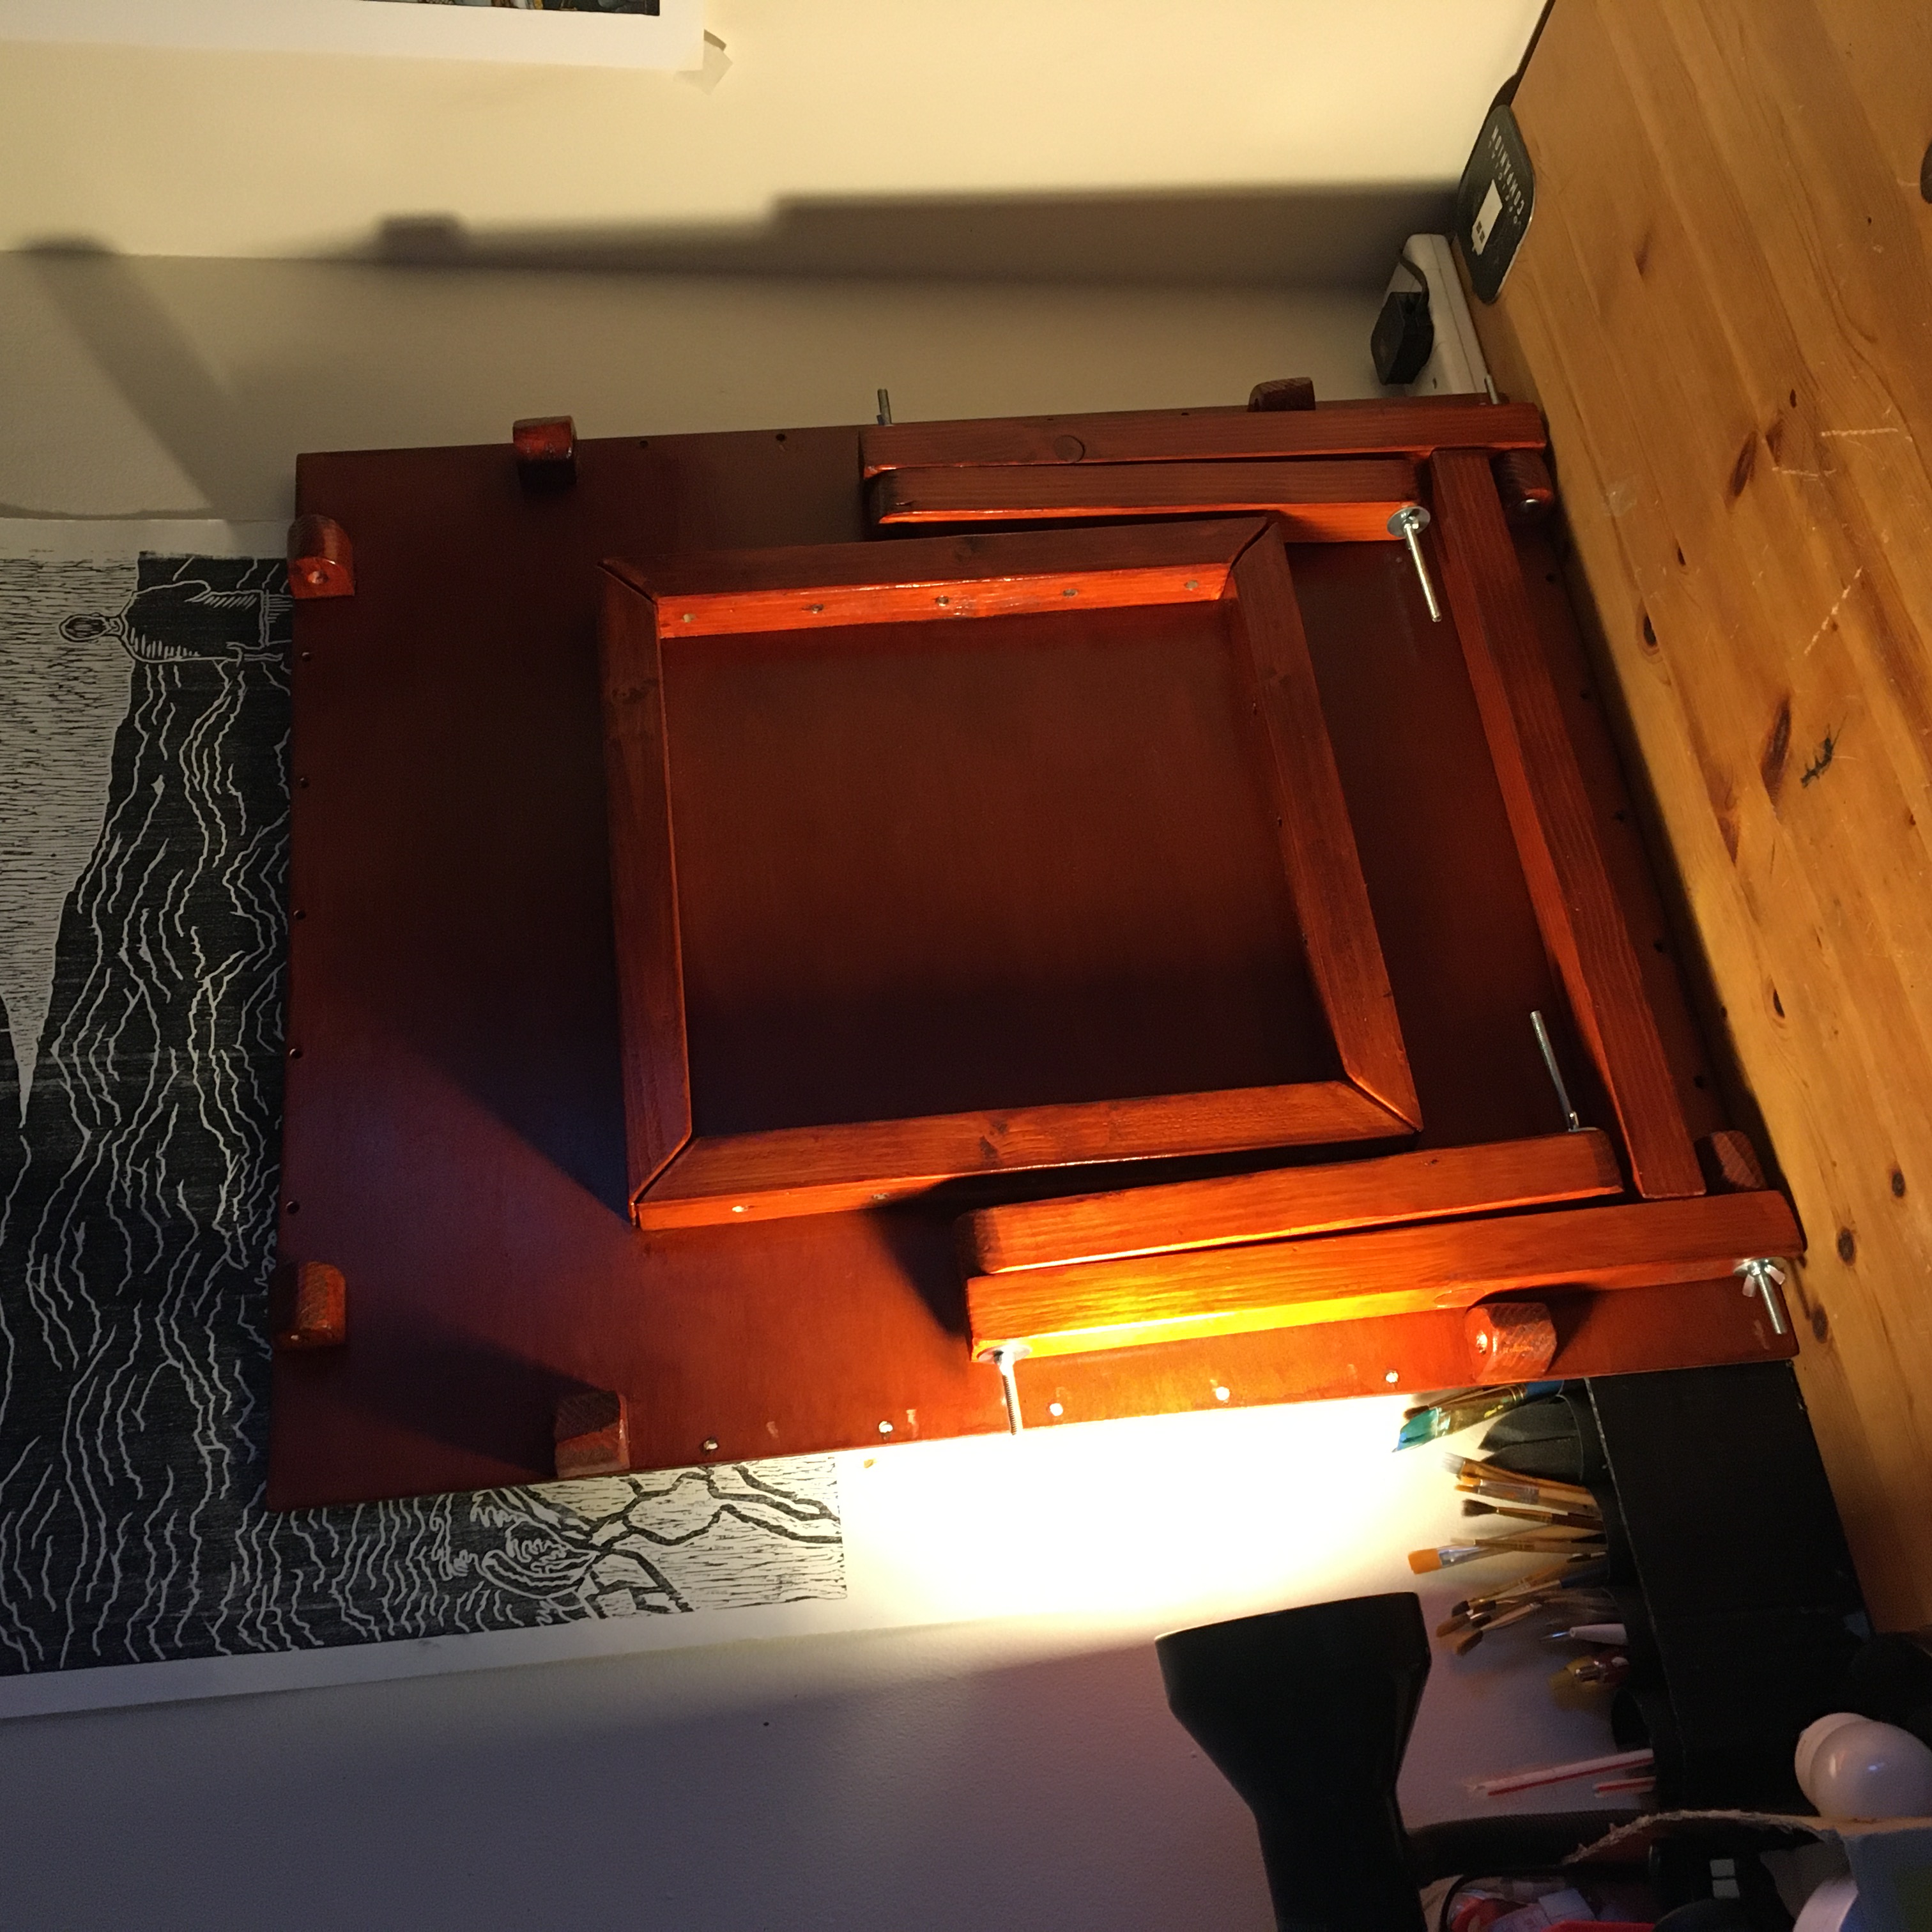
One of the other additions I wanted to add was that I wanted to make the board be rotatable, so that I could have it either portrait or landscape. It’d be no good making an A2 drawing stand only for A2 paper not to fit on it vertically. To make it rotatable any sane person would allocate one short side and one long side to work with, but I like making things difficult for myself and wanted the board to be symmetrical. I wanted to be able to take the board off from the supports, rotate it either 90°, 180° or 270° and still have it attachable. Was a bit difficult to come up with something that would work, but I got there in the end.
![]()
![]()
![]()
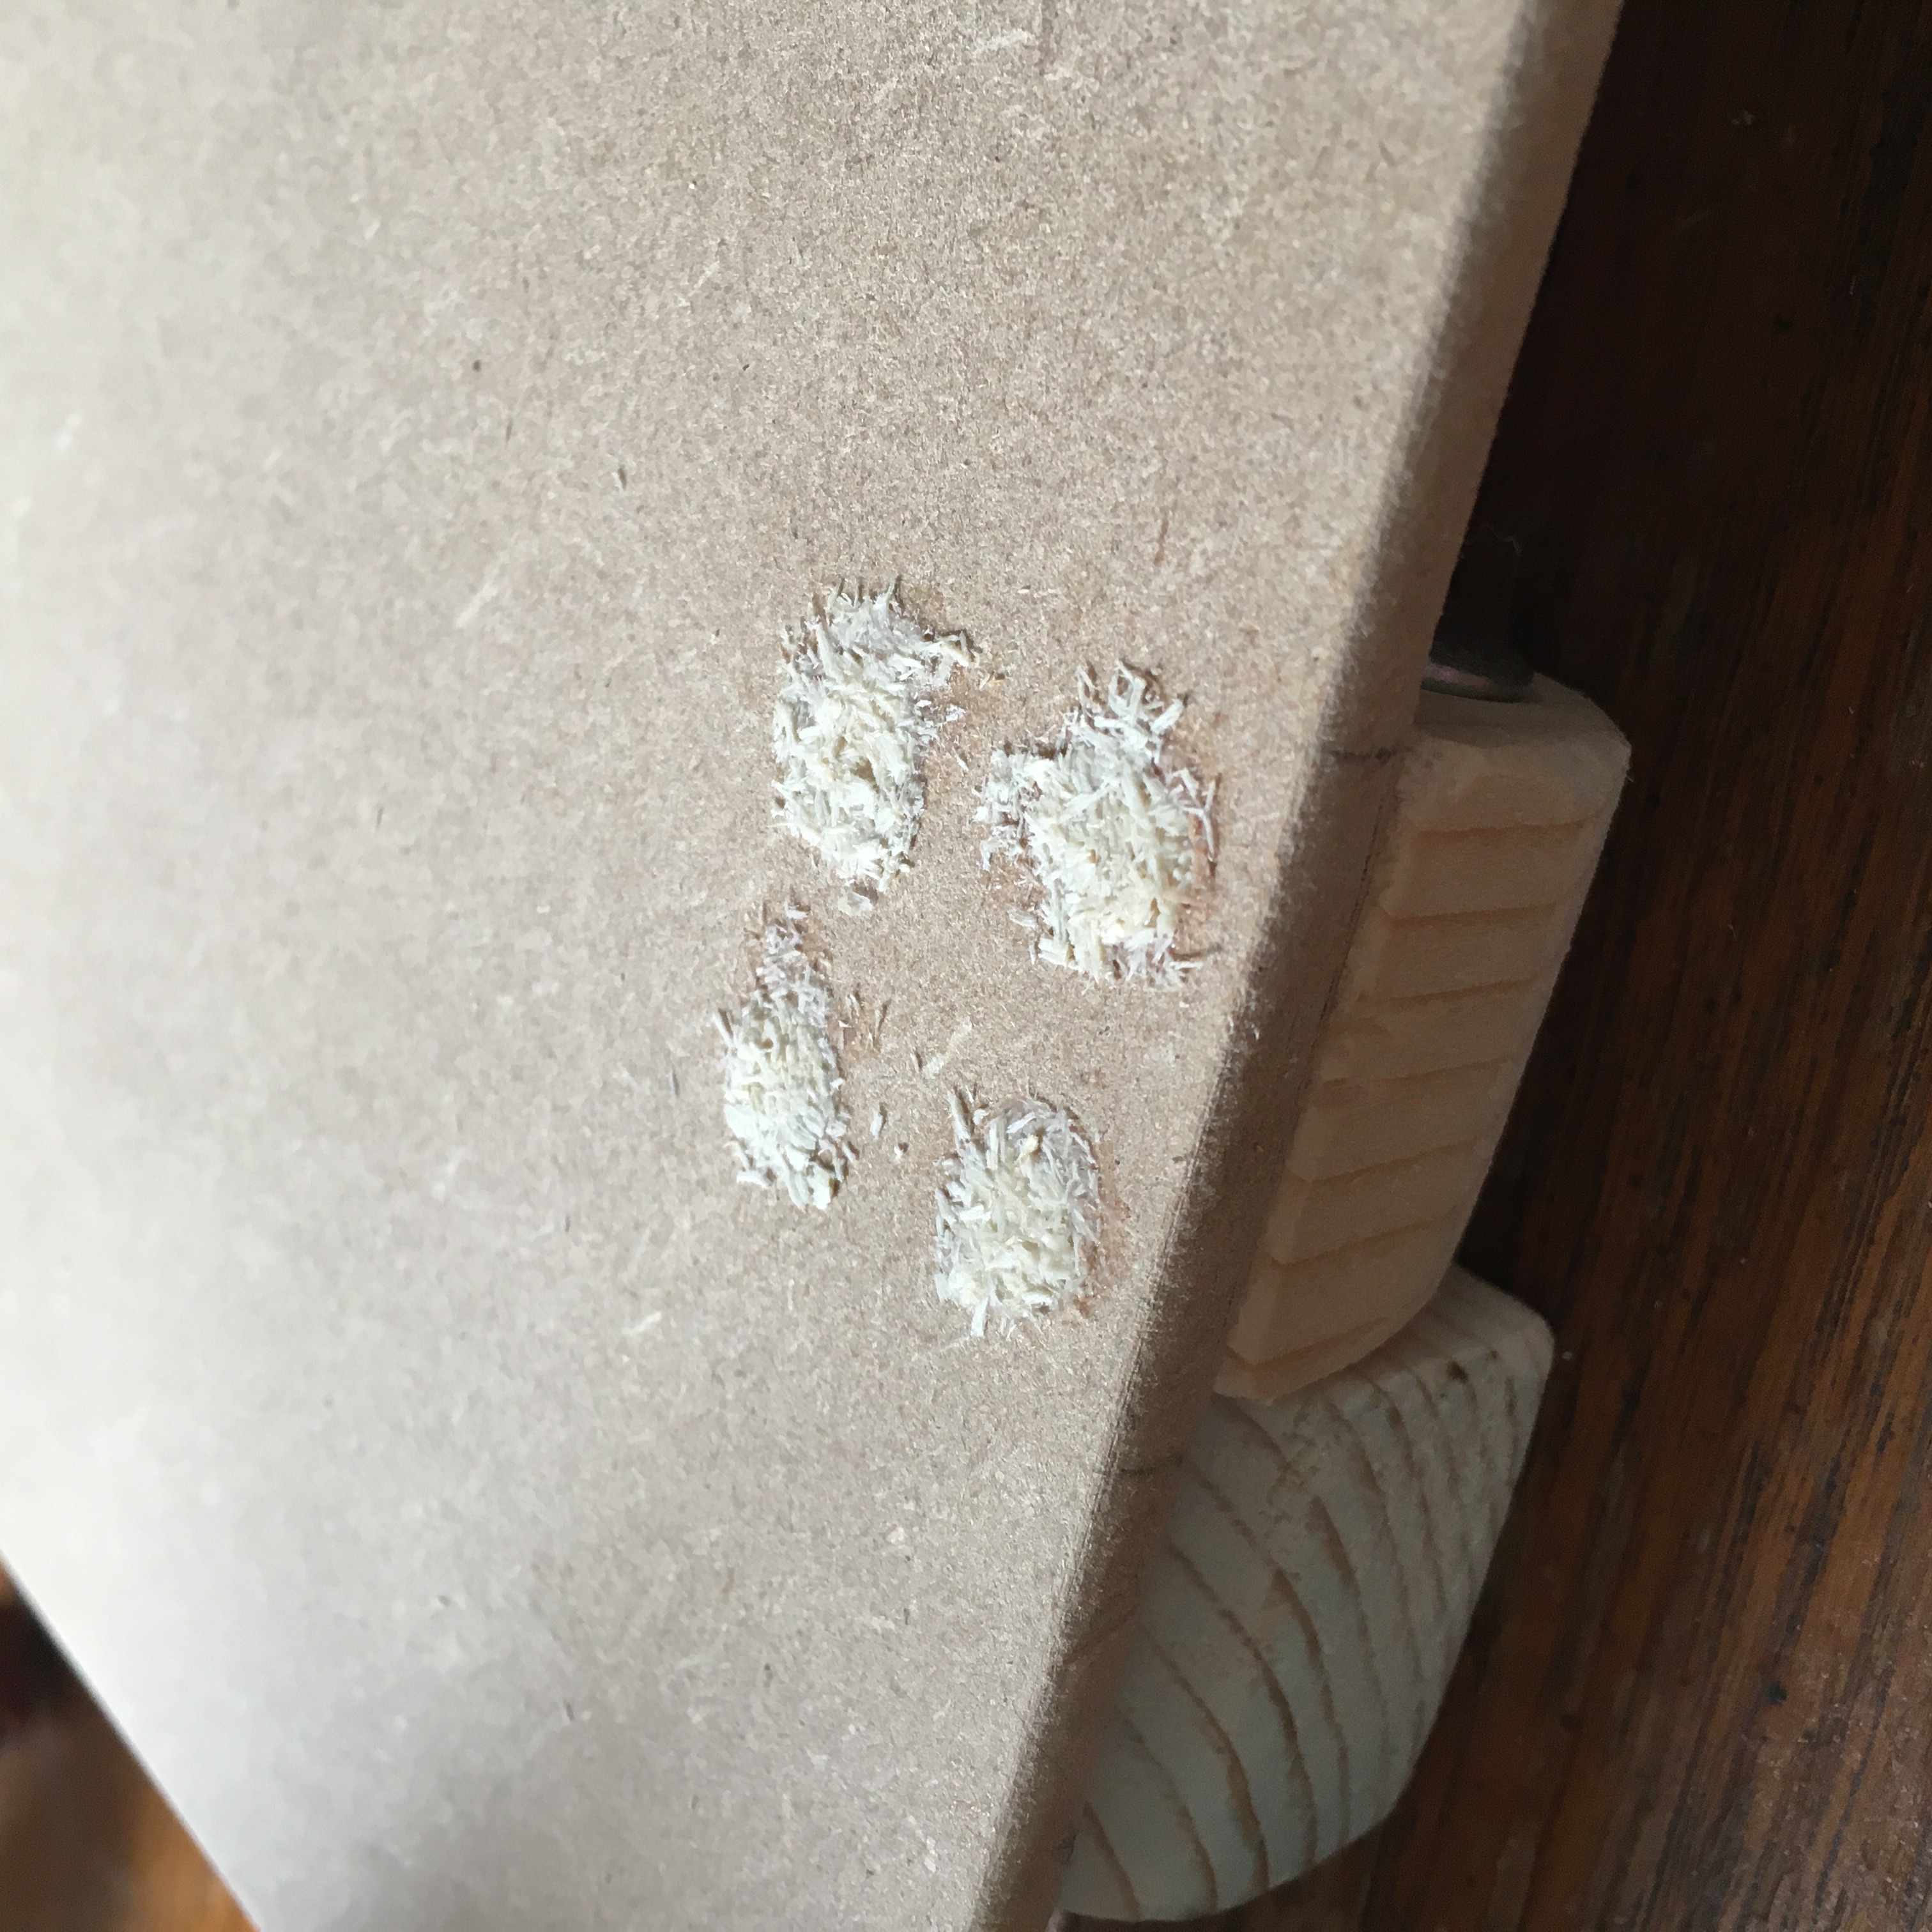
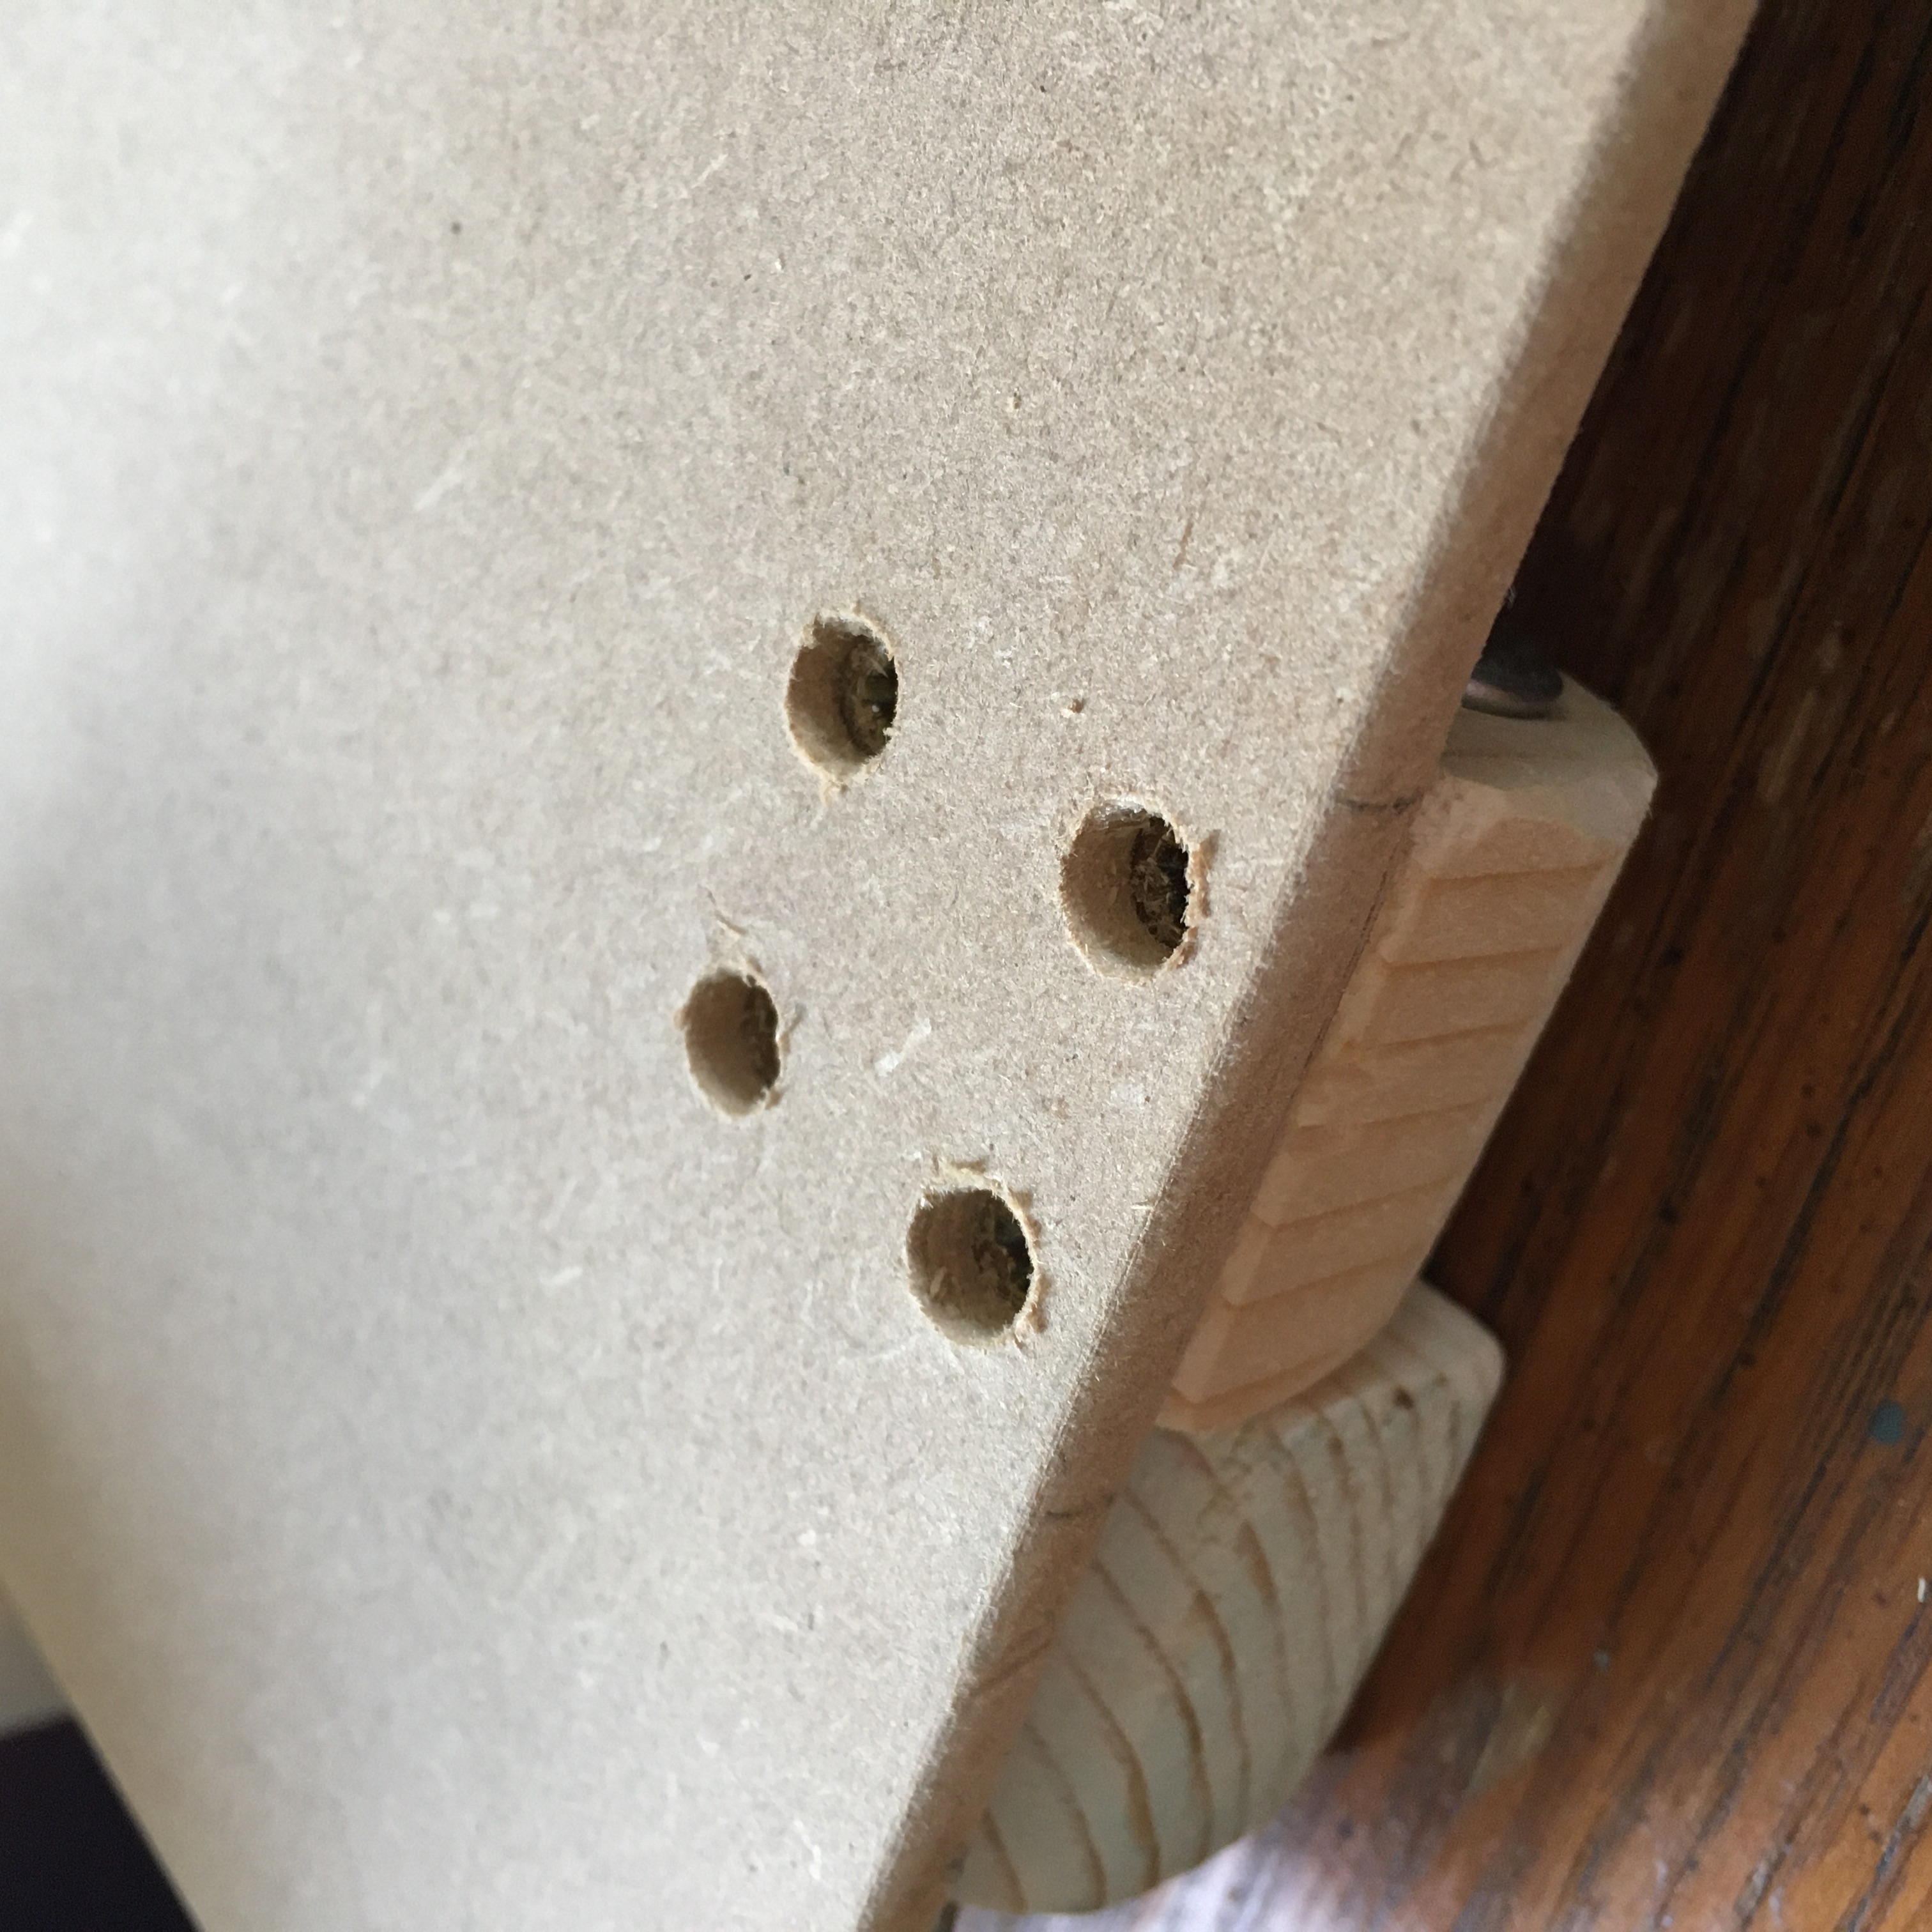
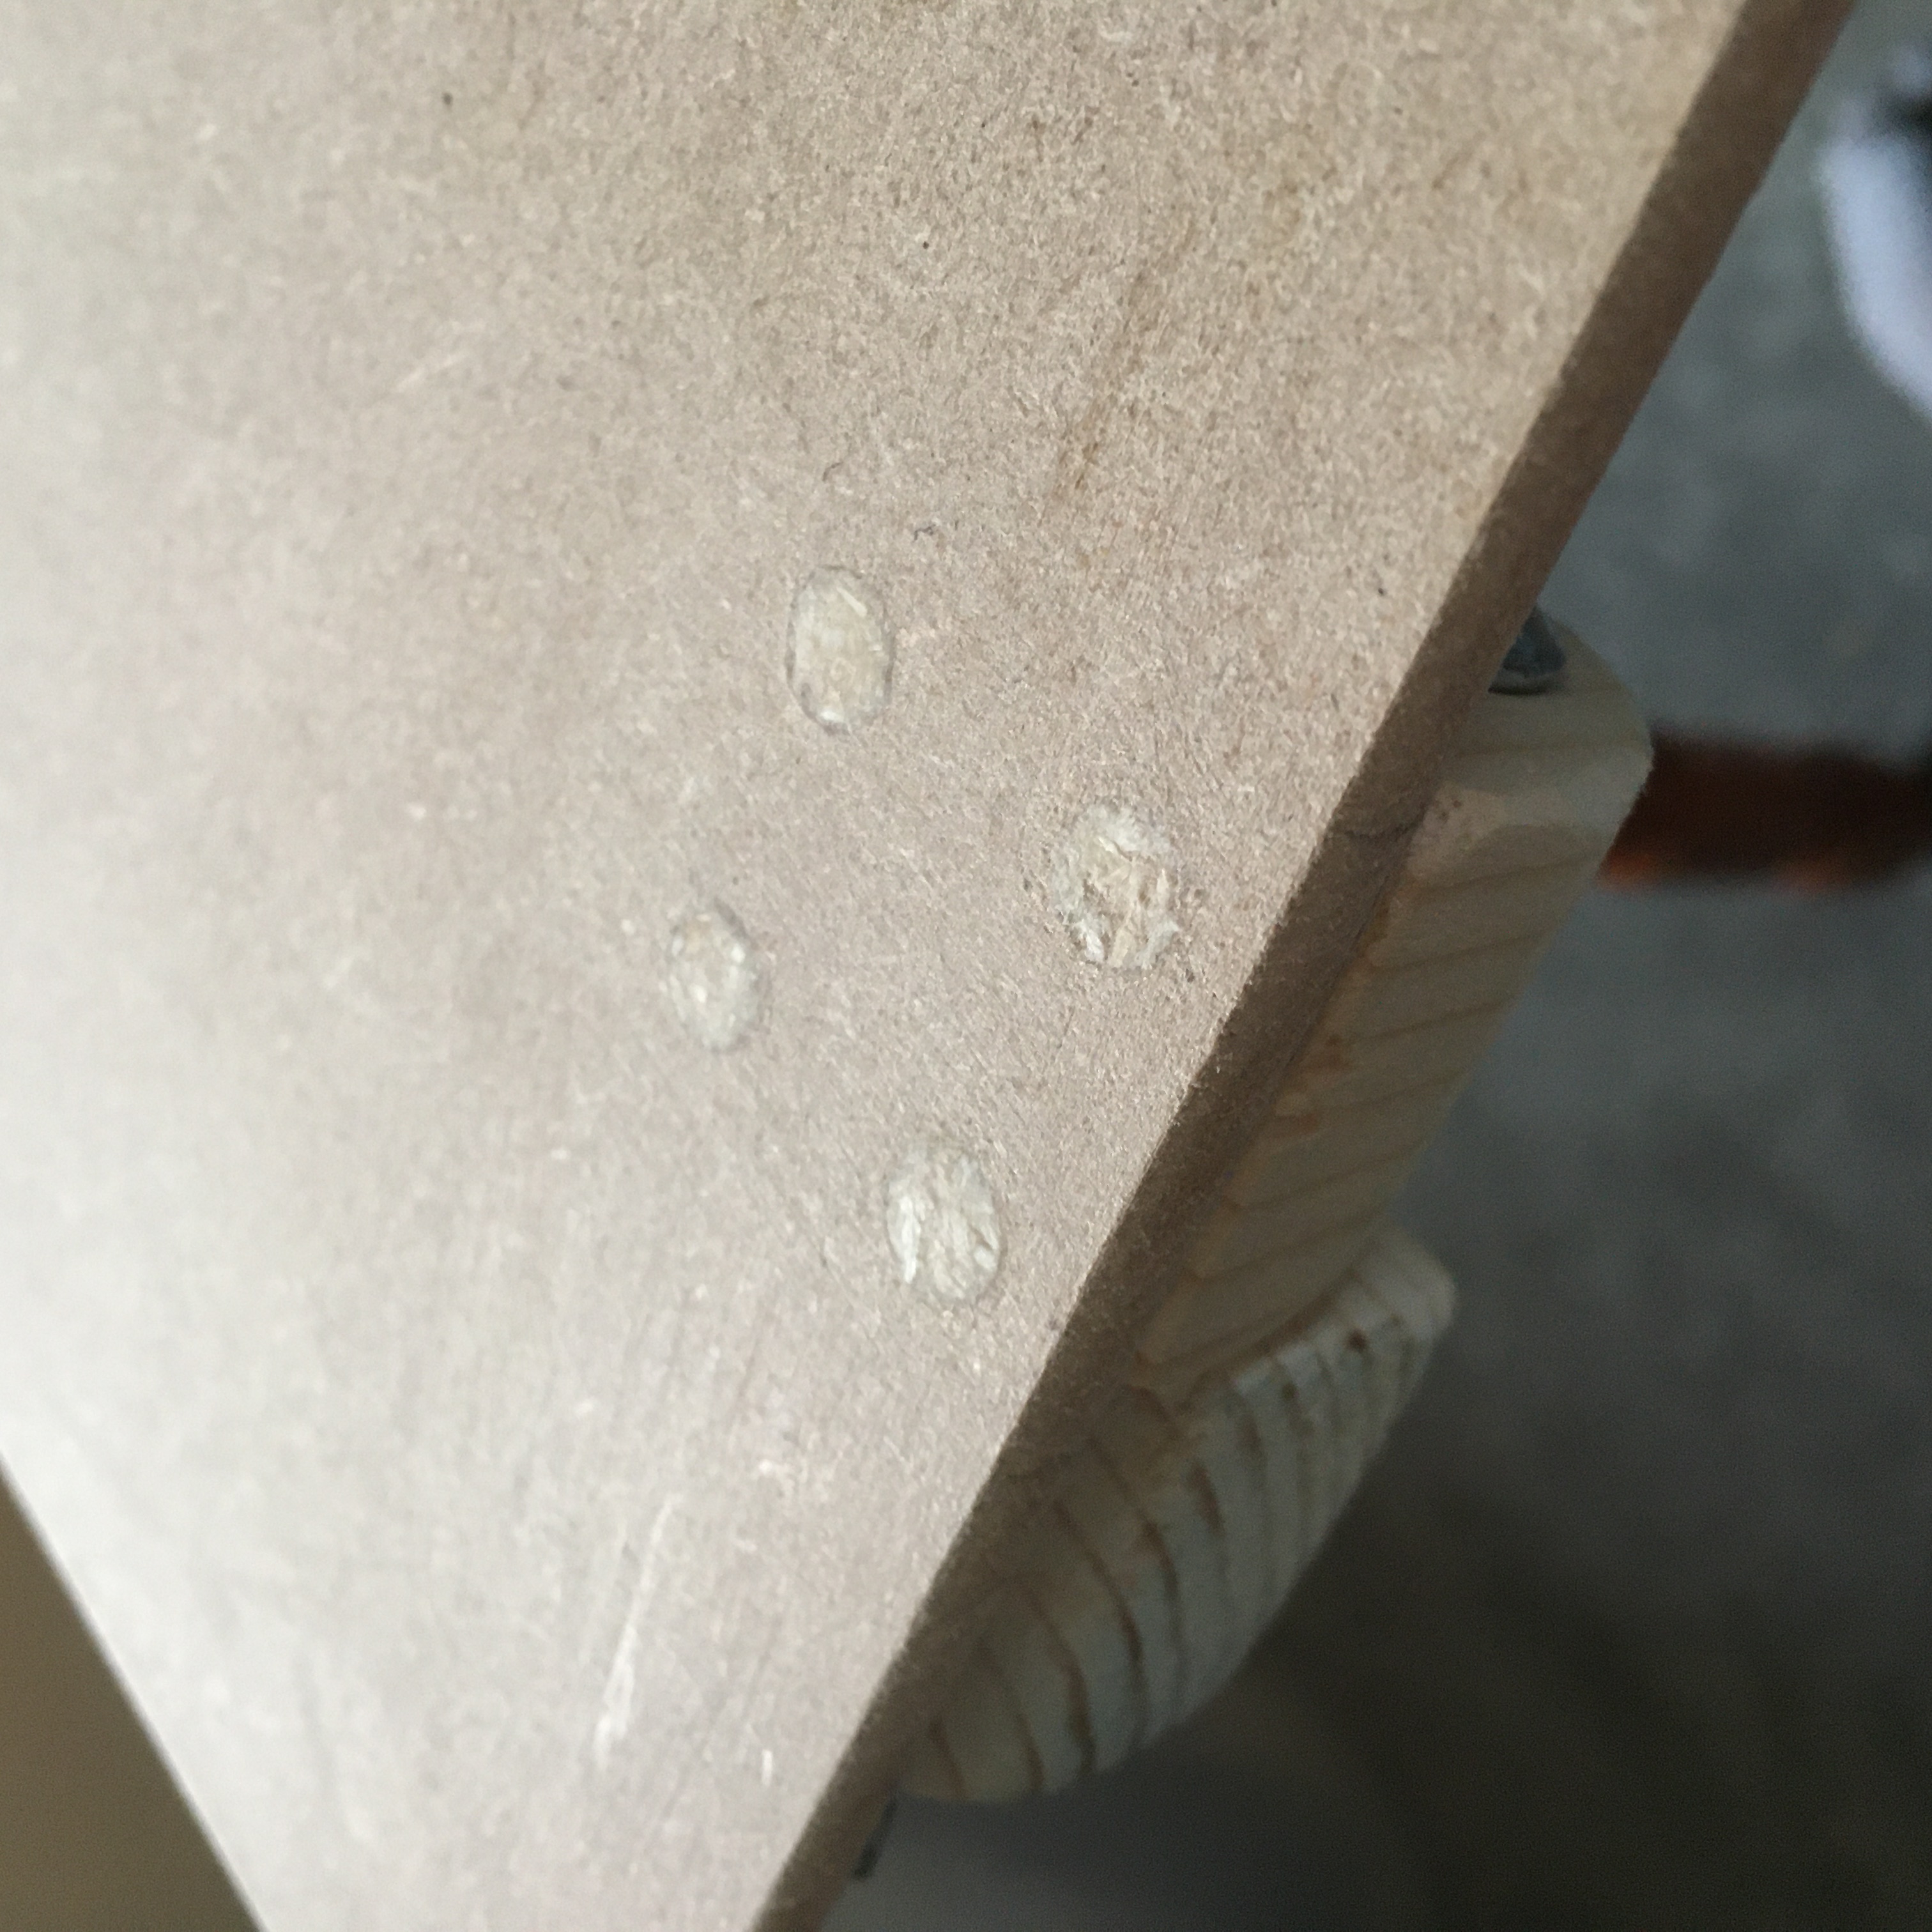
Another thing I don’t like is having screws and nails visible, I like it to look clean and I like to be attempt to hide any mistakes. Not that this project came out perfect, far from it, but I like to try account for any errors I might make. So when it came to fixing some of the wood to the back of the MDF board (all the yellow in the plan above), I didn’t want to rely on just glue to do the job. I’m sure it probably would have, but I didn’t want it to crumble a year down the line. Instead I decided to glue it, then screw it together through the top of the mdf, counter-sink the screws, and then fill in over the screws/holes with sawdust. Seemed easy enough, until I got carried away and there ended up being nearly 70 screw holes in the MDF. I didn’t really think about that, and it took me a lot of hours to fill them all in.
![]()
![]()
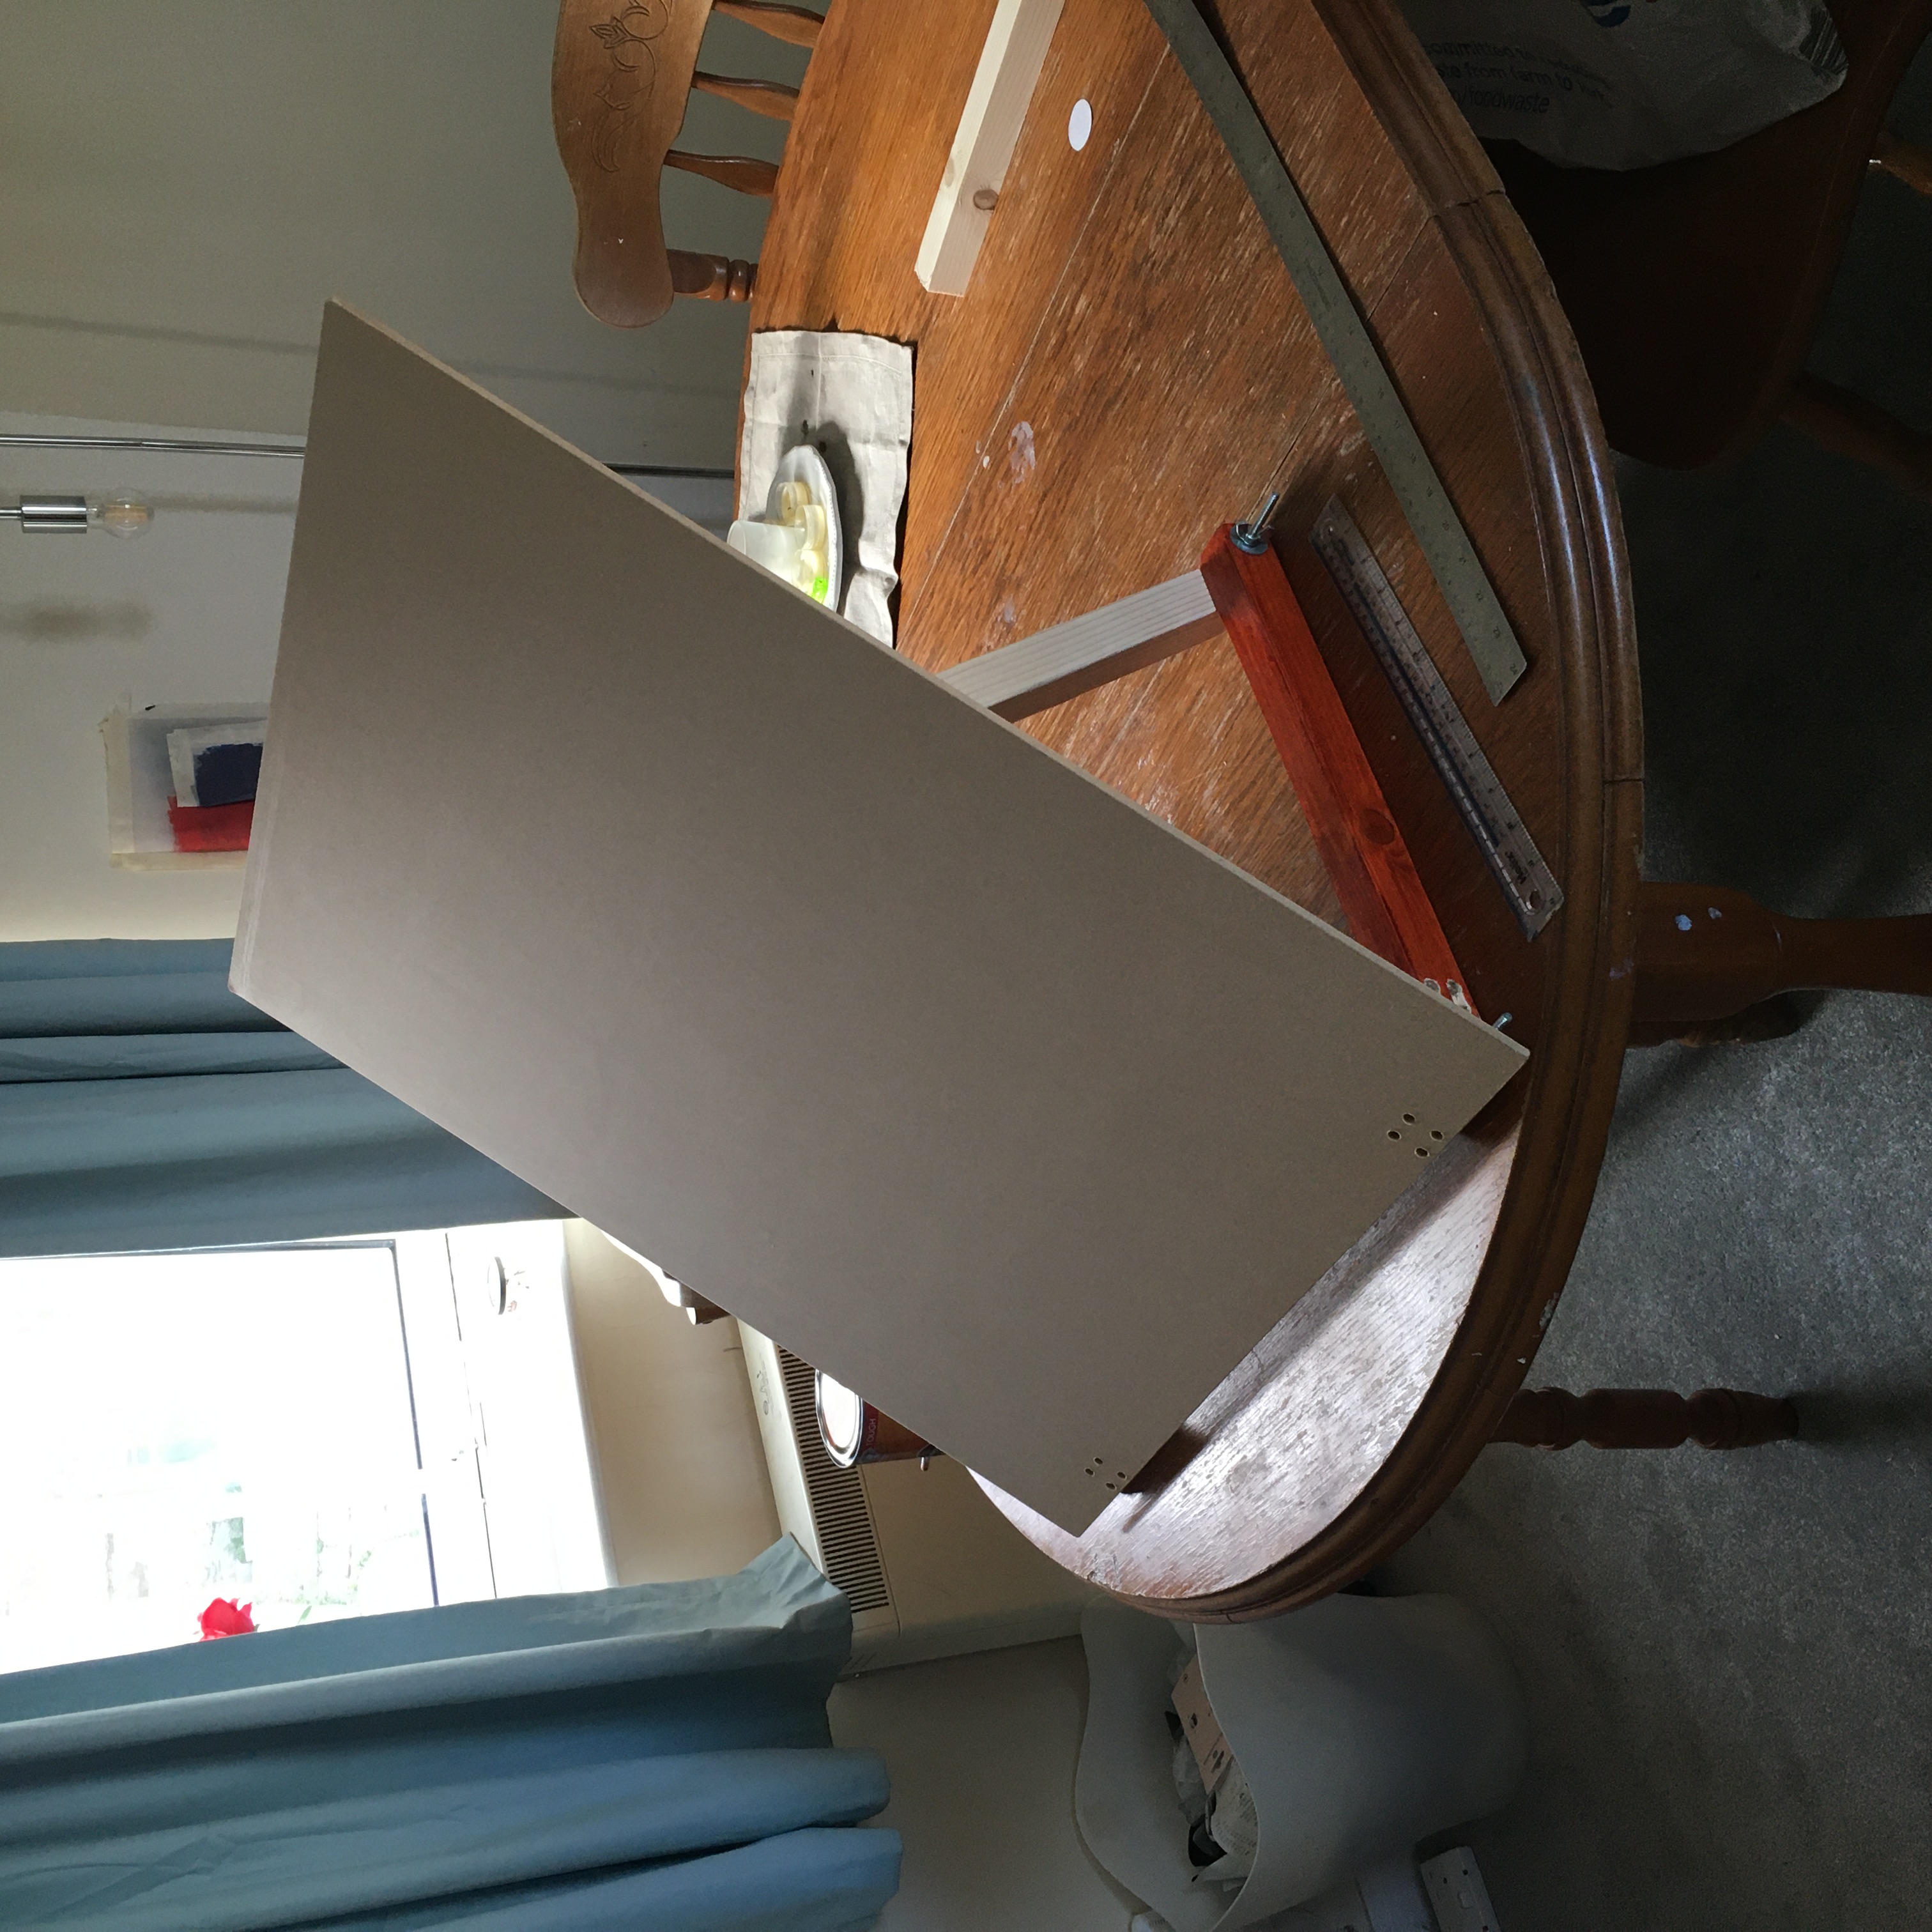
The final step was varnishing the stand. I really wasn’t happy with the project at this point, it wasn’t looking good, but then I added the varnish and it all came together at the final turn. I think from recollection the same thing happened with the laptop stand.
With 70 holes to fill in with sawdust and glue, and then having to hand cut 14 square ends into circles, I clearly overdid a lot of aspects of this project. But I suppose if I didn’t over-complicate it and refuse to cut corners then it wouldn’t be a Morgan Girvin project. And honestly, if there was one take away from this project, it’s that varnish does nearly all of the leg work.
One of the other additions I wanted to add was that I wanted to make the board be rotatable, so that I could have it either portrait or landscape. It’d be no good making an A2 drawing stand only for A2 paper not to fit on it vertically. To make it rotatable any sane person would allocate one short side and one long side to work with, but I like making things difficult for myself and wanted the board to be symmetrical. I wanted to be able to take the board off from the supports, rotate it either 90°, 180° or 270° and still have it attachable. Was a bit difficult to come up with something that would work, but I got there in the end.
With 70 holes to fill in with sawdust and glue, and then having to hand cut 14 square ends into circles, I clearly overdid a lot of aspects of this project. But I suppose if I didn’t over-complicate it and refuse to cut corners then it wouldn’t be a Morgan Girvin project. And honestly, if there was one take away from this project, it’s that varnish does nearly all of the leg work.
