morgan girvin
illustrator, maker and hermitinfo
about
contact
shop
illustrated work
wimmelbilder
film postersalbum art
maps
general illustrations
crafted work
hand crafted projects
big things
film boxsets


morgan girvin
illustrator, maker and hermit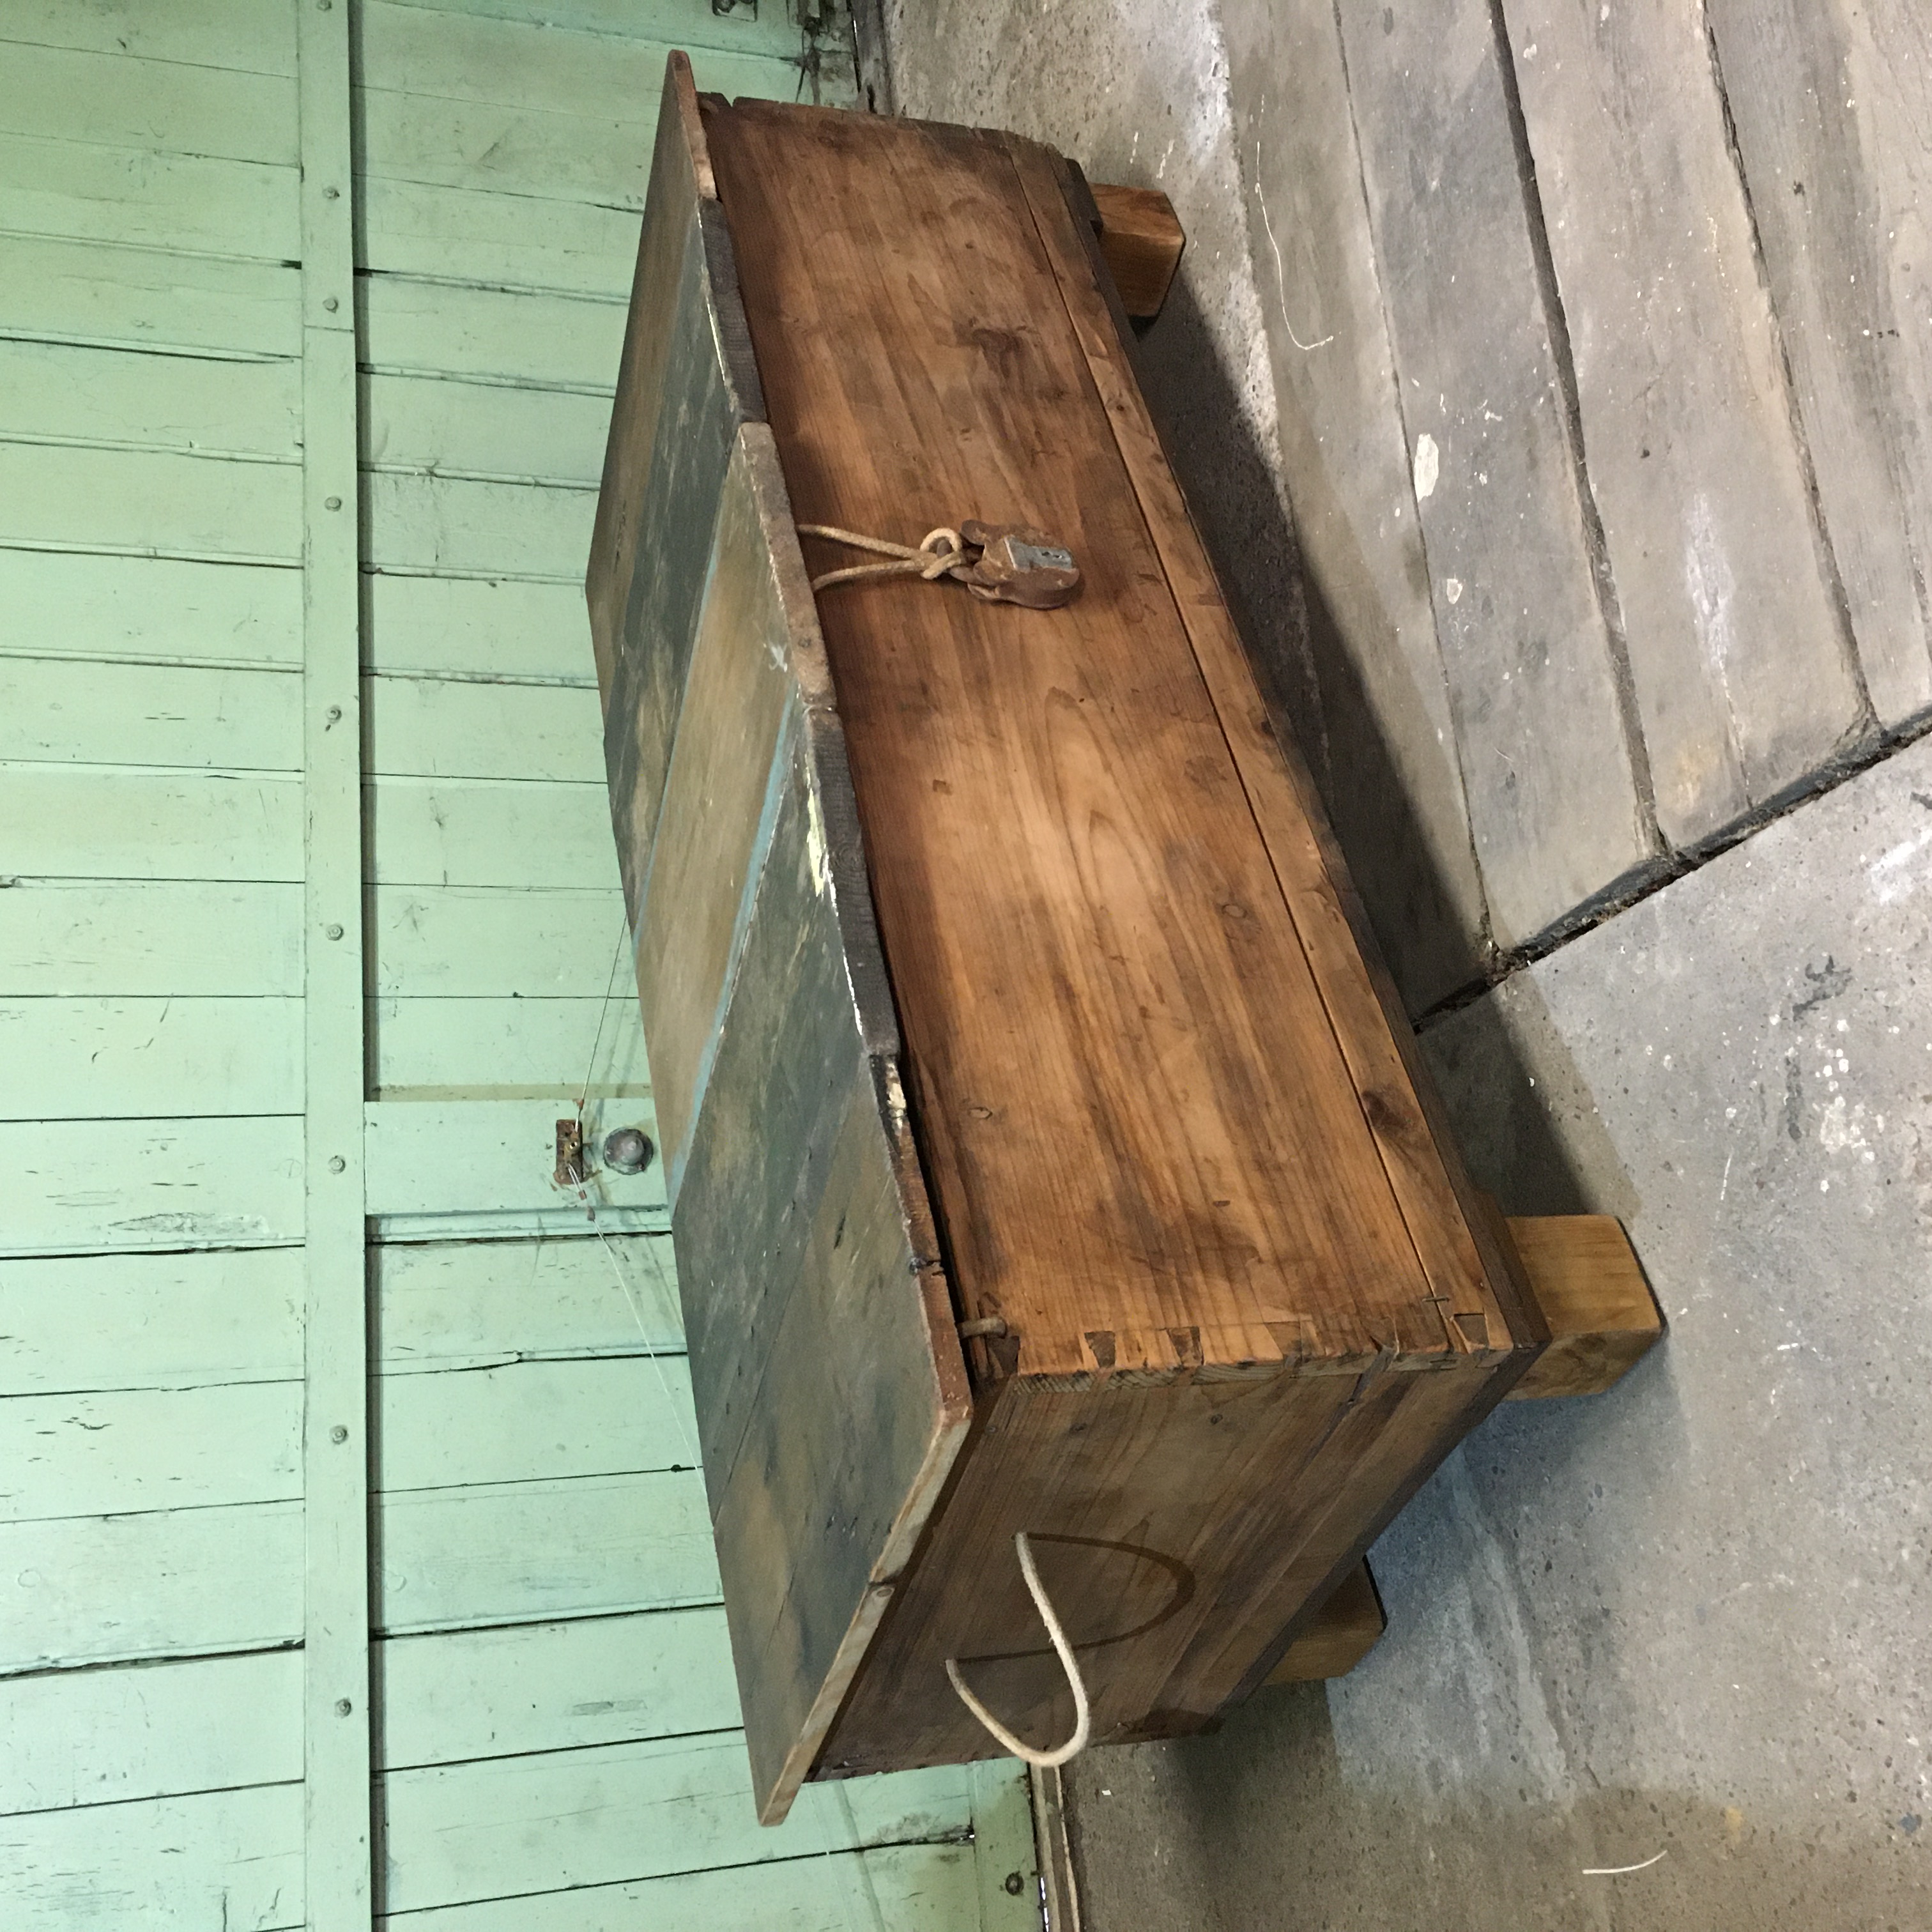

WOODEN TRUNK
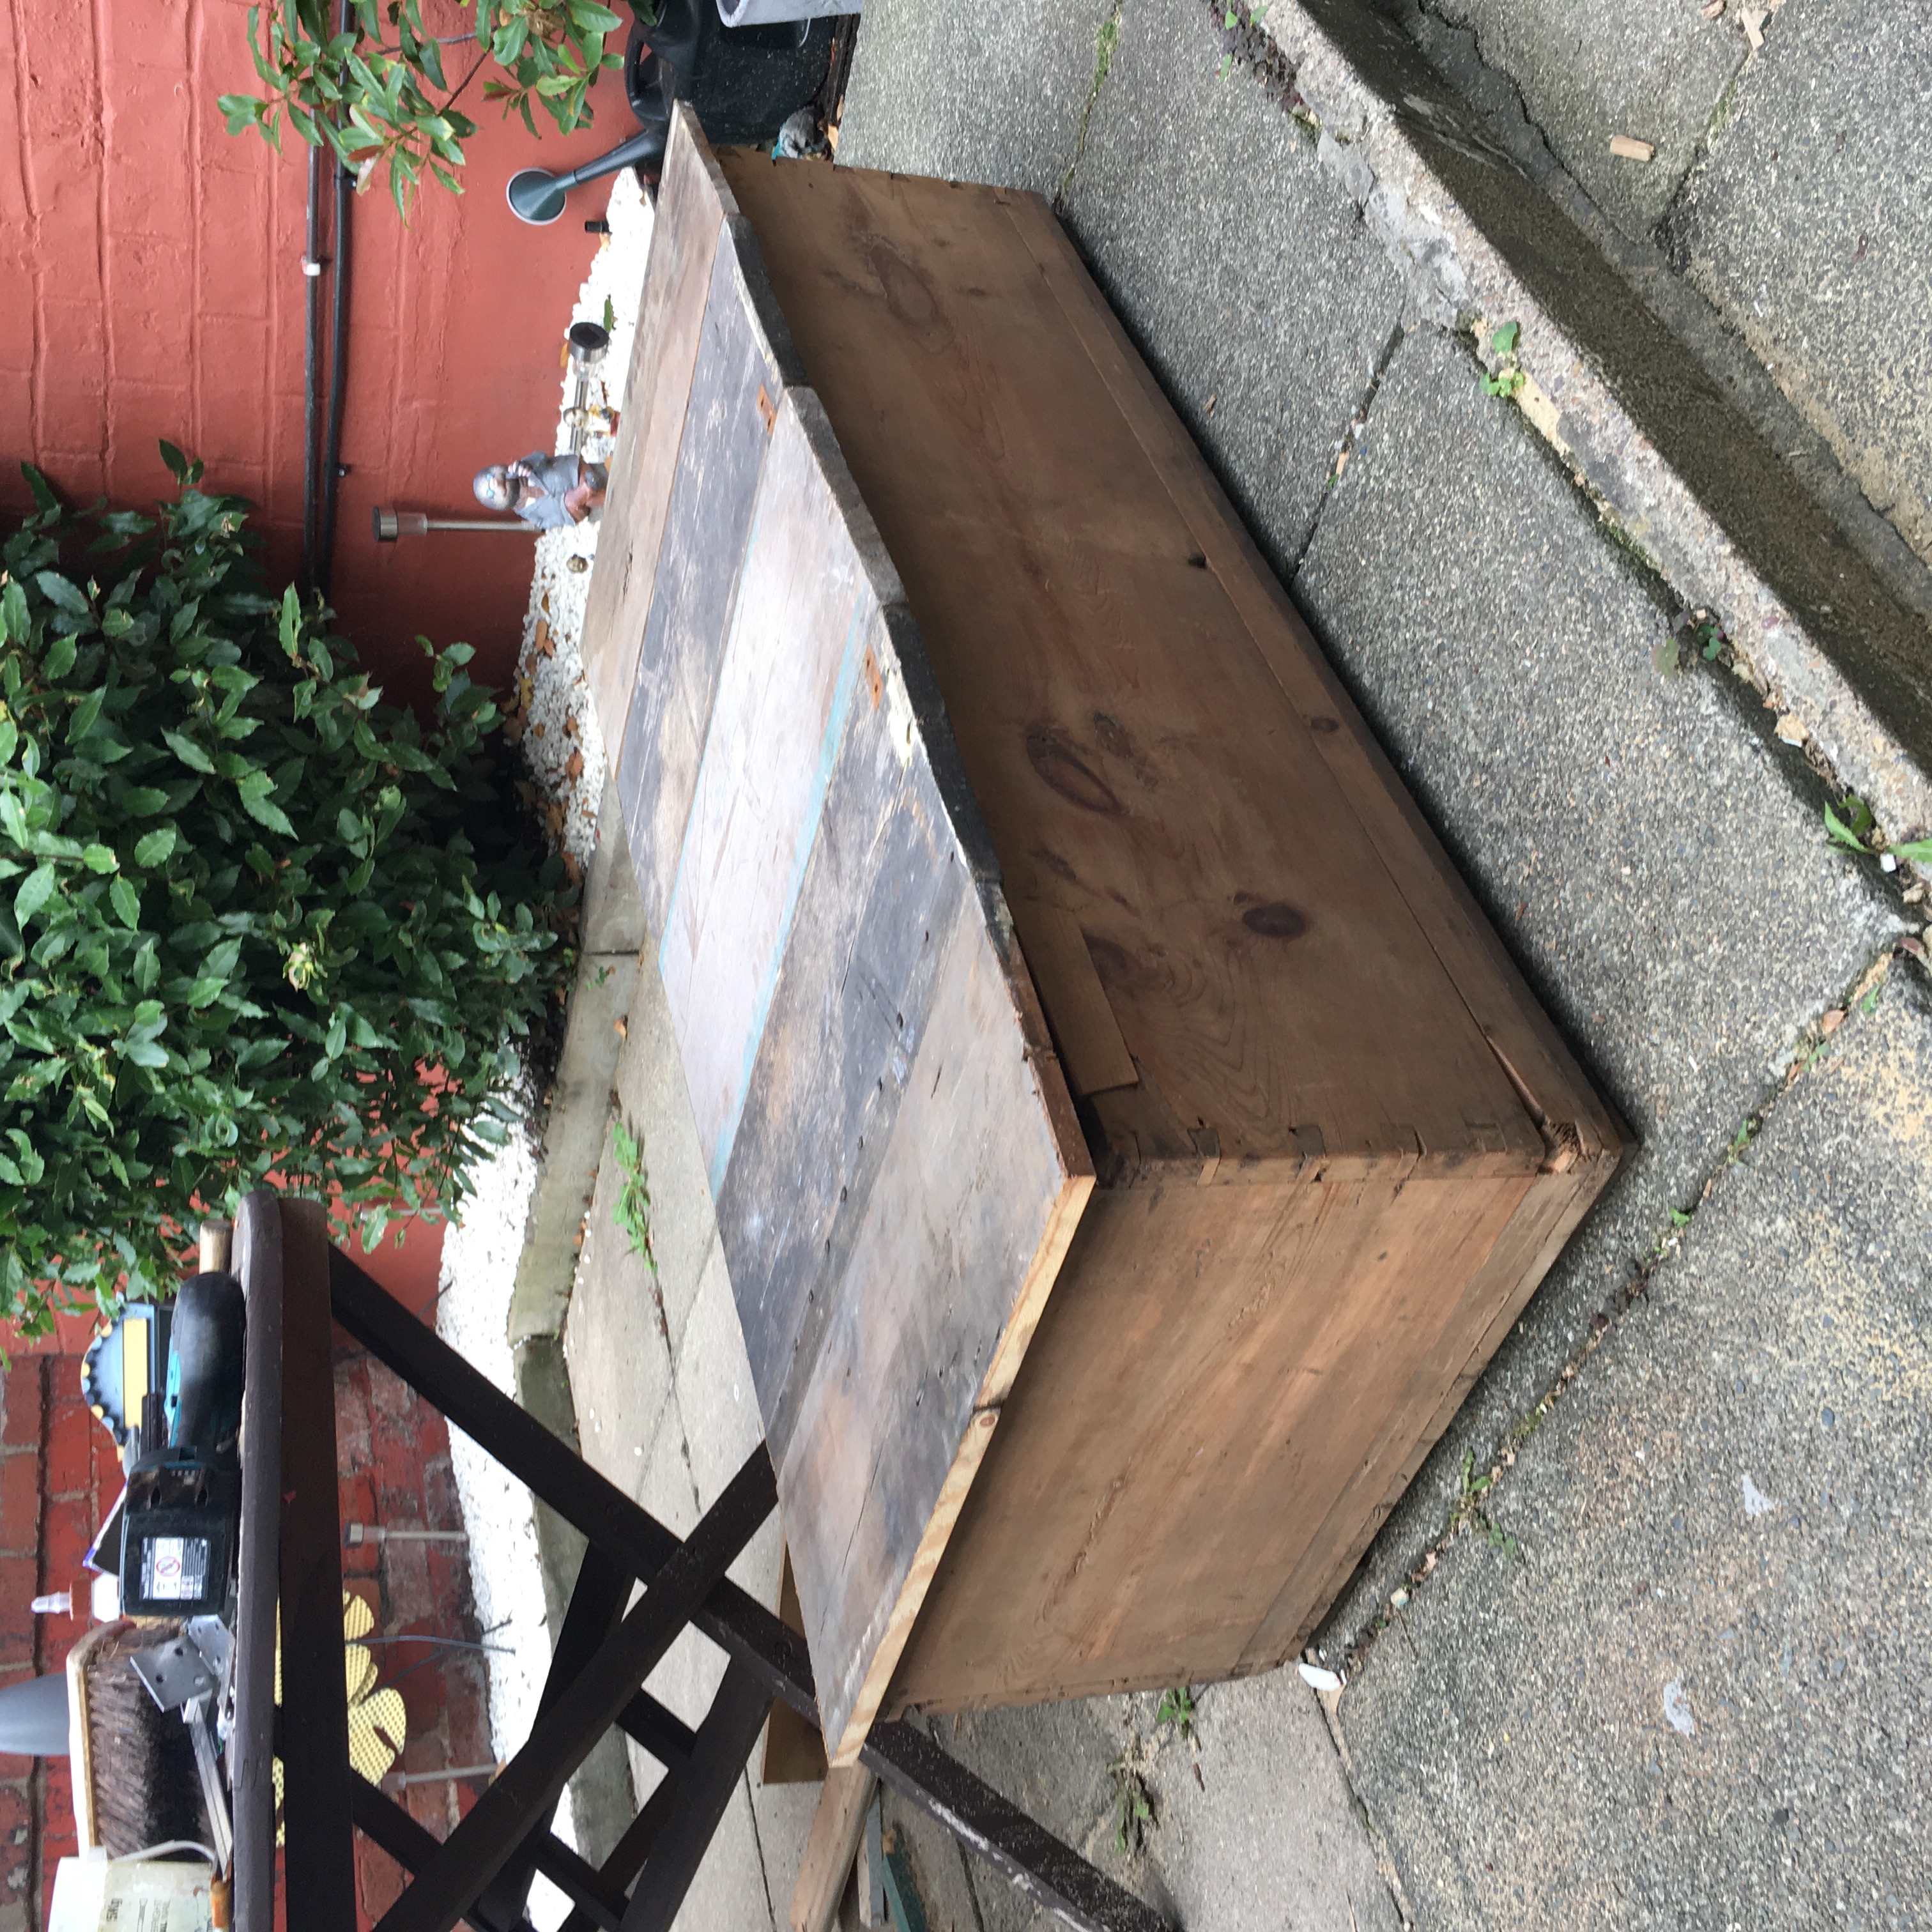
We recently moved house, and a few days after we’d moved in and started to settle we ventured down to the cellar and found that there were plenty of bits and bobs that had been left behind, one of the most interesting being this old crate!
![]()
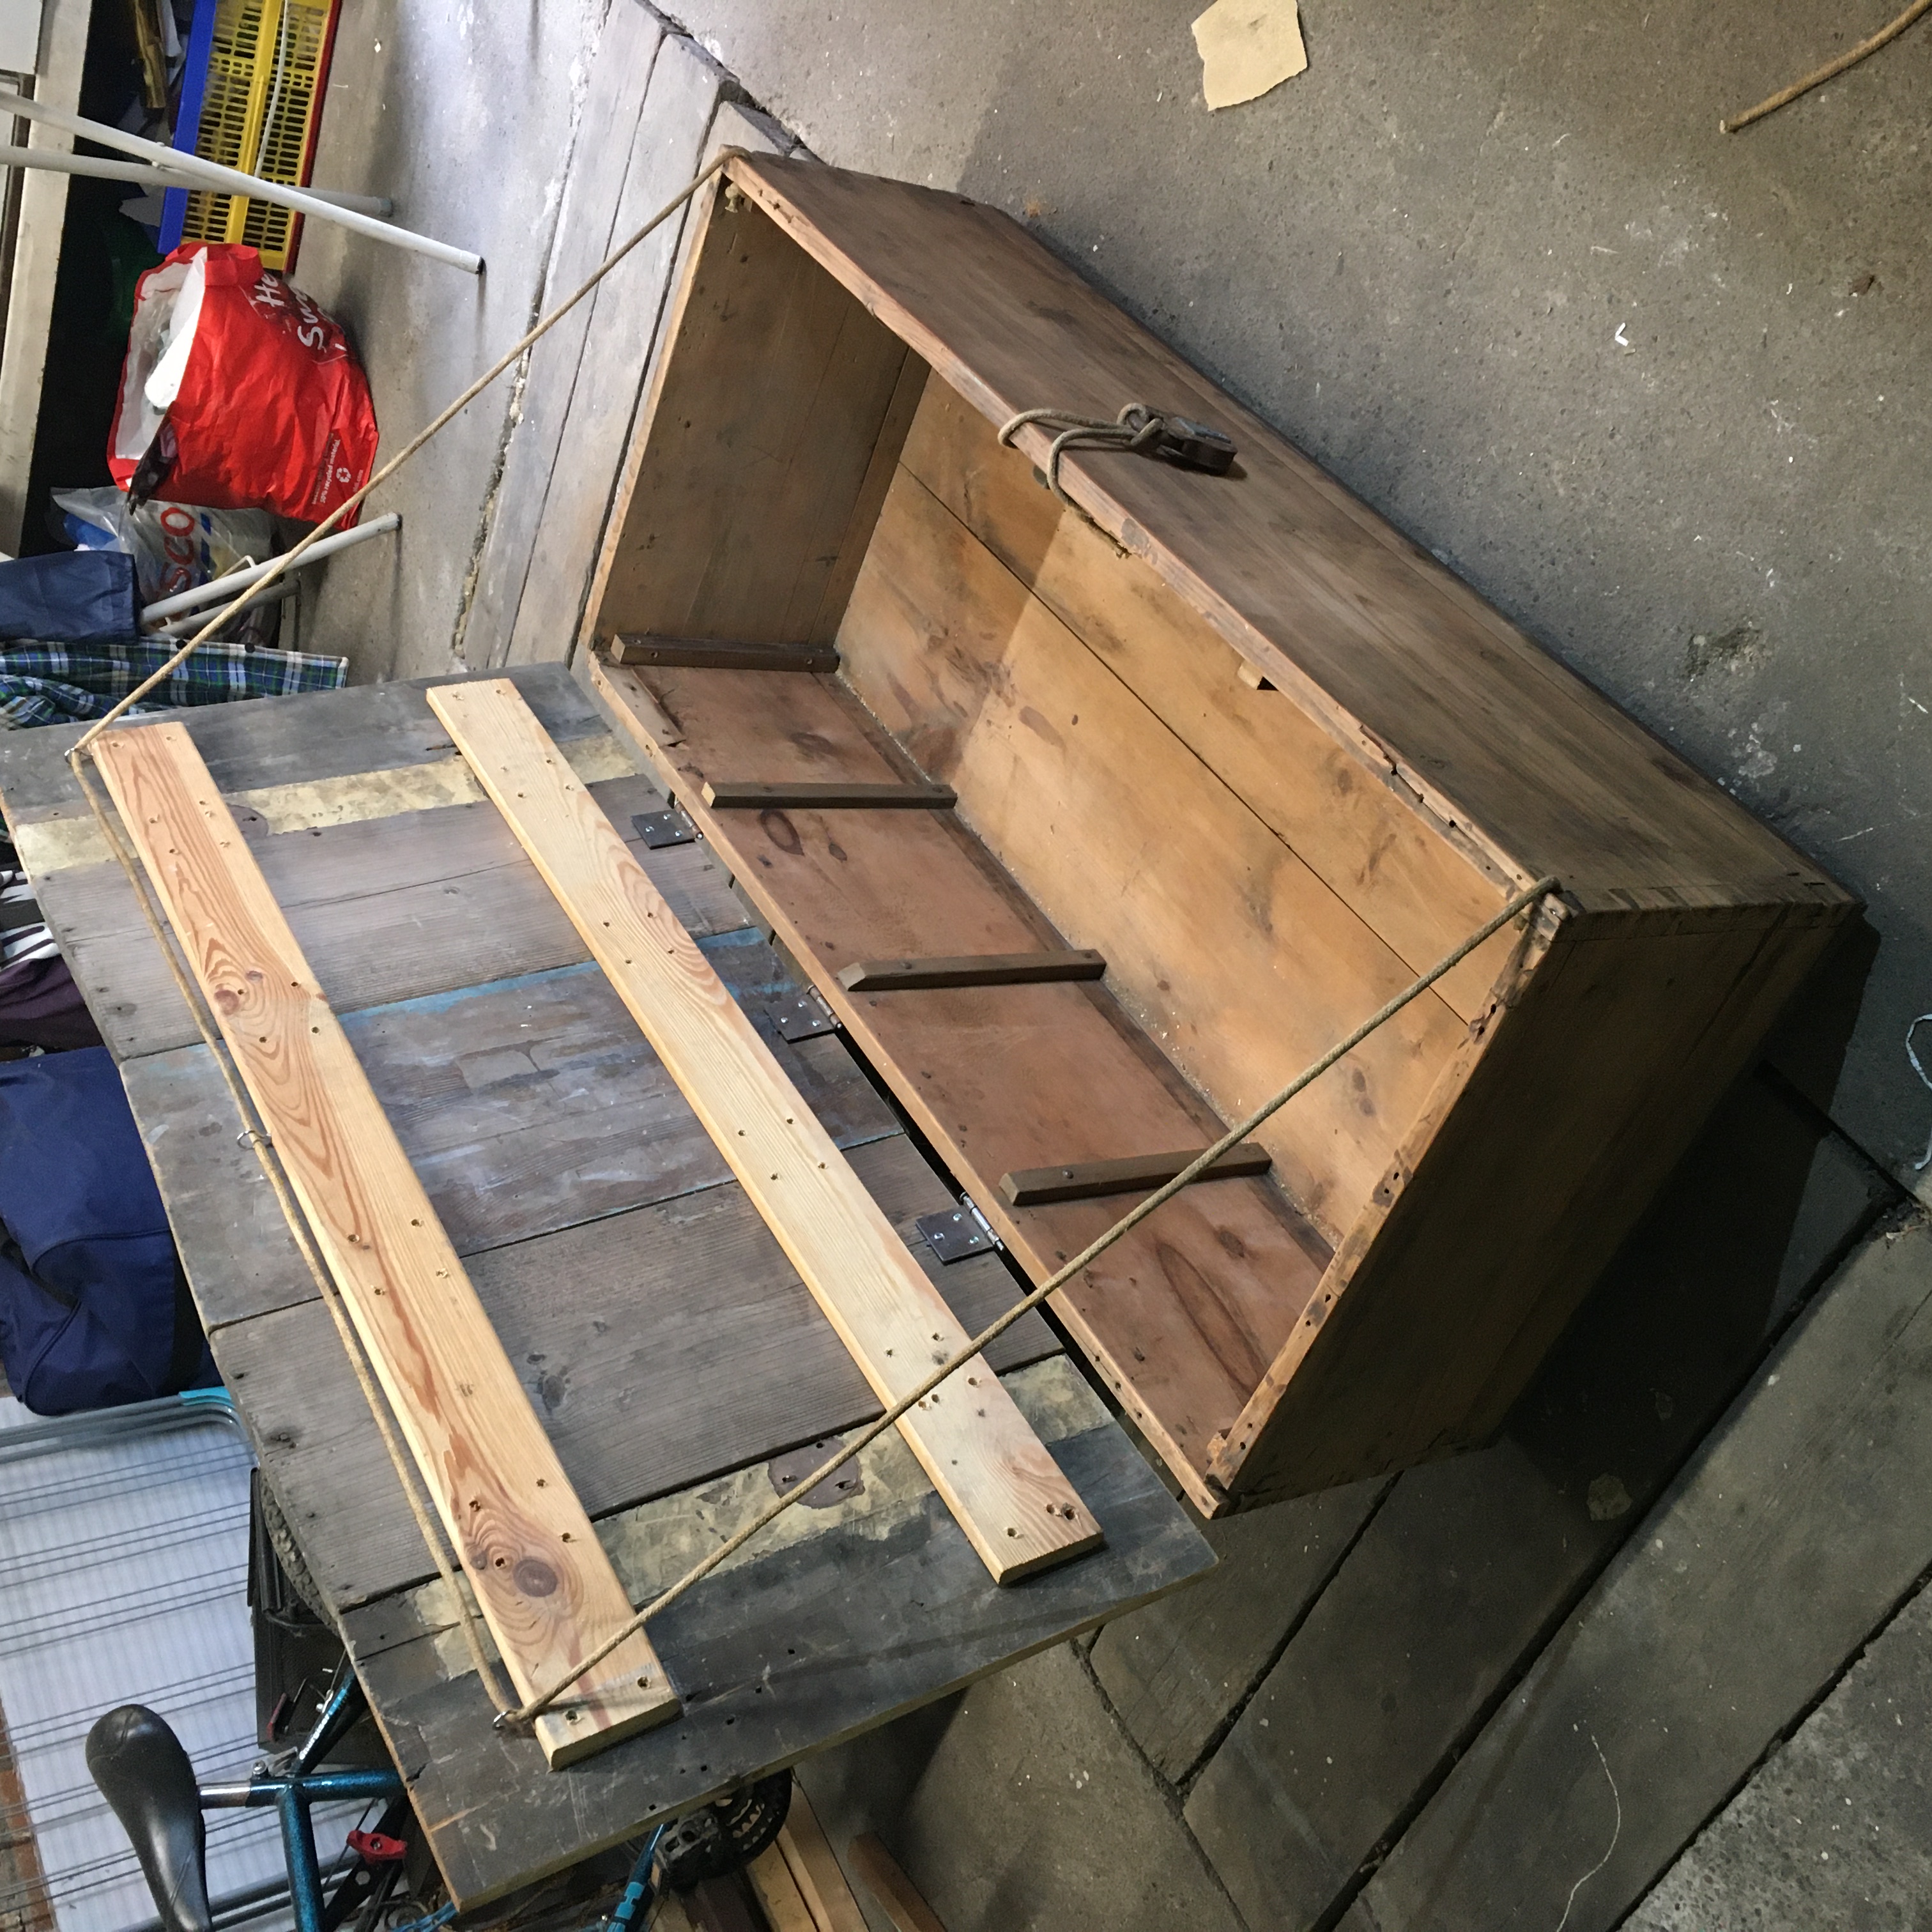
I’m not really sure what the crate/box was originally used for, but it was surprisingly sturdy. All 4 corners had a number of dovetail joints holding the faces together, and the 2 base pieces were doweled together so that the middle wouldn’t fall through. I didn’t know exactly what I was going to do with it, but it was in such a nice condition that I knew it would be a shame to do anything to change or hide the wood, so I wanted to keep it as natural as possible (this included the few cracks, splits and chips that were in it - they add character!).
As a preface, I’m delighted with how well this project came together. It was nice to have a break for a few days where I could focus my energy into building something rather than drawing, and in this case that ‘something’ was turning the old crate we found into a wooden trunk!
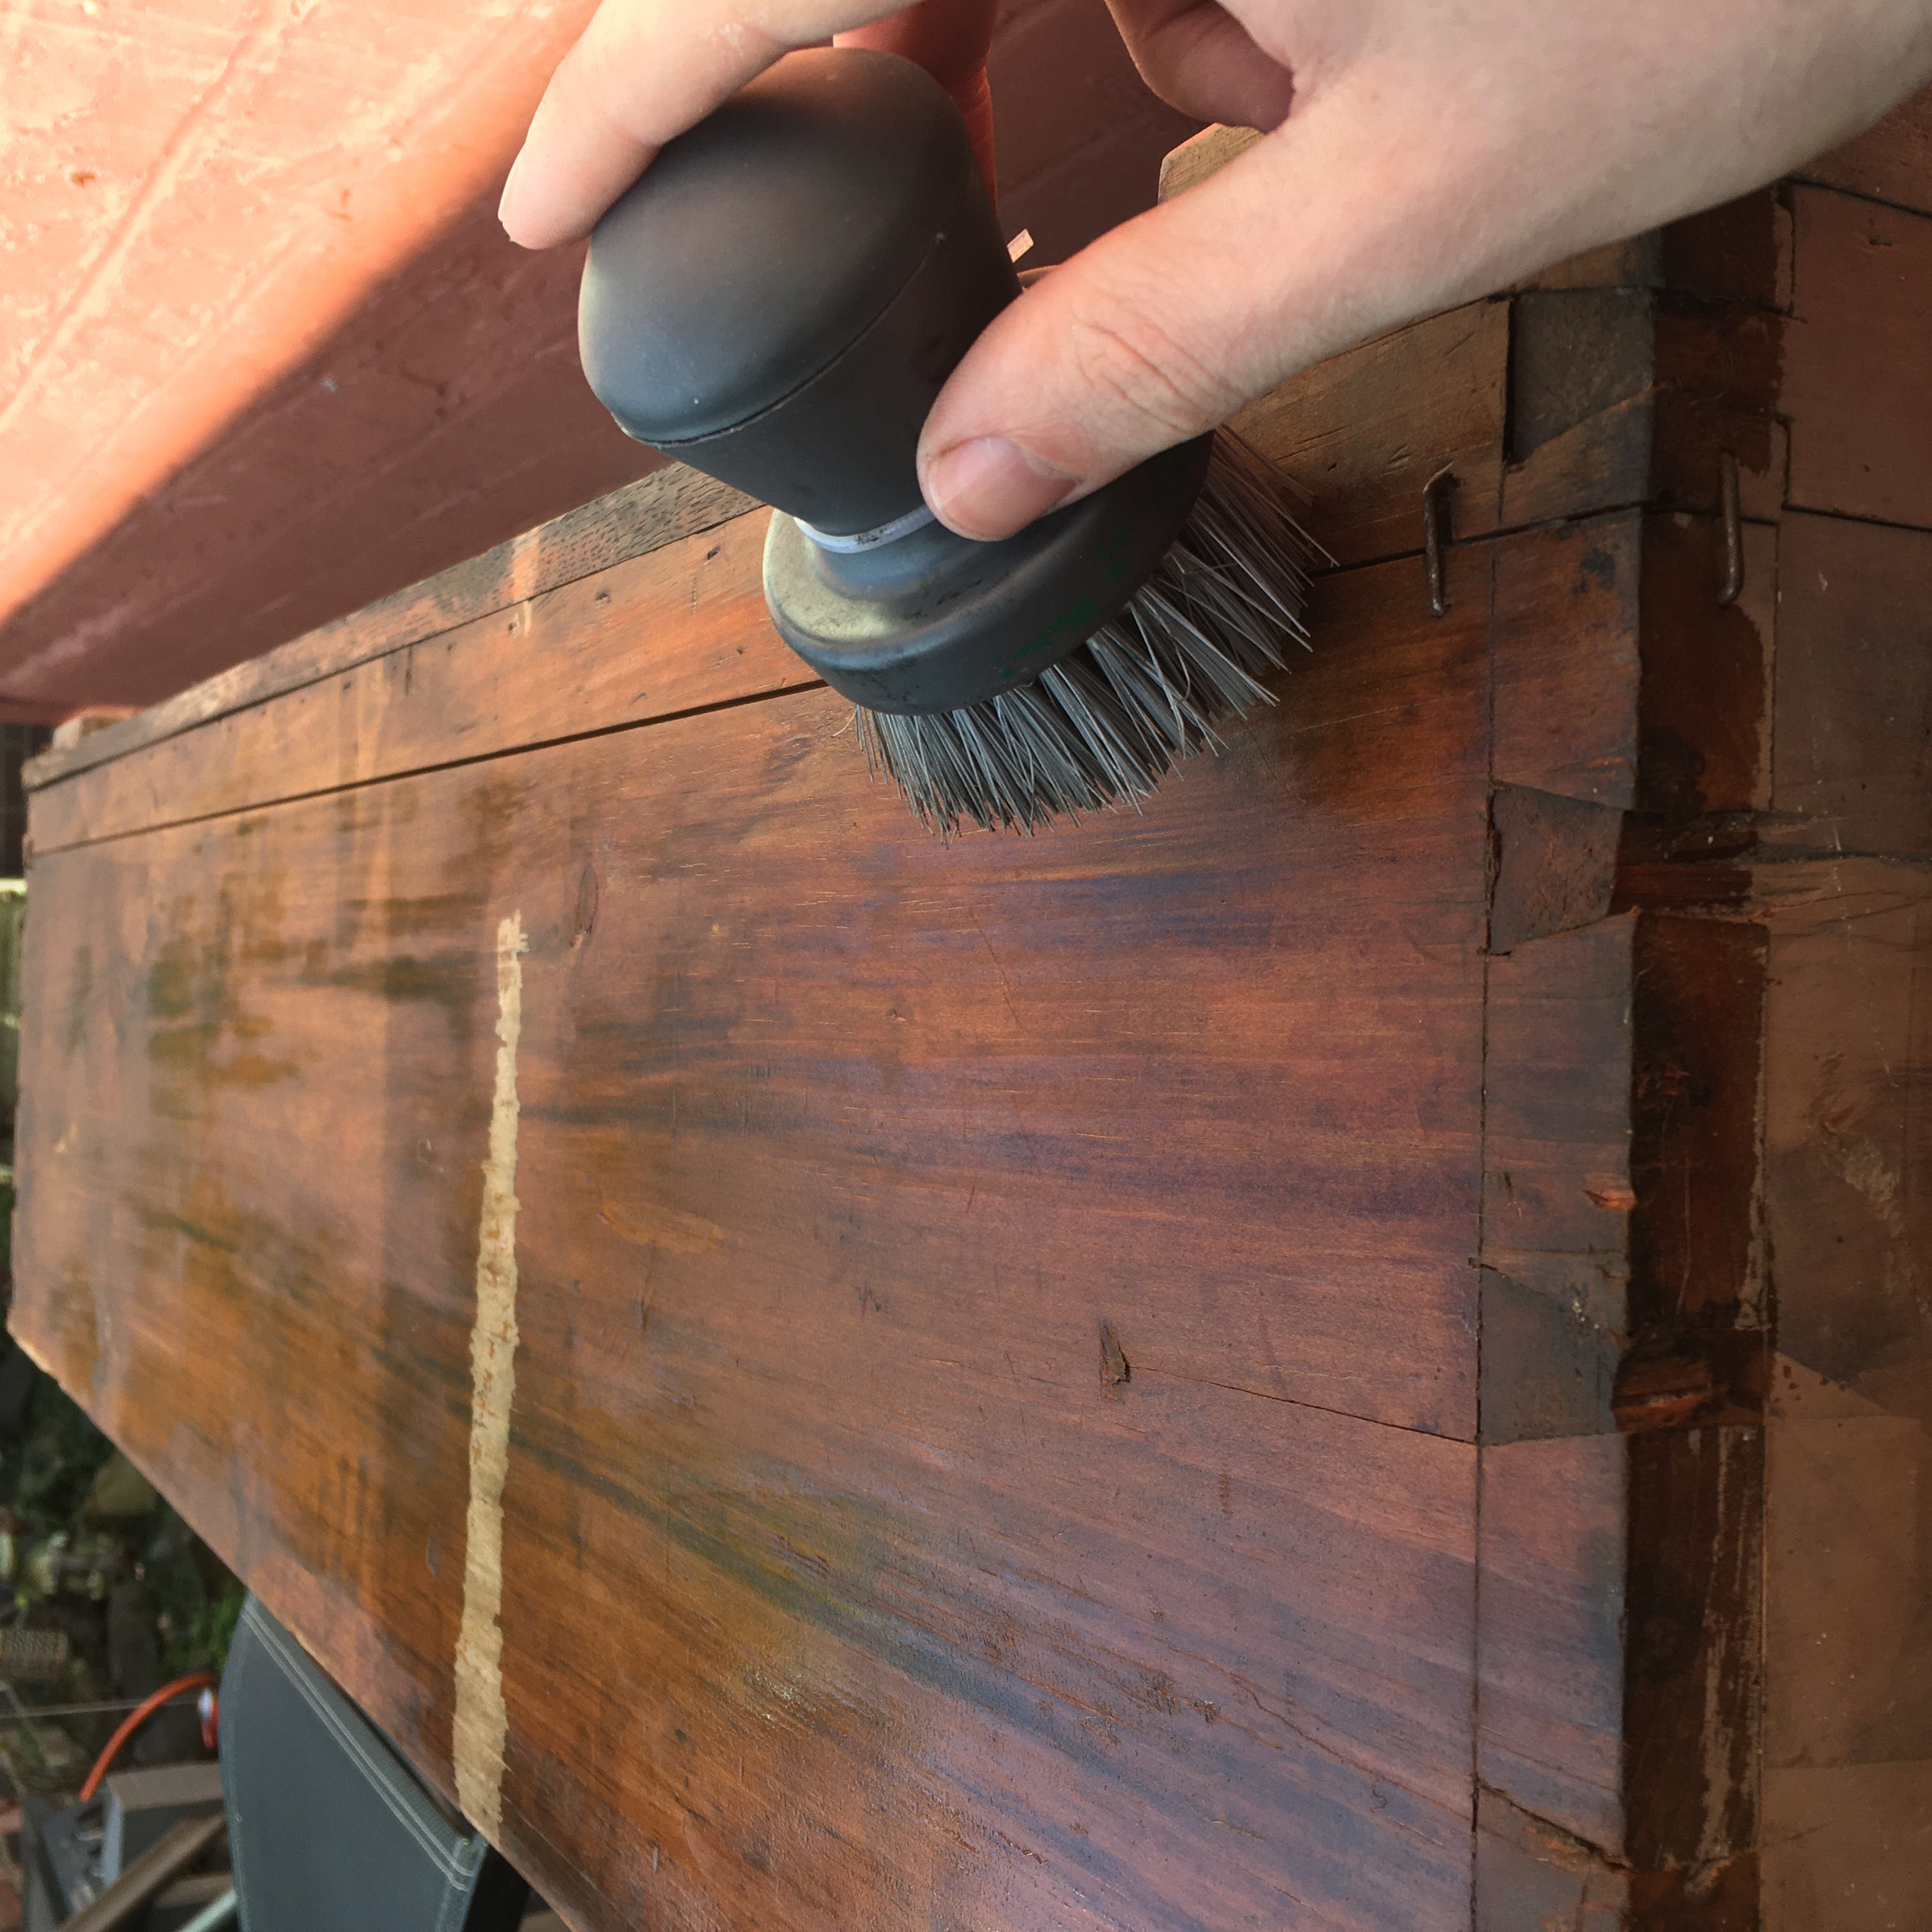
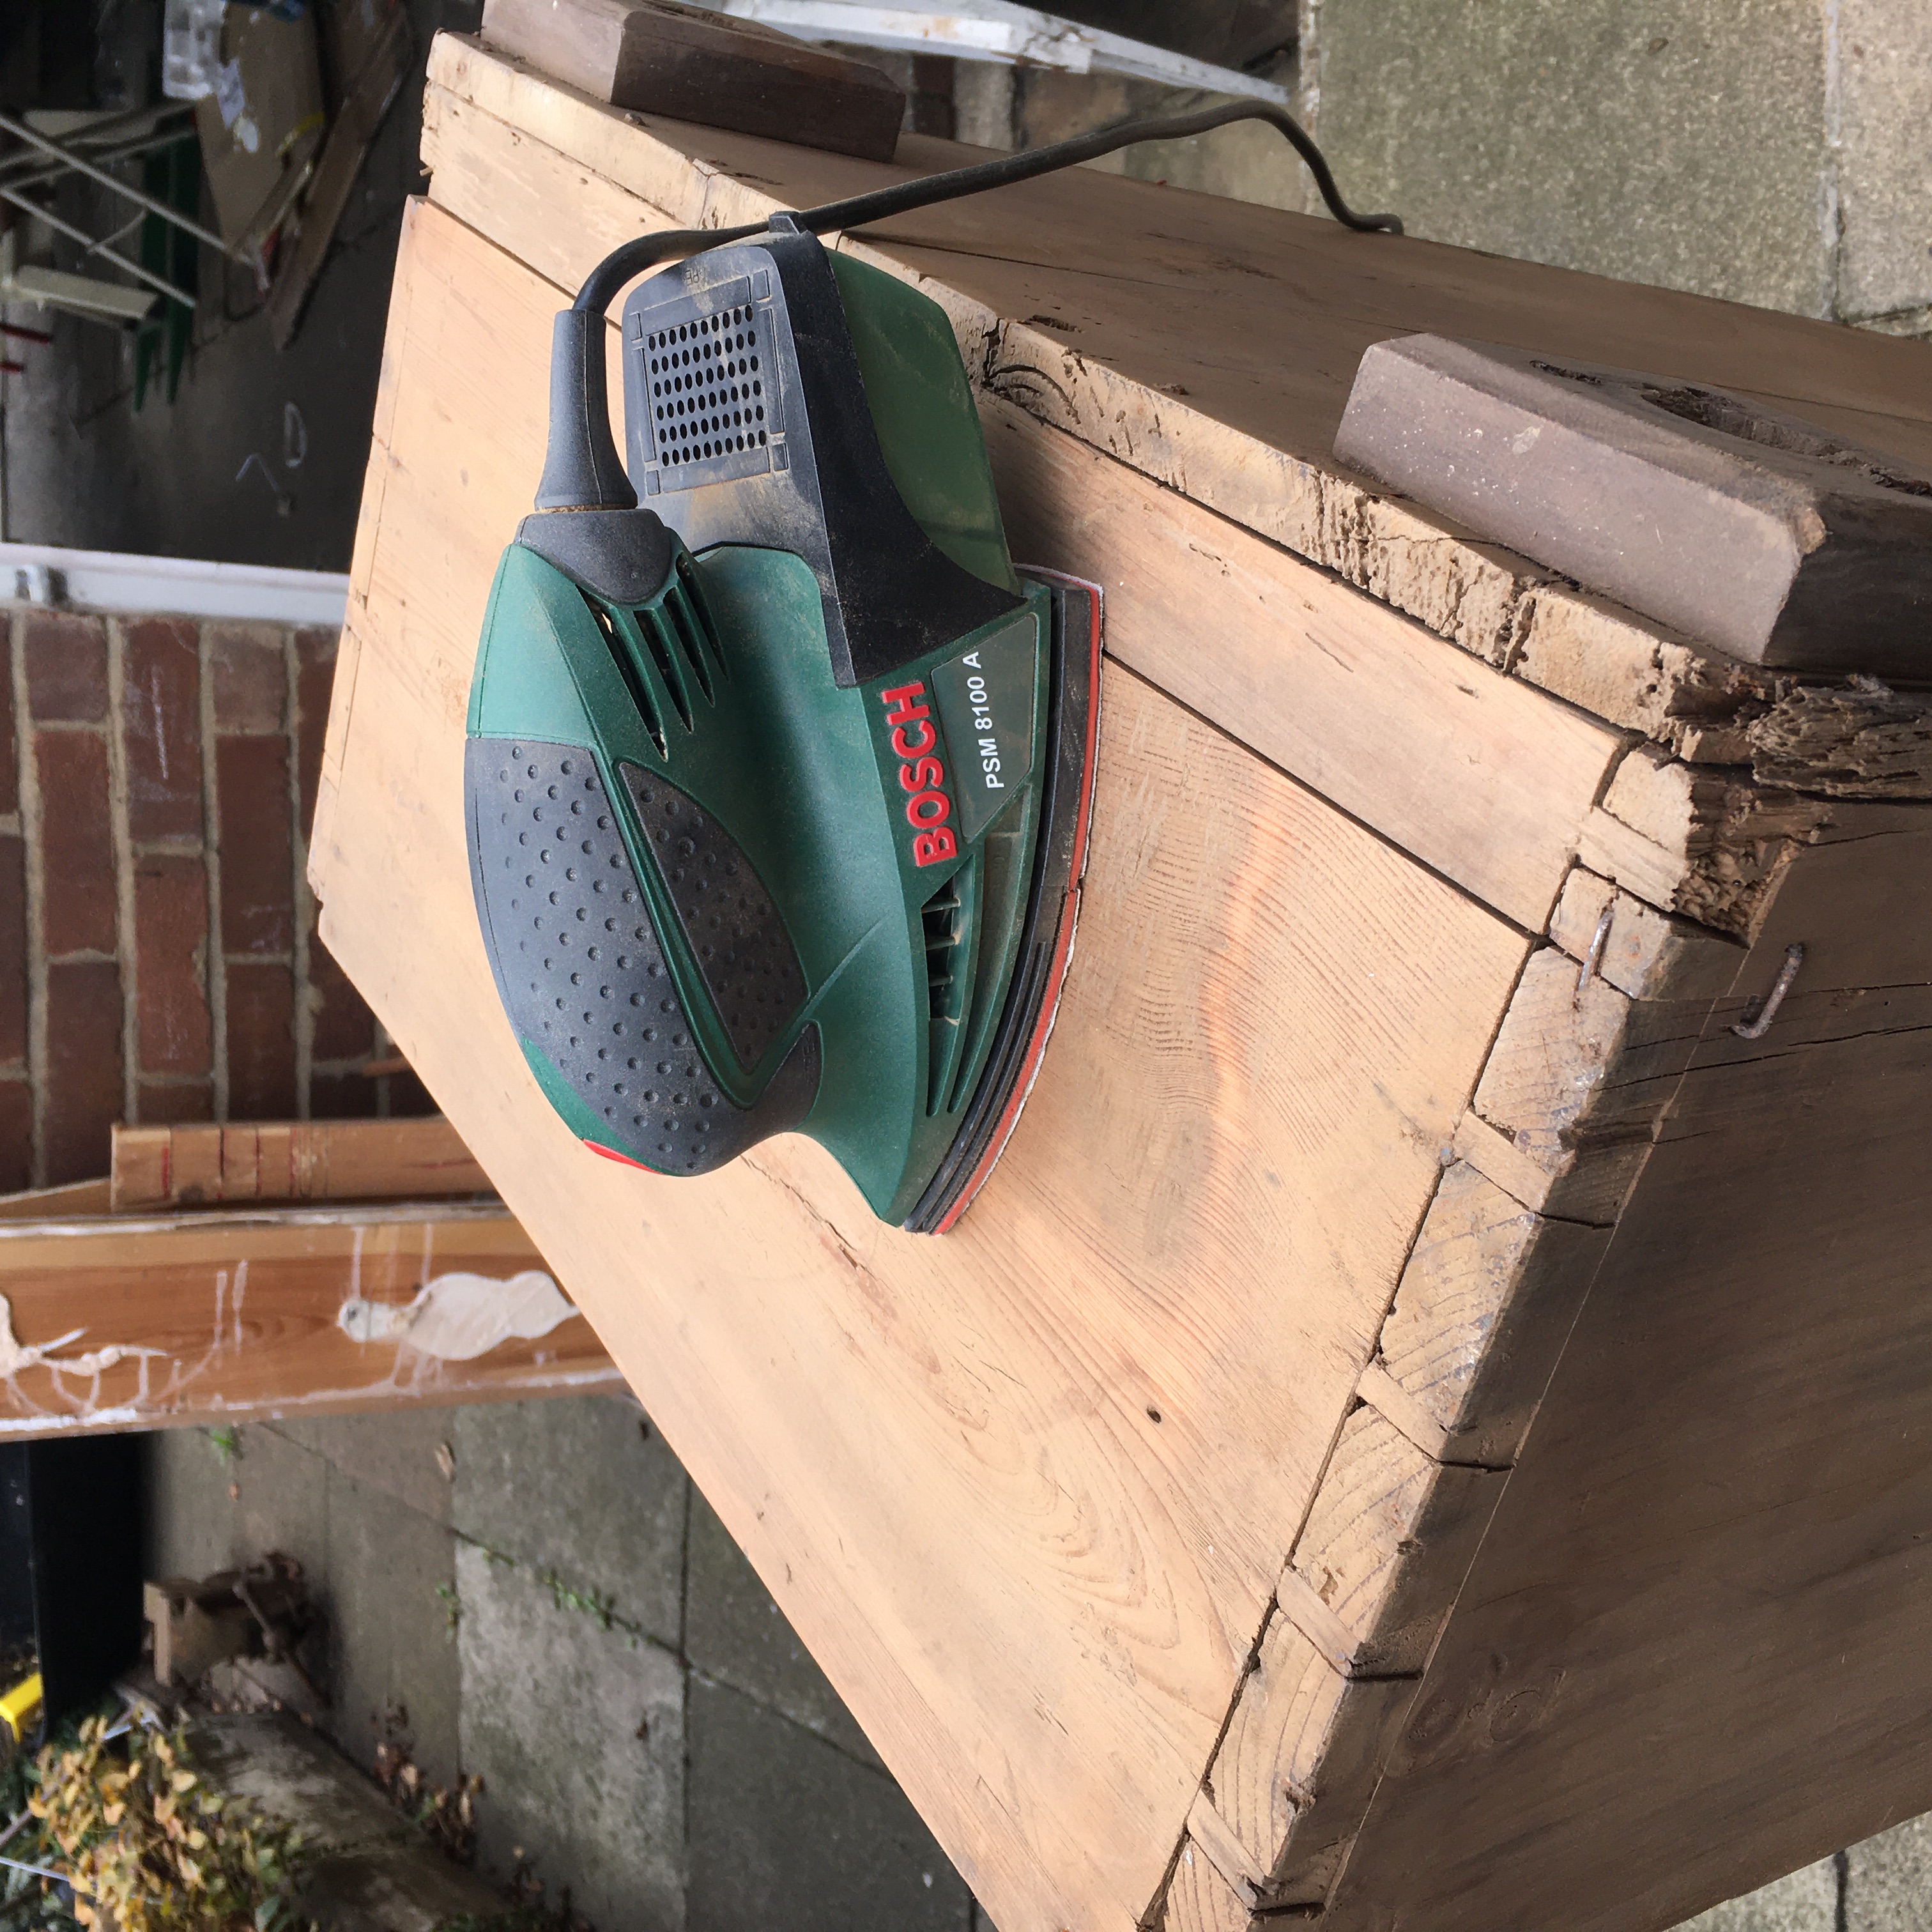
The first thing I did was clean the crate with a hoover and then some warm water and a brush, removing all the grime, dirt and cobwebs that had accumulated on it over however long it had been in our cellar. I then sanded the outside using an electric sander just to neaten up any rough patches.
![Scrubbing the crate clean...]()
![...and sanding the crate smooth!]()
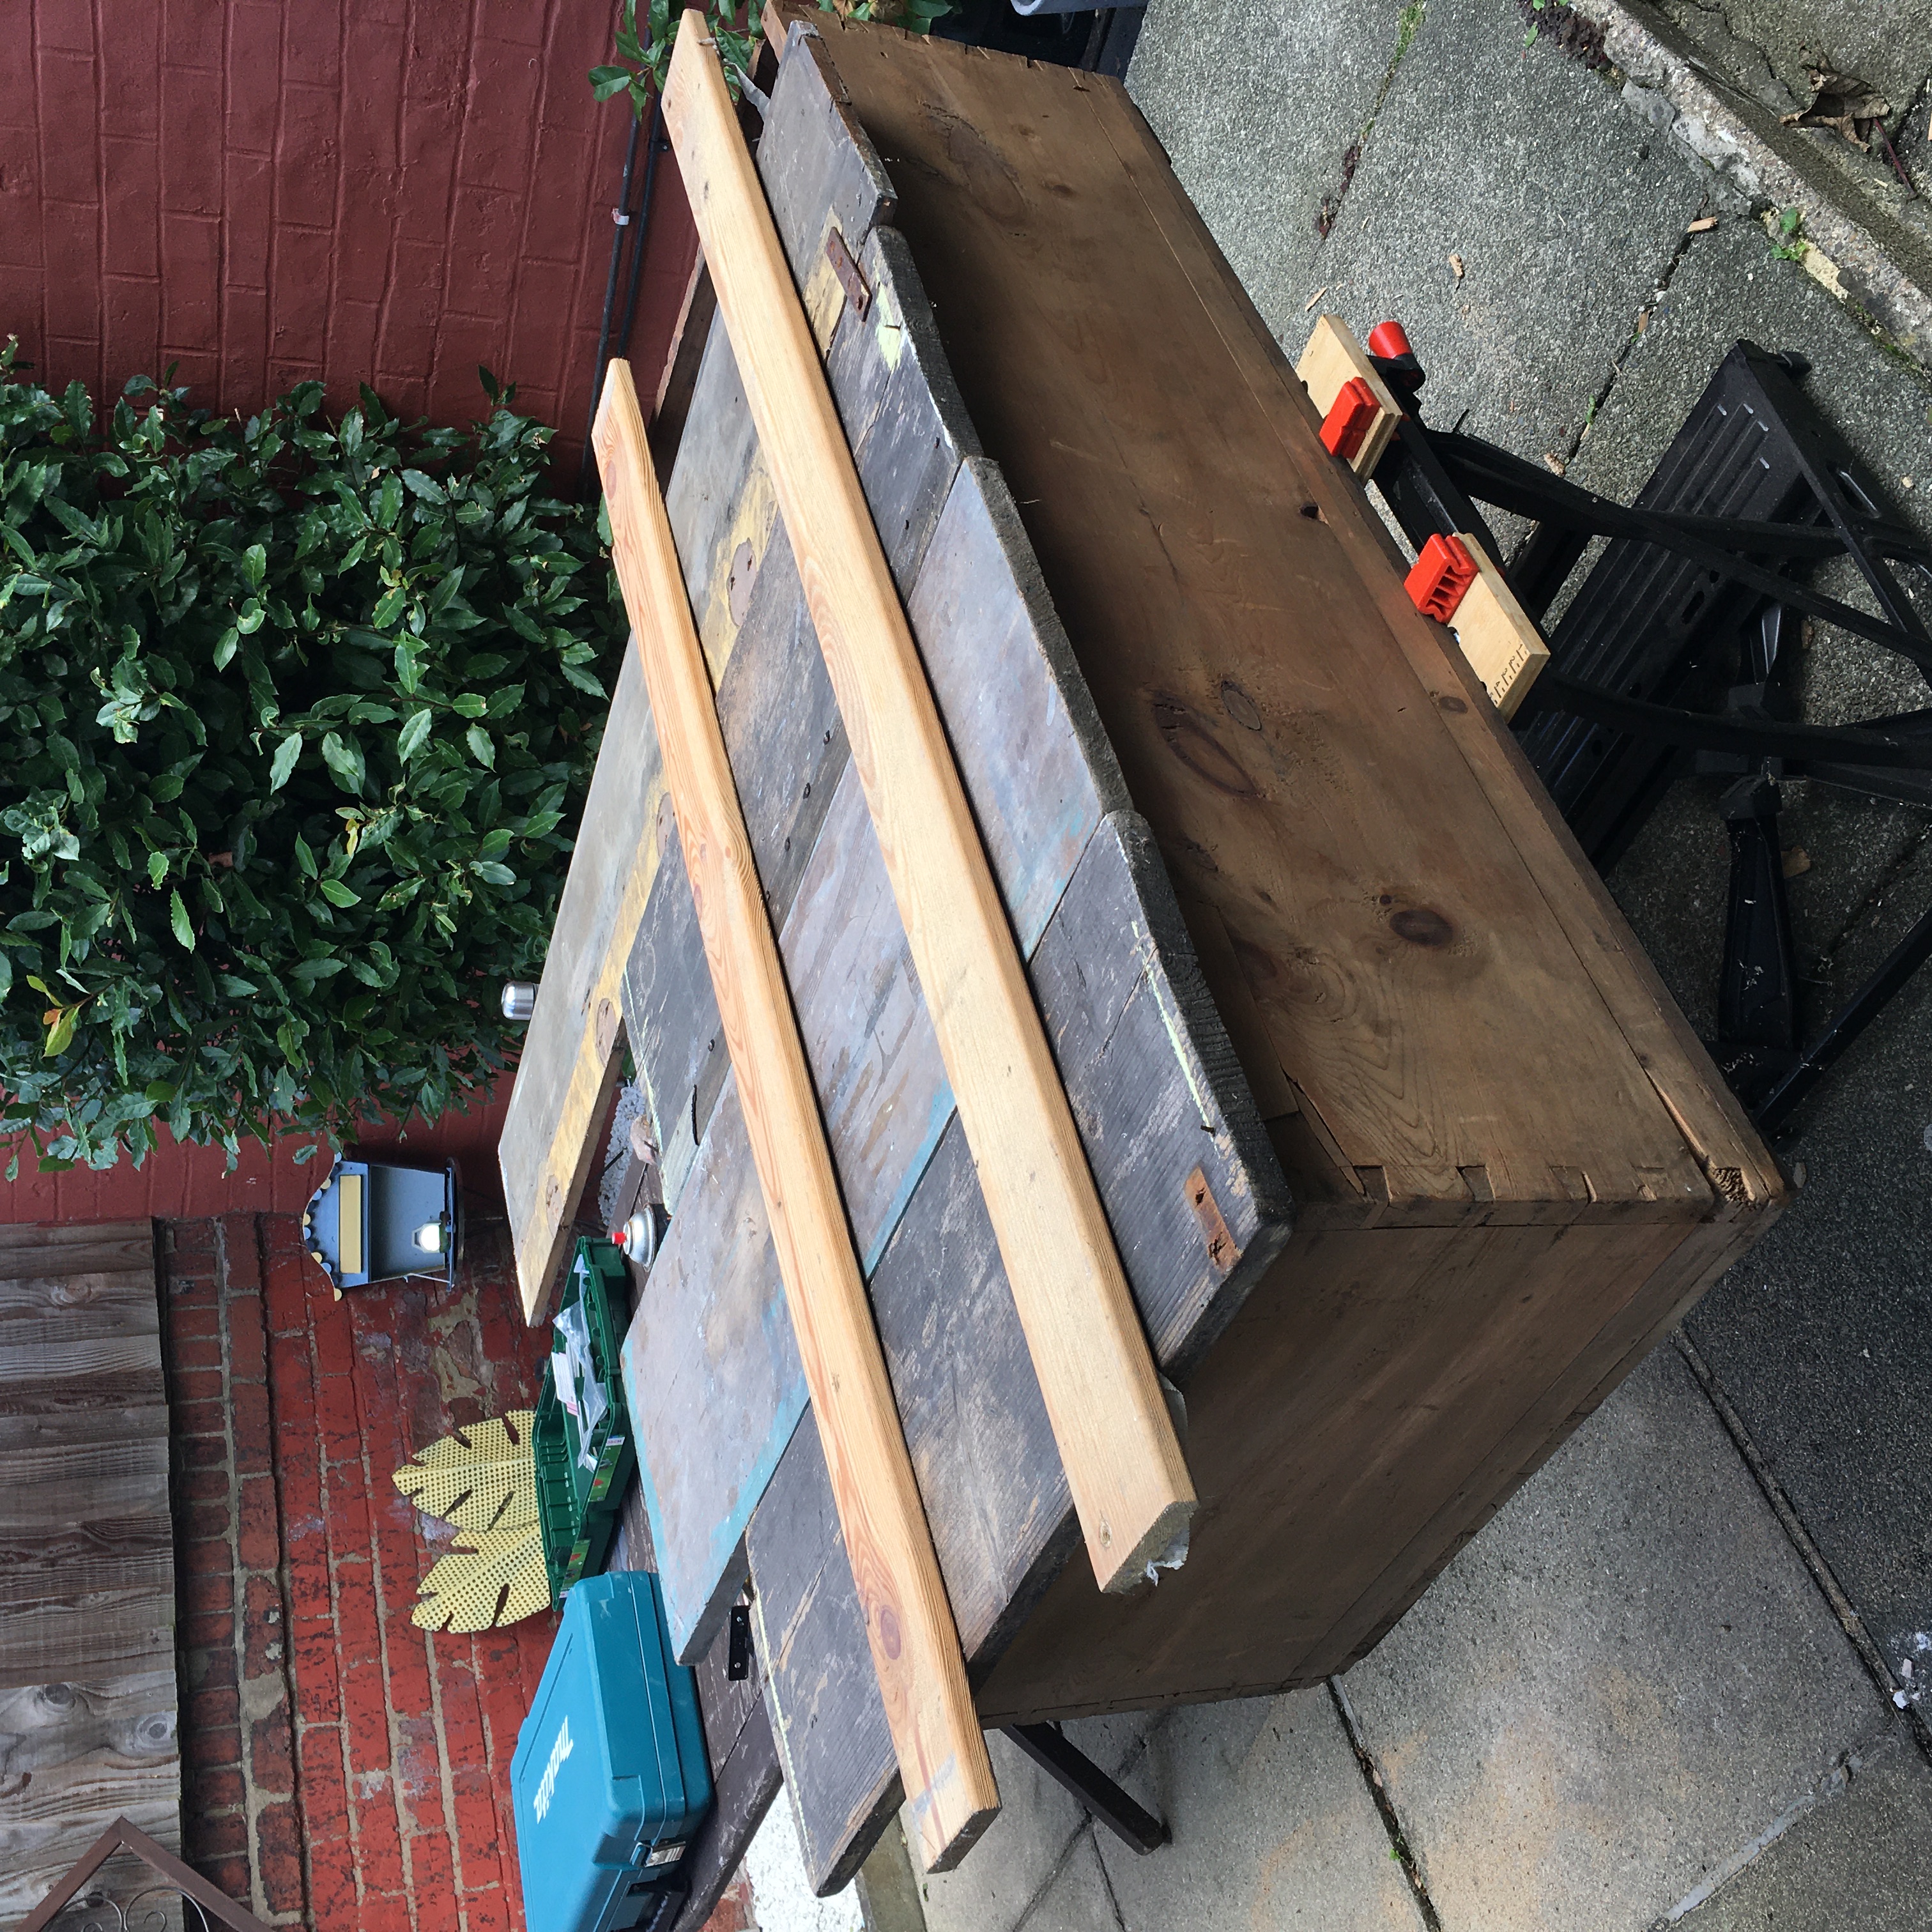
After cleaning the crate up, I strengthened the crate. Even though it was in already in pretty good condition we thought it’d be a good idea if I added some extra support just in case. In the image of the original crate you can see that on the inside of the long edges there are 6 wood strips (3 on either side). I decided to find wood as close to this as possible so that I could cut 4 more stips and put them in the 4 corners of the crate, giving each side extra rigidity. Conviently, there was also a lot of spare pieces of wood left behind in the cellar too, so I didn’t have to look particularly far to find some that matched. I didn’t take a picture of these when I made them, but I’m sure you’ll see them crop up in other photos.
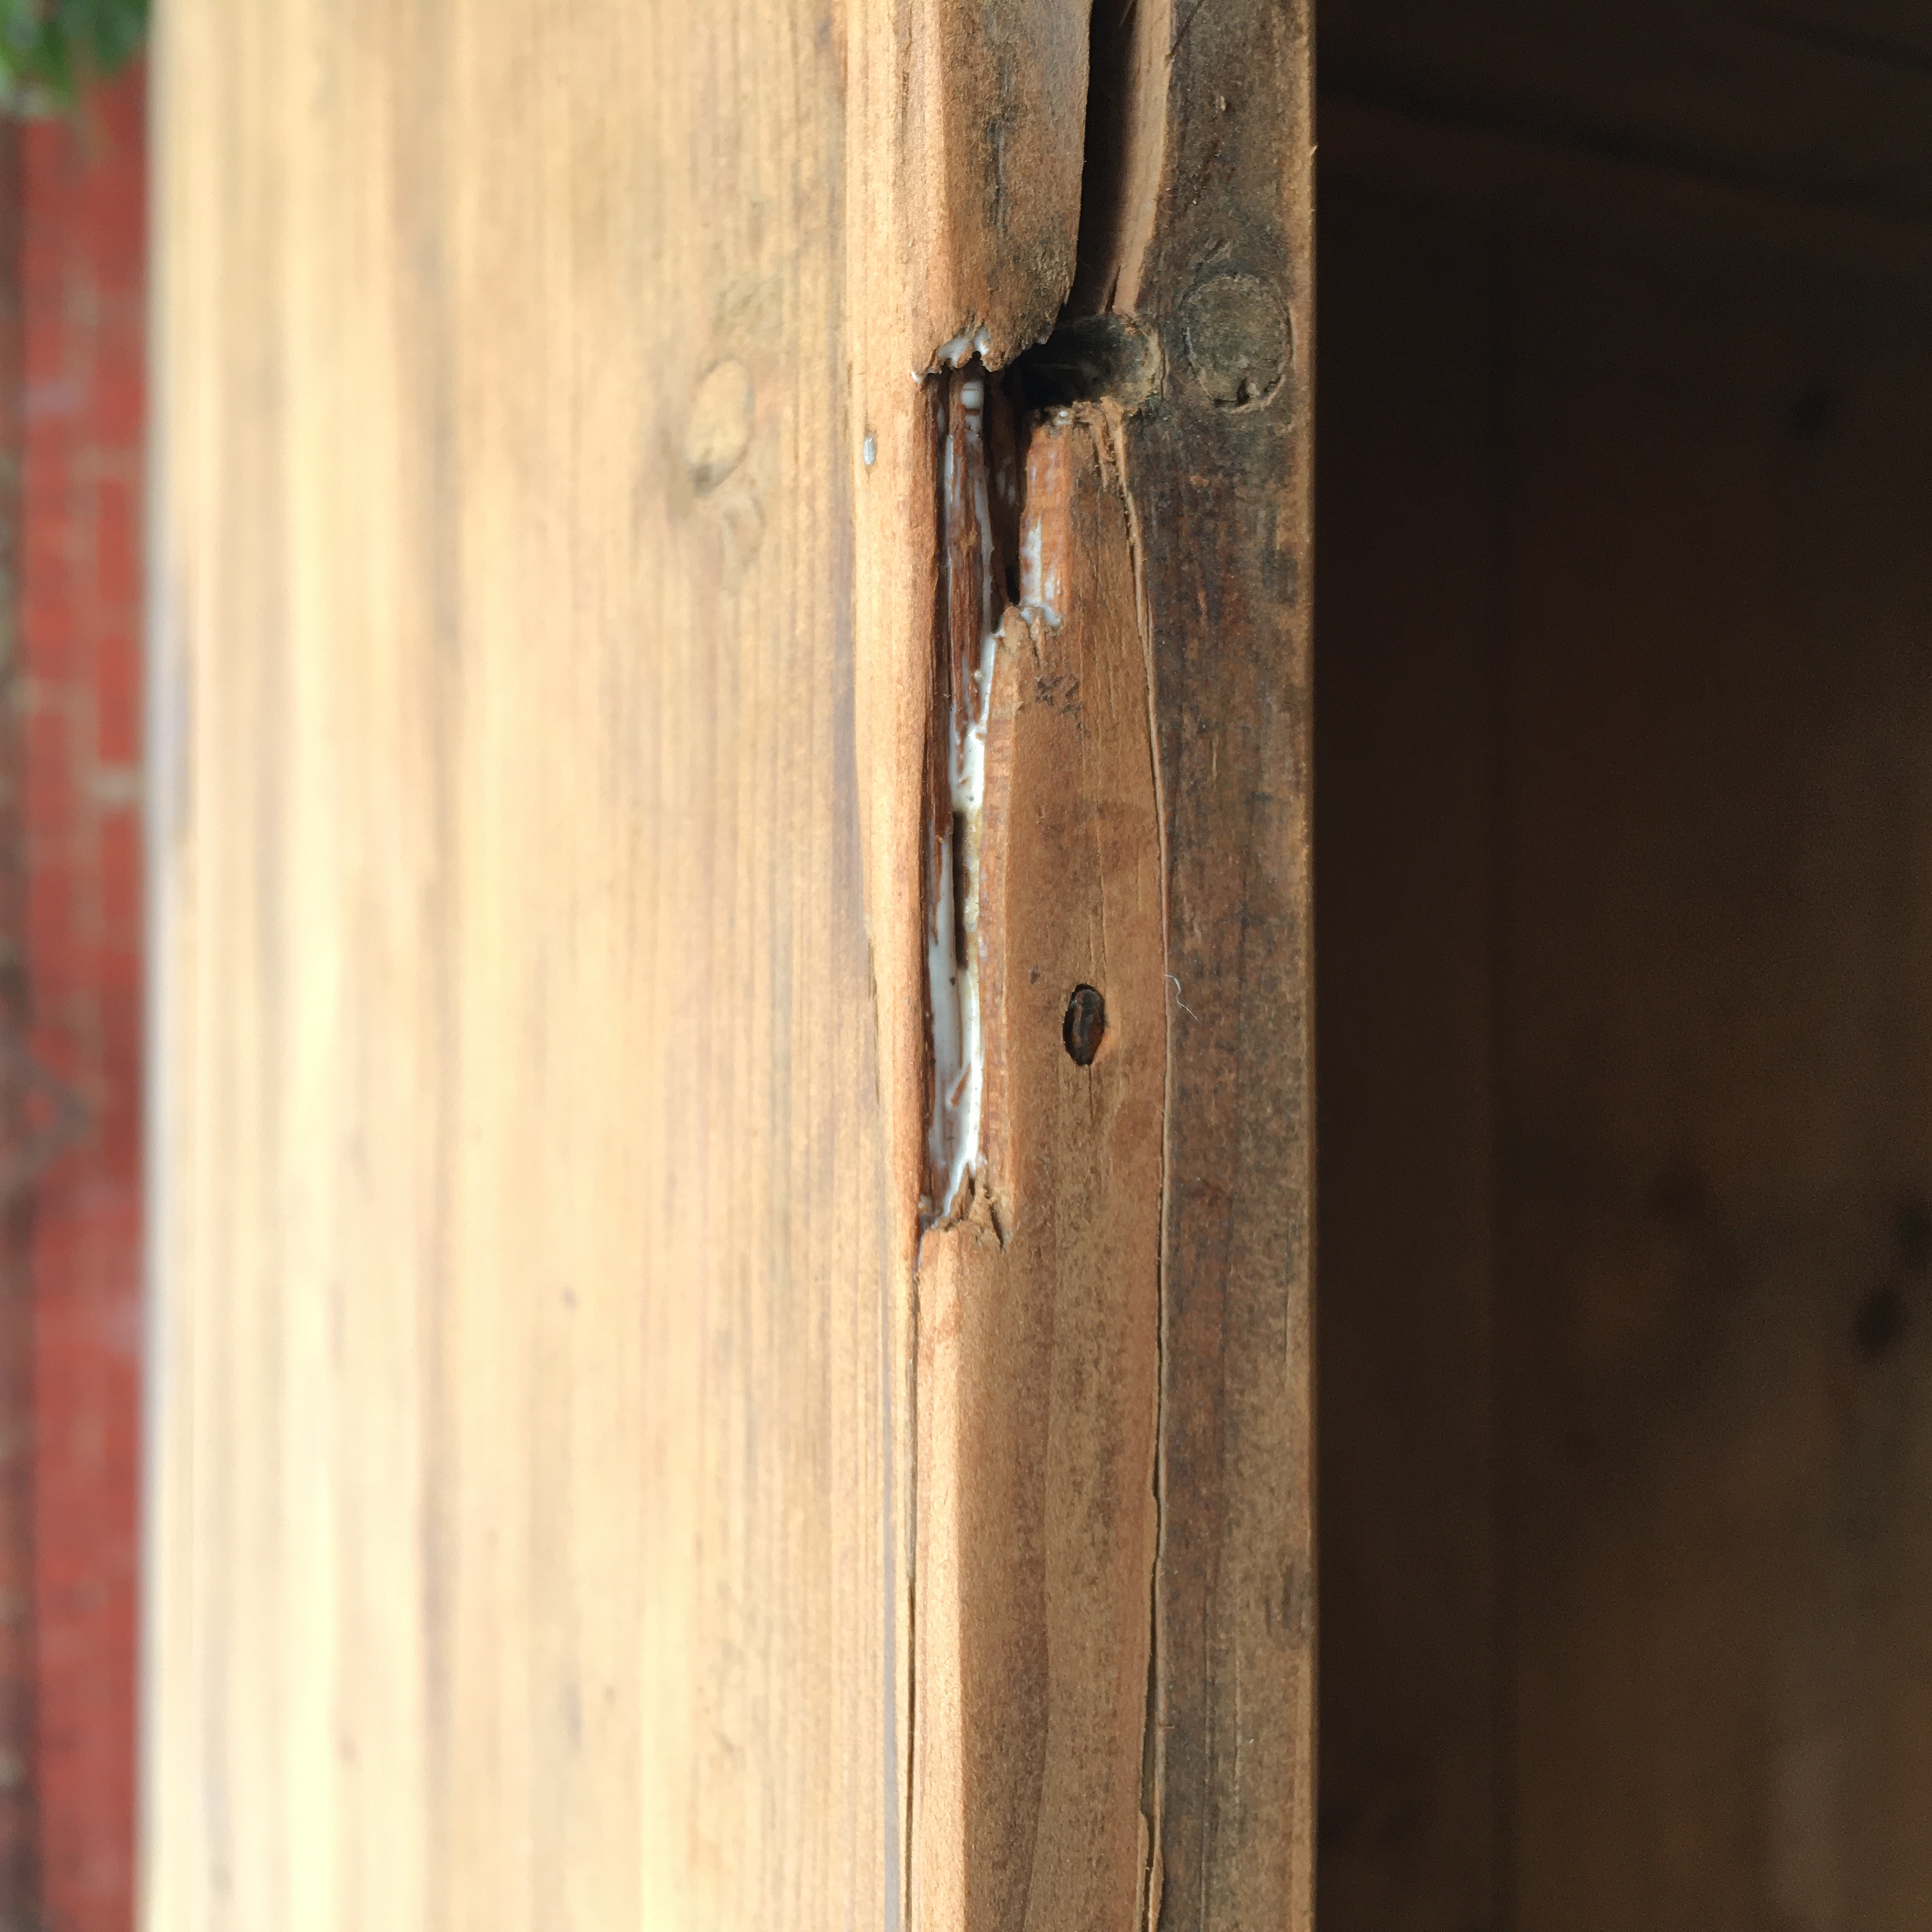
I also went over some of the bigger splits in the wood and glued/nailed them down just so that they weren’t majorly peeling away and nicking anyone in the fingers.
![]()
CREATING THE LID
All praise to the magical cellar that beholds many gifts! When it came to creating the lid, I felt the best thing to do was to just have a rummage around the wood that was left behind and see what I could scrap together. And with the amount of stuff that was left, it honestly didn’t take long to find 4 bits of wood that were of similar heights and suitable lengths. (The lid was going to be 5 planks wide, but the fourth piece I found was twice as long as need be, and so was split in 2!).
![Exploring Wood options and their potential layouts!]()
All the pieces of wood were quite old and rough, and I quite liked them that way. I think it would have felt odd having a fresh new lid on a quite-weathered crate, so you might as well make the lid a feature too, right? With that in mind, I decided to keep the wobbly edge for the front lip of the trunk. None of the planks I’d chosen were particularly clean cuts at 90 degree angles, and I quite liked that. So I played around and explored different ways to line them up so that the front lip was wonky but also continuous:
![]()
I then marked the back edges of the planks so that I could cut them down to size individually. During this process it was said to me:
“It probably would have been quicker for you to fix the planks together first - and then cut the back edge of all 5 in one go, rather than marking out each one individually”
And yeah that was probably true...but in typical Morgan fashion I’d committed to my method so I might as well finish it. I fixed the planks together via 2 bed slats I found (in the magic cellar) on the underside. Next up was the hinges, and keeping in spirit of reusing materials we went on the hunt for some in the magic cellar! But alas, we didn’t find any. At least not any matching ones. And we felt if we were going to do the trunk properly then we might as well take the time to get matching hinges.
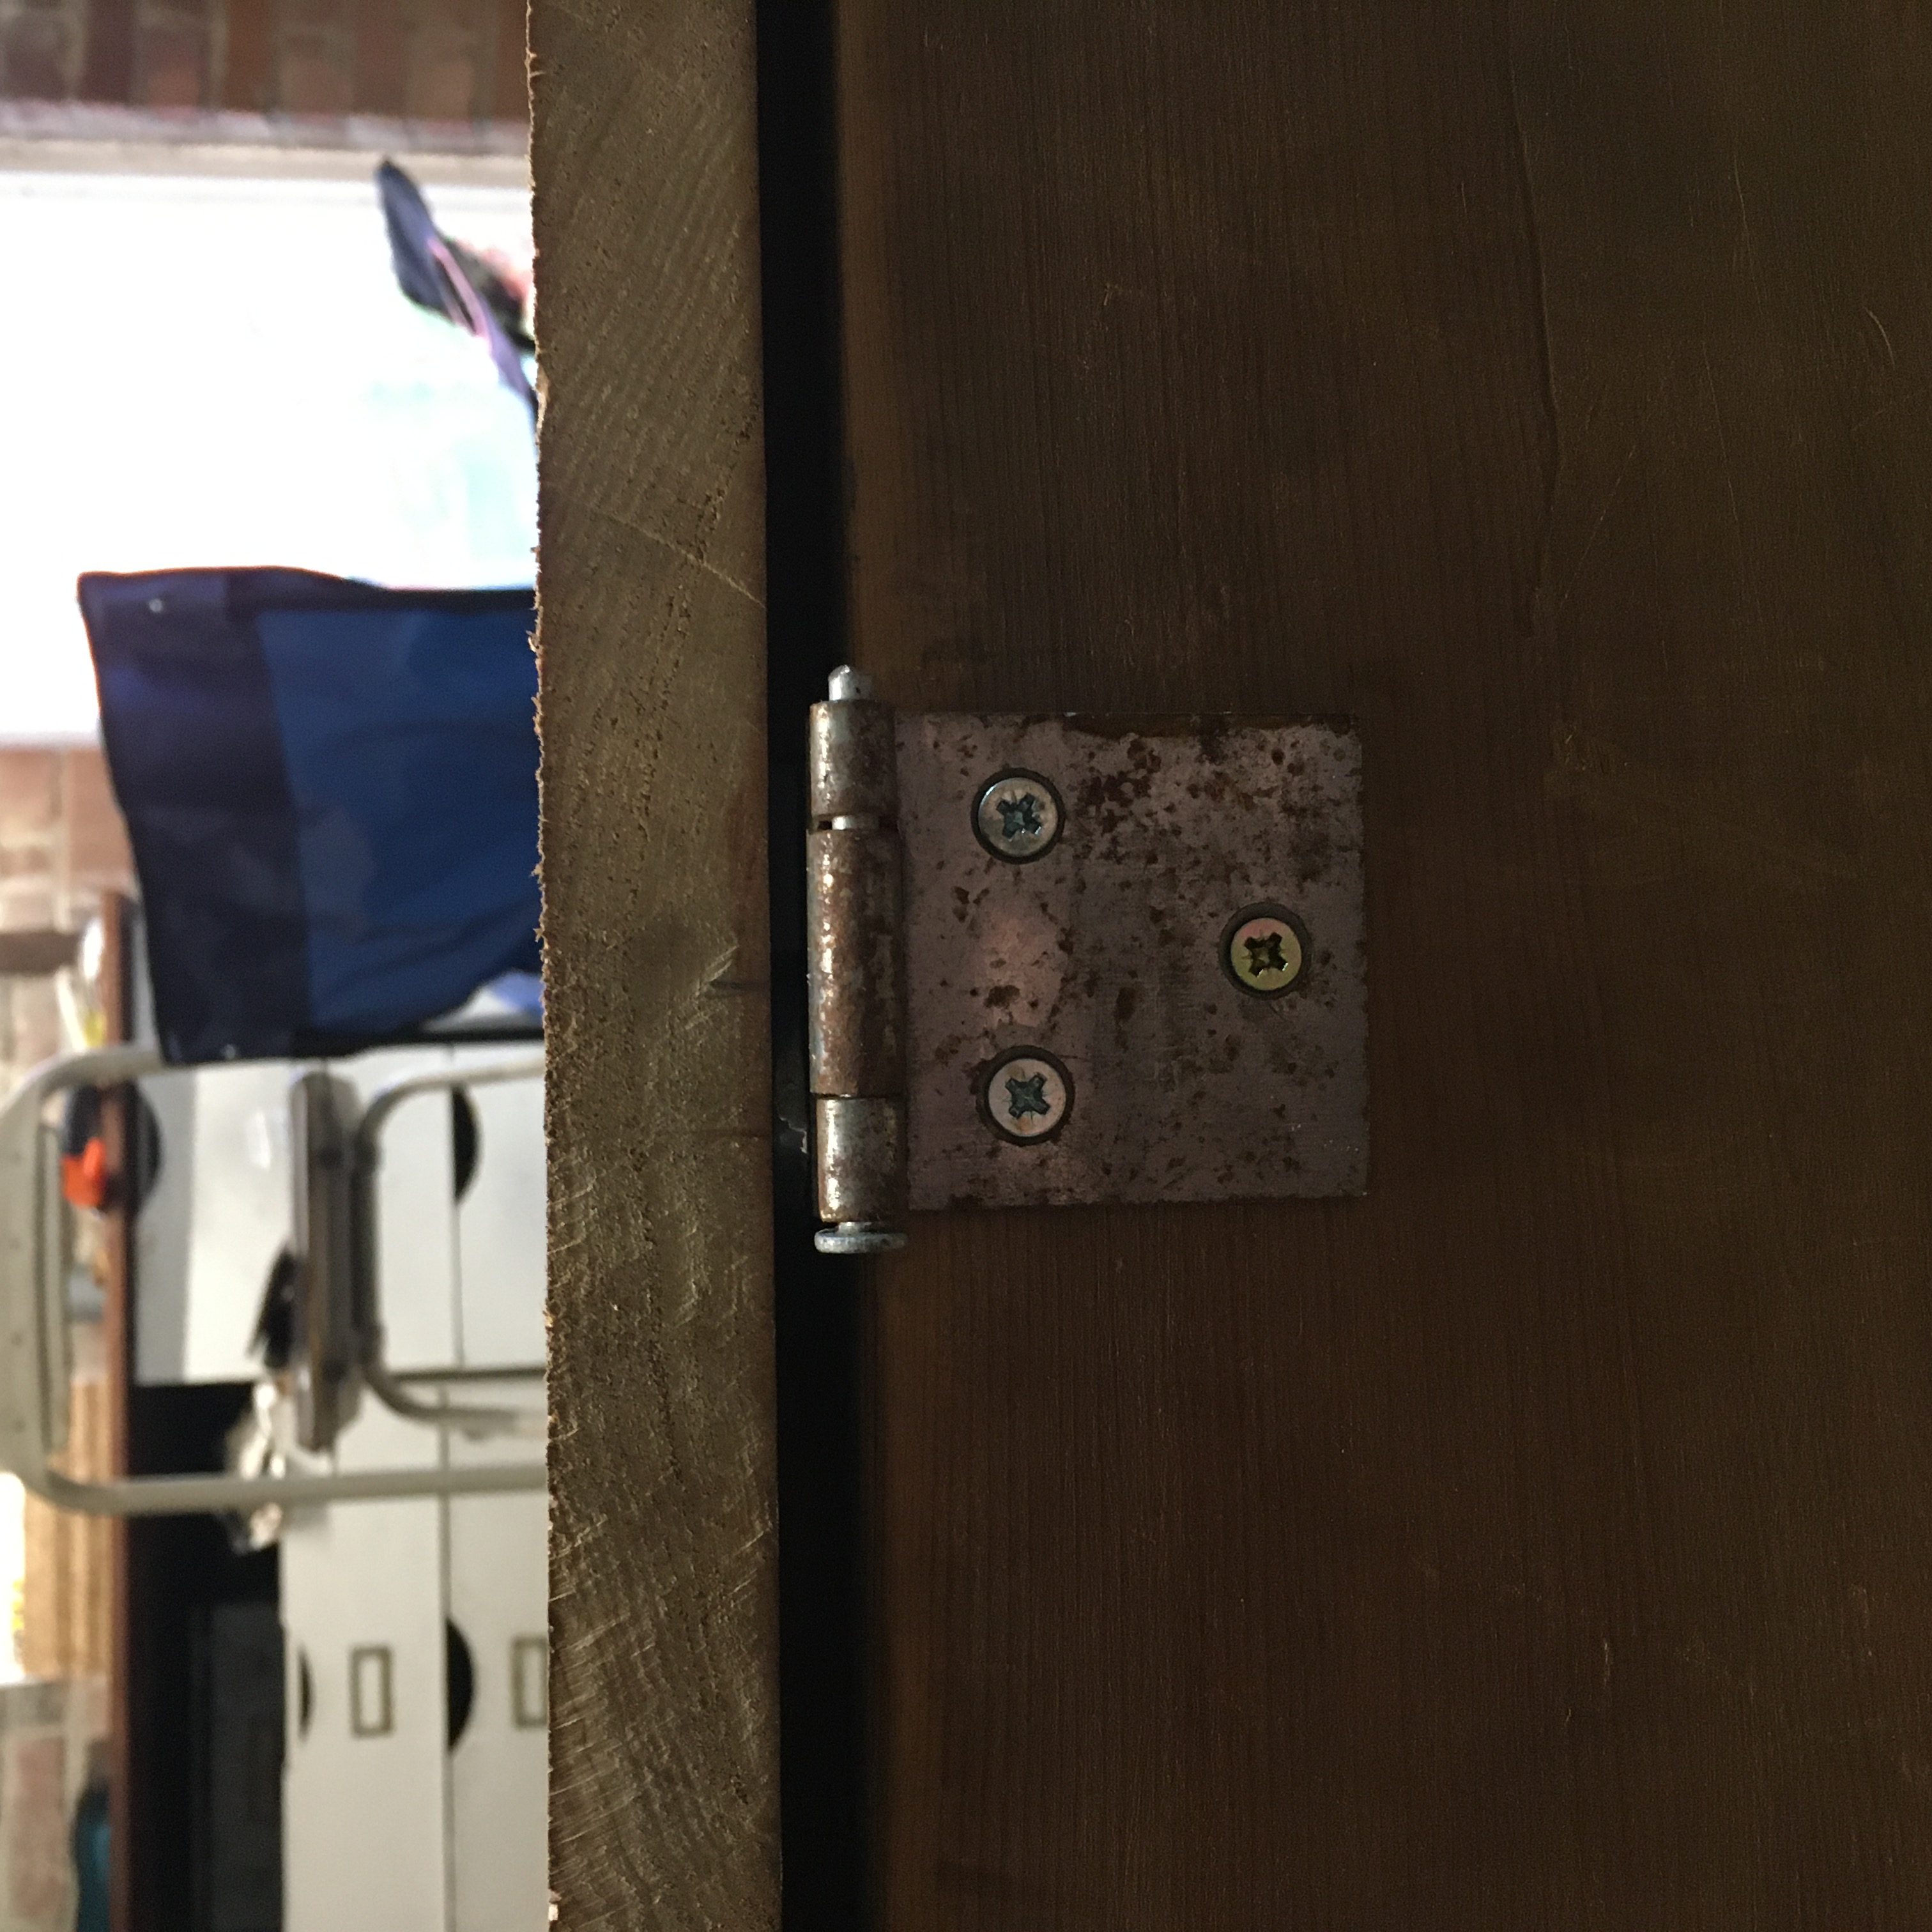
That said...it still didn’t stop us from coming up with a bonafide bodger solution. I noticed that there were remnants of hinges on our shed/garage door. Clearly someone had put fresh hinges on and had been too lazy to take off the old ones. Happy days for me! Unfortunately they didn’t have any pins in them...but again that didn’t stop our bodgering ways - and I searched for some loose nails that I could hammer in as replacement pins!
![]()
Surprisingly enough, this worked an absolute treat! I knocked the nails all the way through until the head met the hinges, and then I took an angle grinder to the other end and cut off the excess. Et voilà! Whether I’m a cheapskate, environmentally conscious or just too lazy to go out and buy some brand new hinges, this is a level of bodgery that would make my mum proud!*
*she once tried to paint our living room curtains in lieu of buying new ones...
![]()
![]()
ROPE!
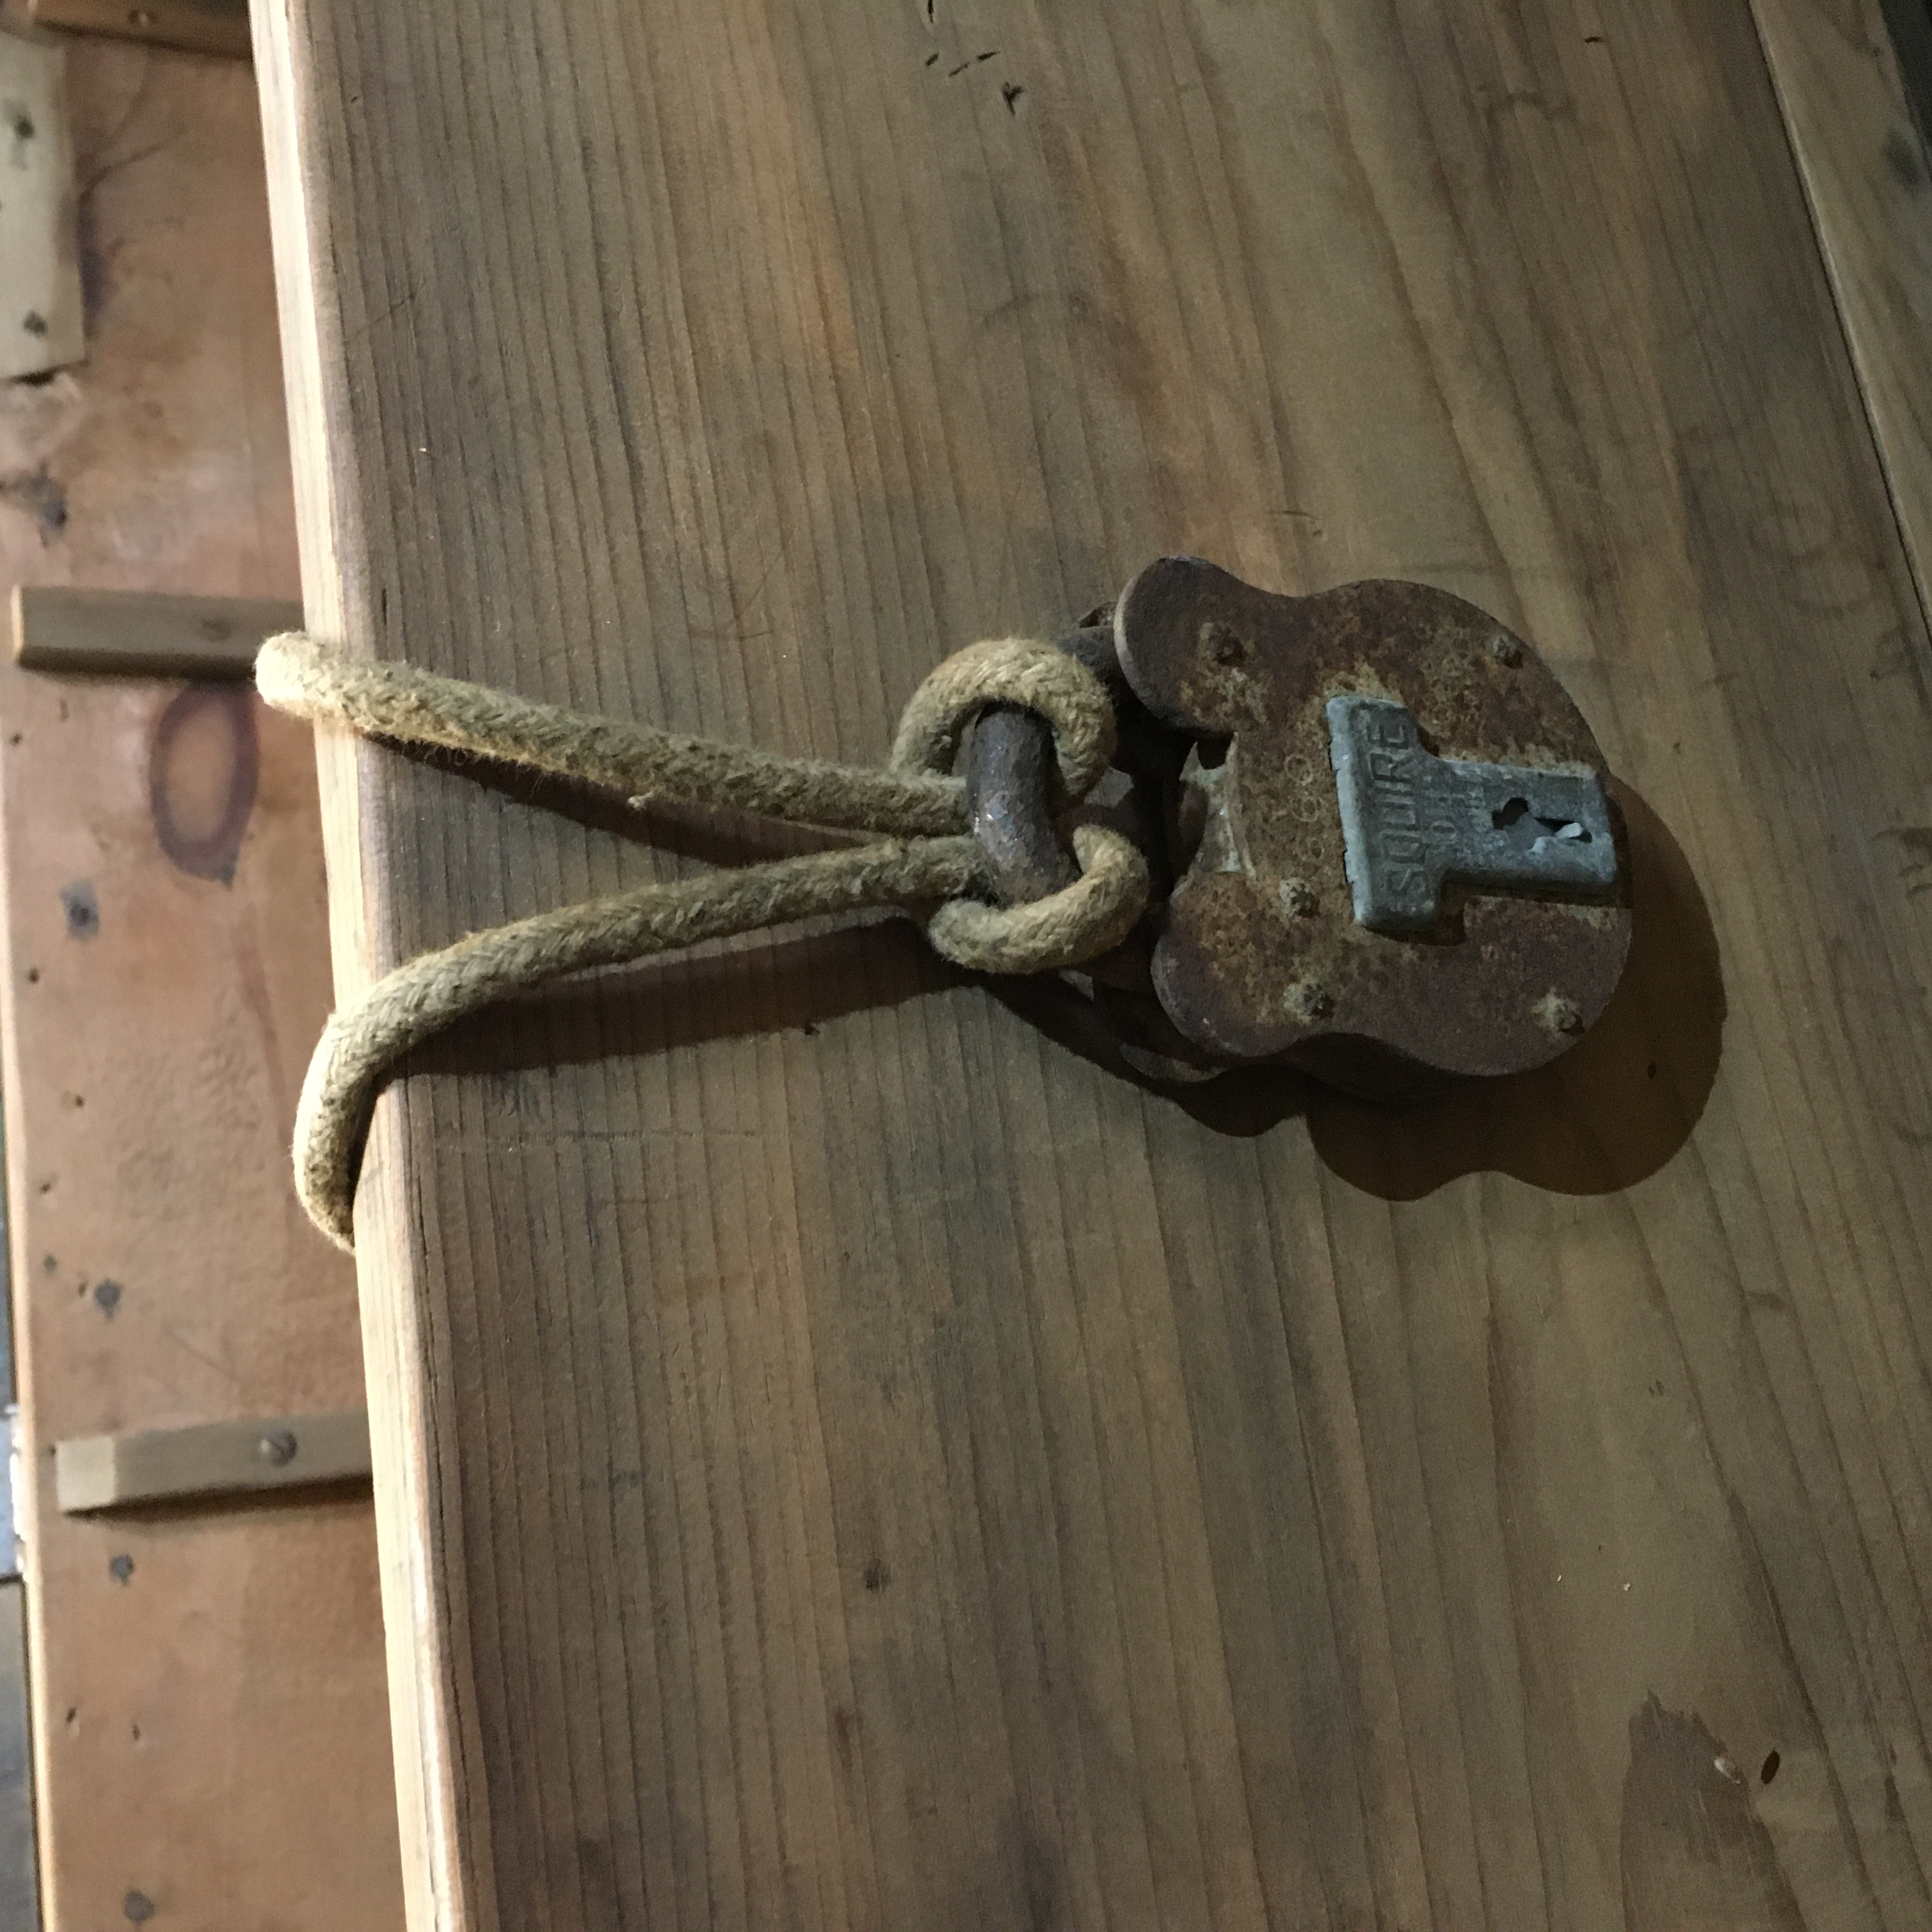
Now, since I was sort of working things out as I went along, I knew the next step was to add something that would stop the lid from opening too much. I also wanted to add some handles to the sides, some form of ‘dampener’ under the lid that would make closing it a tad bit softer and I also had an old padlock that I wanted to add to the front as a decoration.
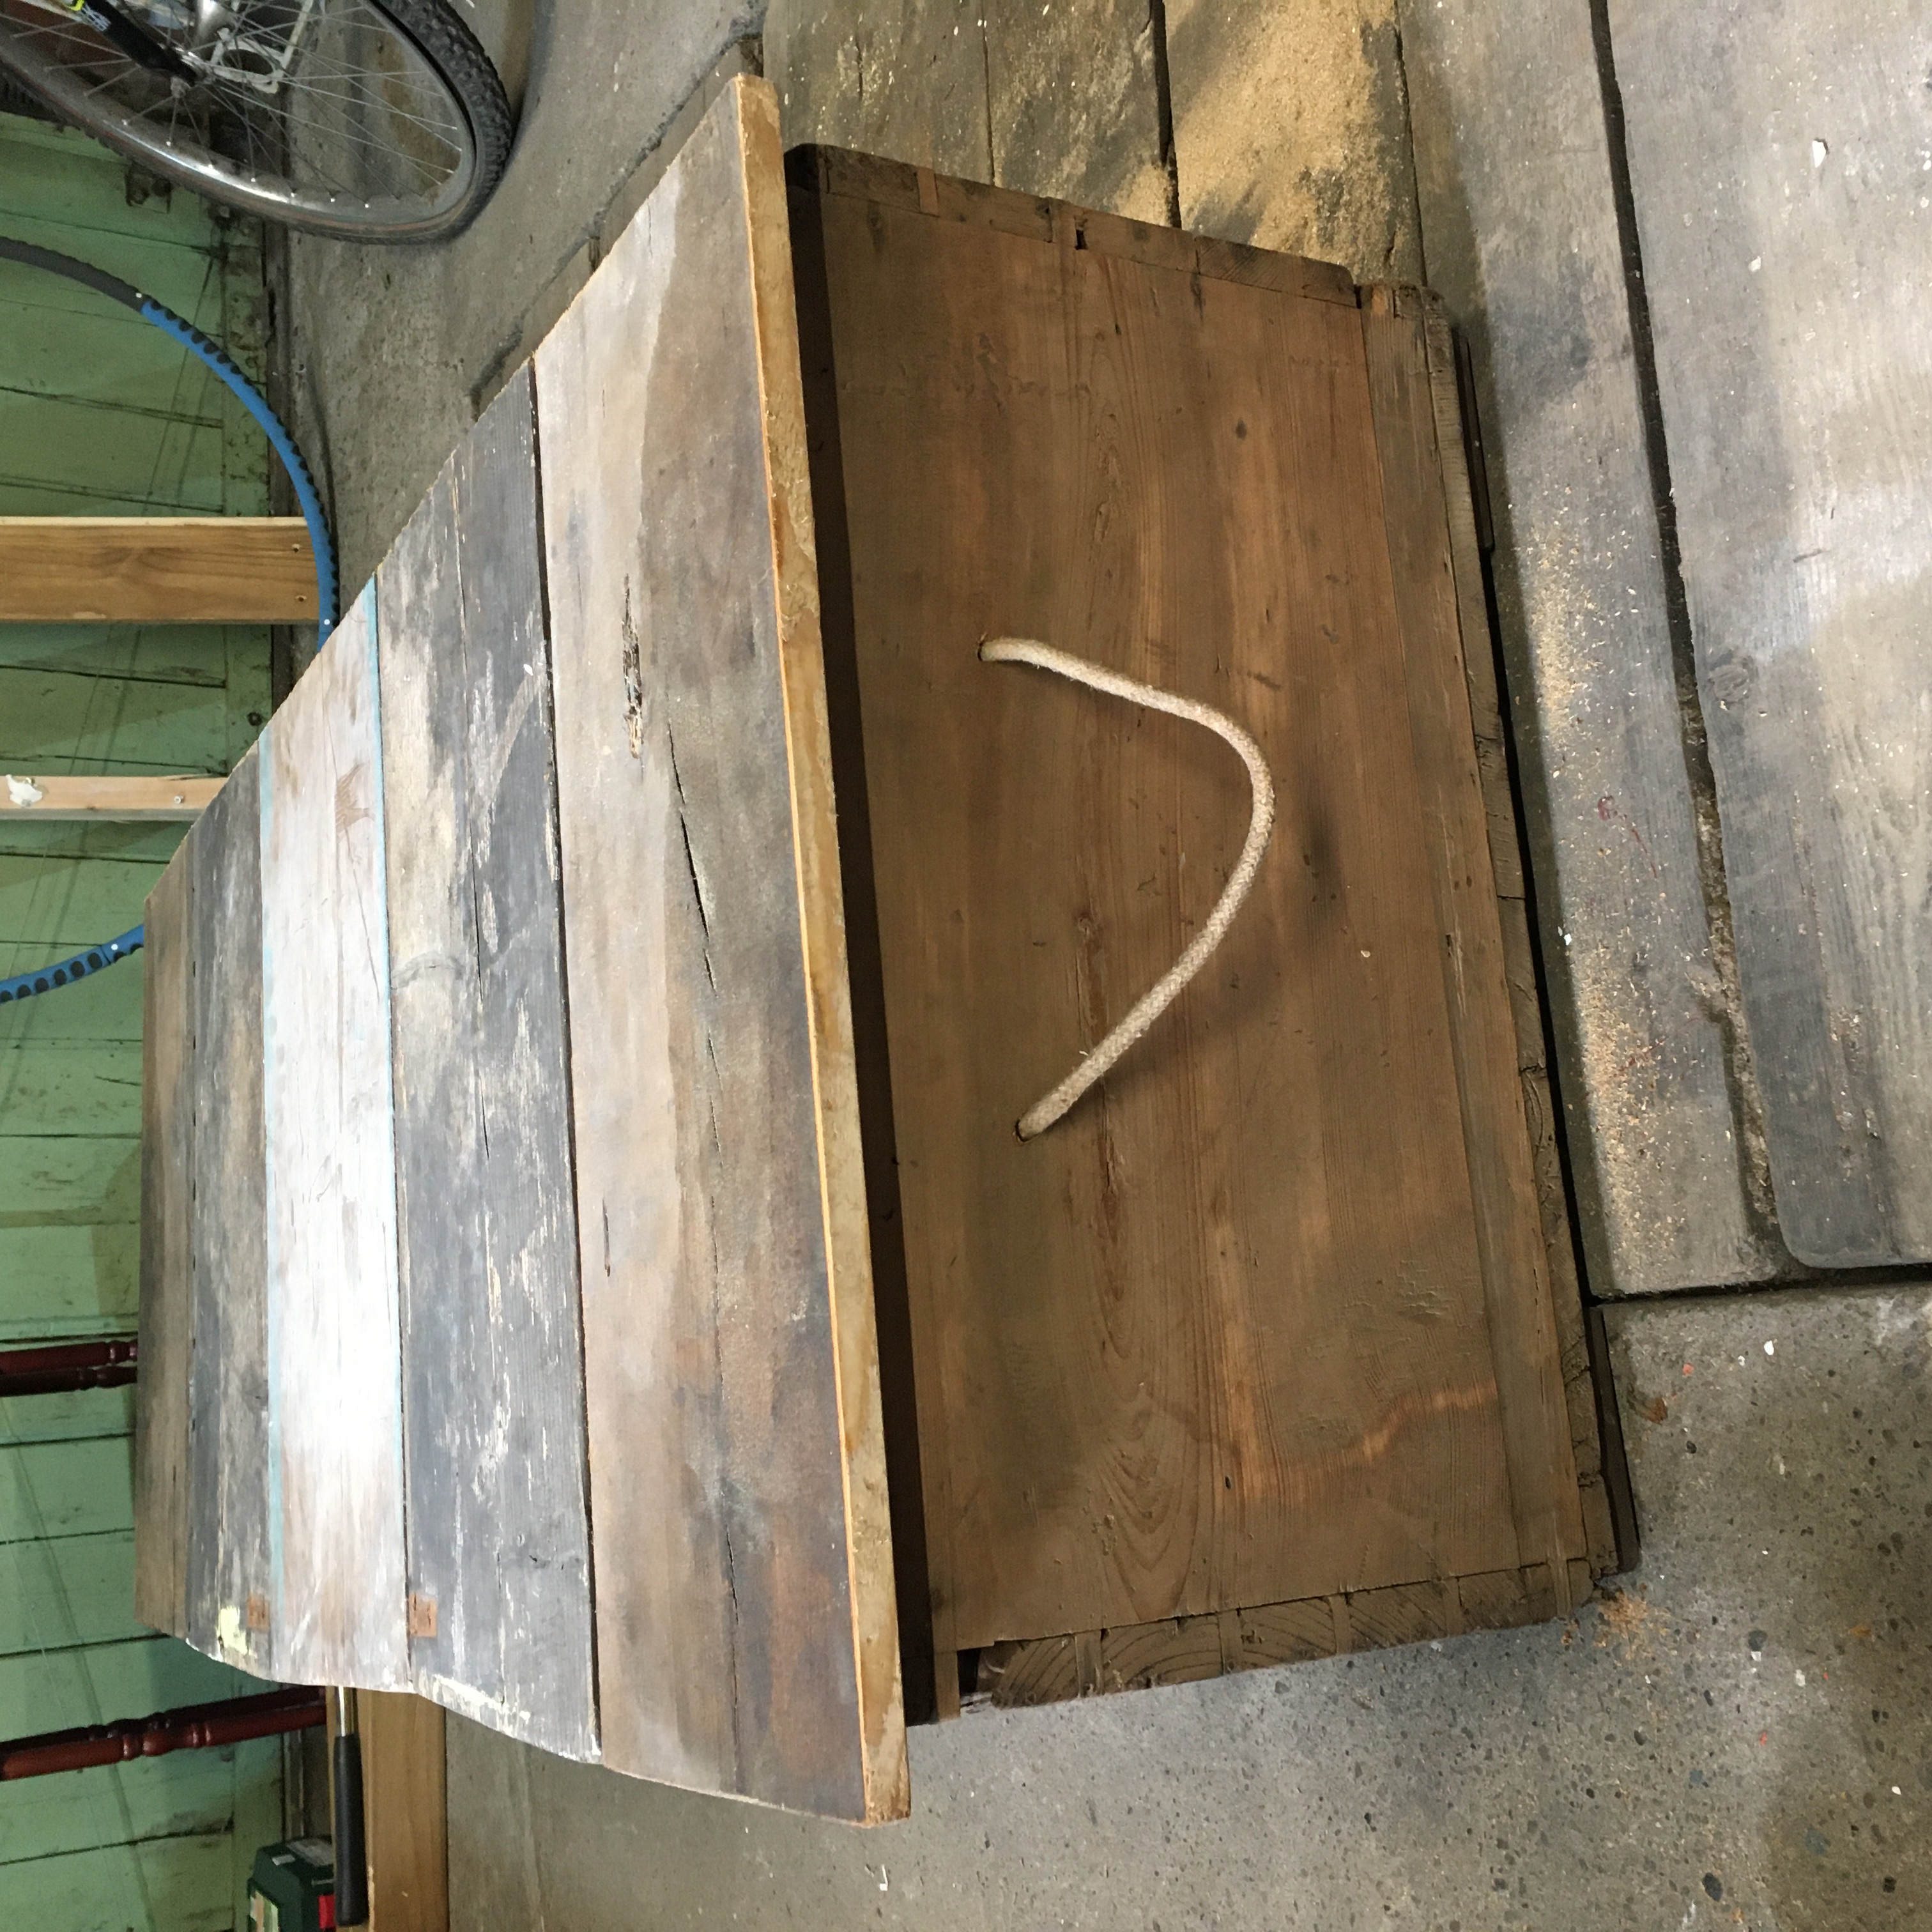
When I was last down in the magic cellar (looking for hinges), I noticed there was some old, strong rope. And now it came to tackling these additions I thought: “Well the rope would make good handles...and a nice way to attach the padlock...and a good way to hold open the lid...and maybe it’ll even soften the closure of the lid!” I hadn’t just killed 2 birds with 1 stone, I felt like I’d fortuitously annihilated the whole flock (that is if annihilating a whole family of birds were ever fortuitous).
The first thing I mucked around with was the padlock, a nice easy task after having the biggest task of faffing with the lid. I just ended up running the rope through the latch and I think (other than one family member saying “it looks like a vulva” - ???) it turned out quite well!
![]()
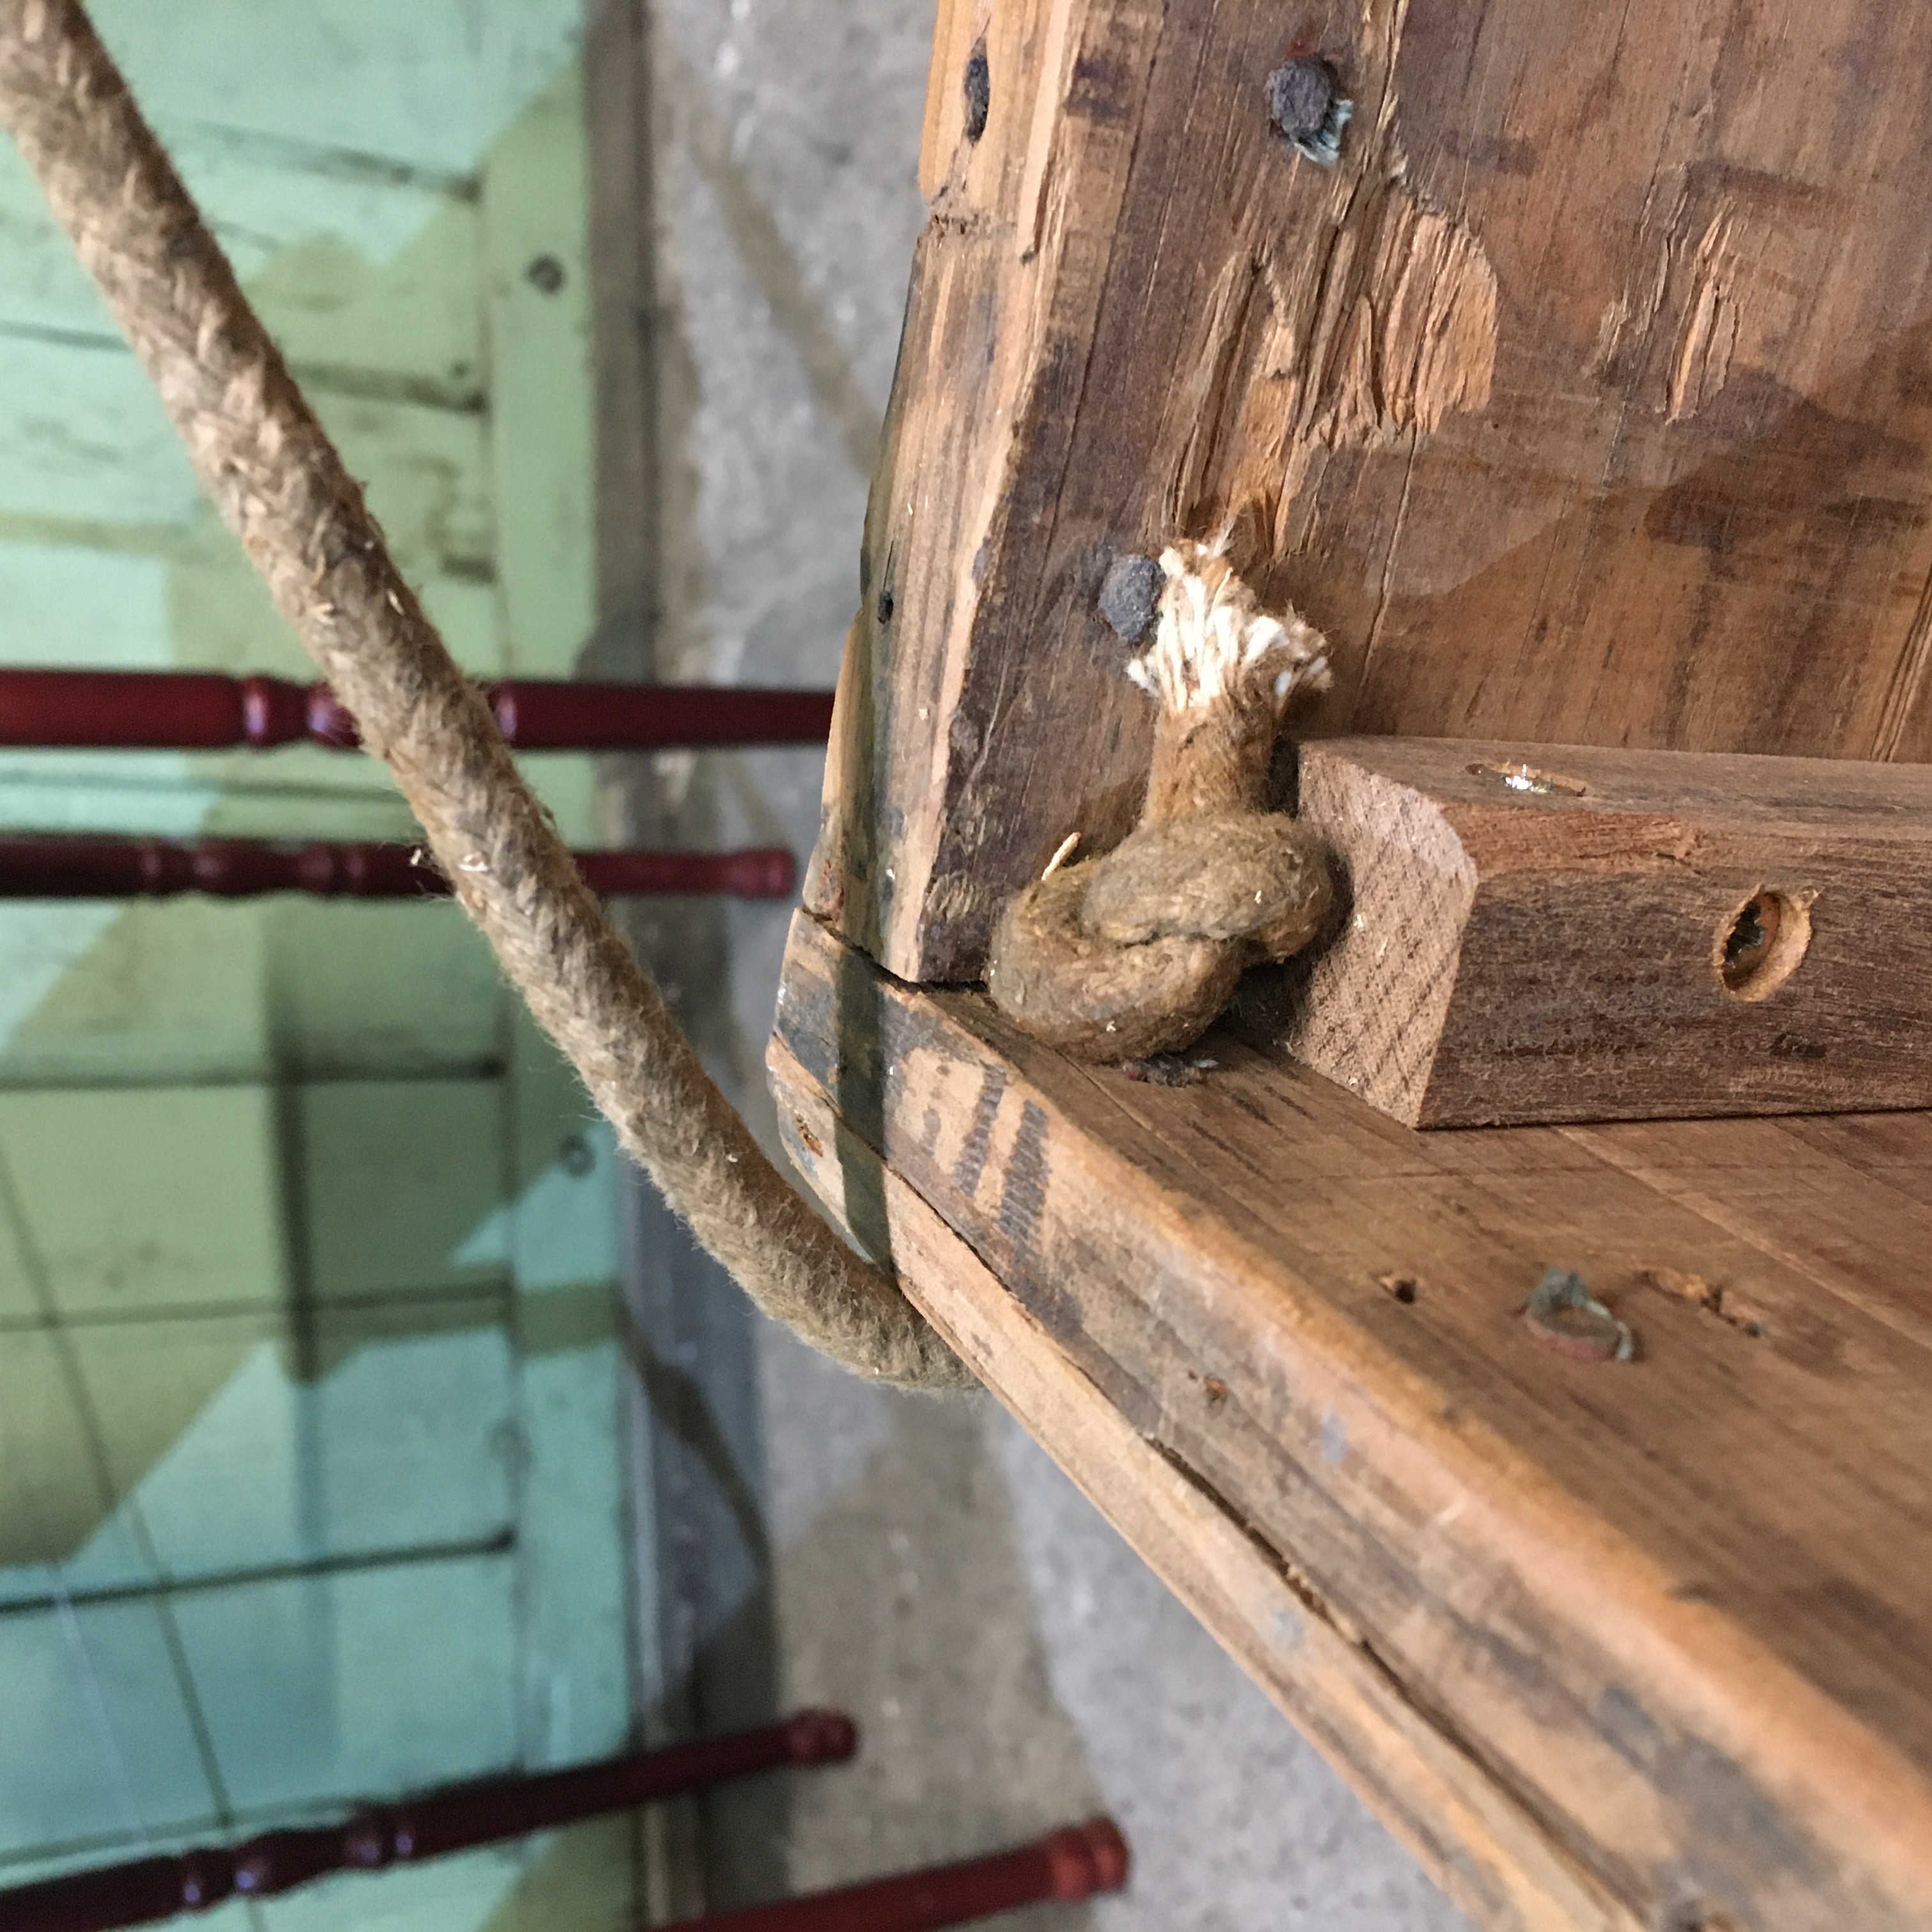
The next thing I did was the rope for the lid. I knew I’d have to tie it from the front face of the trunk to the lid, but beyond that I hadn’t thought much about how I was going to implement it. However, I’d realised that the lid now closed on the rope that was holding in place the padlock. This was great, as it meant the closing of the lid was slightly dampened, and wasn’t as harsh as wood hitting wood. But also, it meant that the centre of the lid was raised slightly, and led to either end rocking slightly.
To solve this I decided that the rope that was going to hold the lid open would also have to run over the top edge, so that the gap at the front was even all the way along. To do this I drilled a hole through the front face of the wood, threaded the rope through and tied a knot on the inside.
![]()
Next step was how I was going to attach it to the lid. I didn’t really fancy my chances at cutting a piece of rope for either end of the trunk and then tying them at the exact same length, so instead I decided that I would use one continuous piece of rope and just run it along the top of the lid. I had some hooks that I’d previously bought for other things, and so I screwed 3 of them into the top slat of the lid and ran the rope behind them.
![]()
Really happy with this solution, as any uneveness in the rope length will just balance itself out when the lid is opened, and I think it would have saved a lot of ball ache if I’d tried to tie two length of rope to be the same.
Although I was applauding myself for my rope-lid solution, it dawned on me after that I only had a small amount of rope left to do the hand,es. God forbid I was going out to buy some more, so I prayed that it was going to be enough. I cut what rope I had left in two, tied a knot as close to the end of the rope as I could and threaded it through the holes. Thankfully it was enough. All praise the magic cellar rope!
![]()
LEGS
The penultimate step was that I was going to add some small, chunky legs. And let me blow your mind when I tell you the wood I used for these was not from the magic cellar. I know, it’s quite the revelatory experience...I’ll give you time to gather your thoughts before progressing.
Unfortunately the truth isn’t quite as shocking as me going out and buying new wood, no. Instead, I used the legs off my old bed! Perhaps not as fantastical as wood from the magic cellar, but nevertheless still committed to spending no money.
For context, the bed in question was something I had already cut apart and stuck together in order to fit in my previous bedroom. My mattress fit lengthwise exactly wall to wall, and as such I got rid of the headboard, footboard and then cut/reassembled the remaining bed frame down to size so it would fit. When we were moving I got a number of:
“I can’t believe you’re bringing that old bed with you..!”
But I knew that eventually I’d be able to reuse the wood for something else. And lo and behold I have! The frame and 2 of the legs went towards a desk that I made, whilst the other 2 legs were cut down and used for this wooden trunk! Morgan Girvin: 50% hoarder, 50% repurposer.
![Bed Legs to be repurposed...]()
![Testing how the Trunk might look with Legs.]()
I cut the 2 bed legs down into 4 legs of the same size, which would be screwed on to the existing ‘legs’ that the crate had, and then I cut one extra (and slightly taller) fifth leg which would sit in the centre. This was just to give it extra support in case I put something heavy inside the trunk and the middle decided to fall through.
![]()
I then just screwed them all in from the top down. They were just added onto the old legs that were holding the crate about 15mm off the floor. I could have thought about taking these off, but I quite liked how they look. And also the screw heads that were holding them in place had started to crumble, so that seemed like it would be a huge faff to even think about tackling. And hooray! The Trunk is almost finished! Time to give it one more clean and then I can wax it. Hang on... I’ve just realised how much I HATE the look of those...
This was such a painful moment of realisation for something I hadn’t even given a second thought to earlier in the project. The 2 bed slats that were holding the underside of the lid together look absolutely atrocious. The entire project looks like it’s made of older wood, and it all matches, except for those 2 stupid slats that I picked up as the first things I saw. I hadn’t even considered until now how new the wood looked in comparison to everything else. But now I could see it, plain as day, and they looked absolutely awful.
![Yuck.]()
Annoyingly, I don’t think they stand out as garishly in the photo as they do in real life. But I still think the photo shows just how different they look. Yuck.
In a sort of annoyed panic I started exploring and talking through the different options I had. It quickly crossed my mind to replace them with older bits of wood from the magic cellar, but that would mean taking the lid off the hinges and rope, taking the bed slats off, realigning the wooden top, screwing in new pieces and attaching the lid again. And with 48 screws in the slats and another 9 in the hinges I didn’t fancy it. The thought quickly left my head again.
I then moved on to the prospect of painting them. I grabbed another slat from the cellar that I could test things on. I took out a tin of stain from my room that I’d been given and tried that. The wood came out looking like the sauce from a tin of Spaghetti Hoops, so that was straight off the cards. I tried a few shades of brown outdoor paint we had leftover, but nope. They all looked arguably worse, like I was trying to cover something up. I then contemplated painting them a standout colour, like white, blue or black. Maybe if I embraced them looking different then I could own it. But I quickly vetoed that idea too. I was just annoyed at myself for overlooking this earlier in the project. Oh well, live and learn.
But then, like a smiling angel coming up from underneath me, the magic cellar saved the day, again. A few days prior to this I’d sifted through all of the wood that was down there and sorted it out into piles. Chunky bits over hit, planks over there. I thought it would help to know what we had so I could plan out how I’d approach these types of projects. And now I suddenly remembed that when I was down there I’d found quite a few thin strips of would that I could perhaps use as cladding. And let me tell you, when I brought those bad boys upstairs and out into the garage I almost cried with relief. They looked marvelous!
![]()
In the photo above you can see where I positioned some cladding on the left slat vs nothing on the right one. A couple of nails later and it was such a night and day difference to how it looked. Not only did it hide the ugly freshness of the bed slats, but it also covered the 48 screws and it tied the whole thing together.
I was so relieved that it had worked out that if human/cellar relations were an accepted form of societal relationship then I think me and that Cellar might have eloped and romped our way through a honeymoon.
WAX ON, AND ON AGAIN, AND ON, AND ON...
I thought I’d be excited whilst I was waxing it, with this being the final step and all. But I really hated it. It was like rubbing vaseline into the hole thing with your fingers. It was just tediously time consuming. It also used up a lot of wax, which I don’t think is particularly cheap (reliably as ever, I was using a half opened tin we already had).
![]()
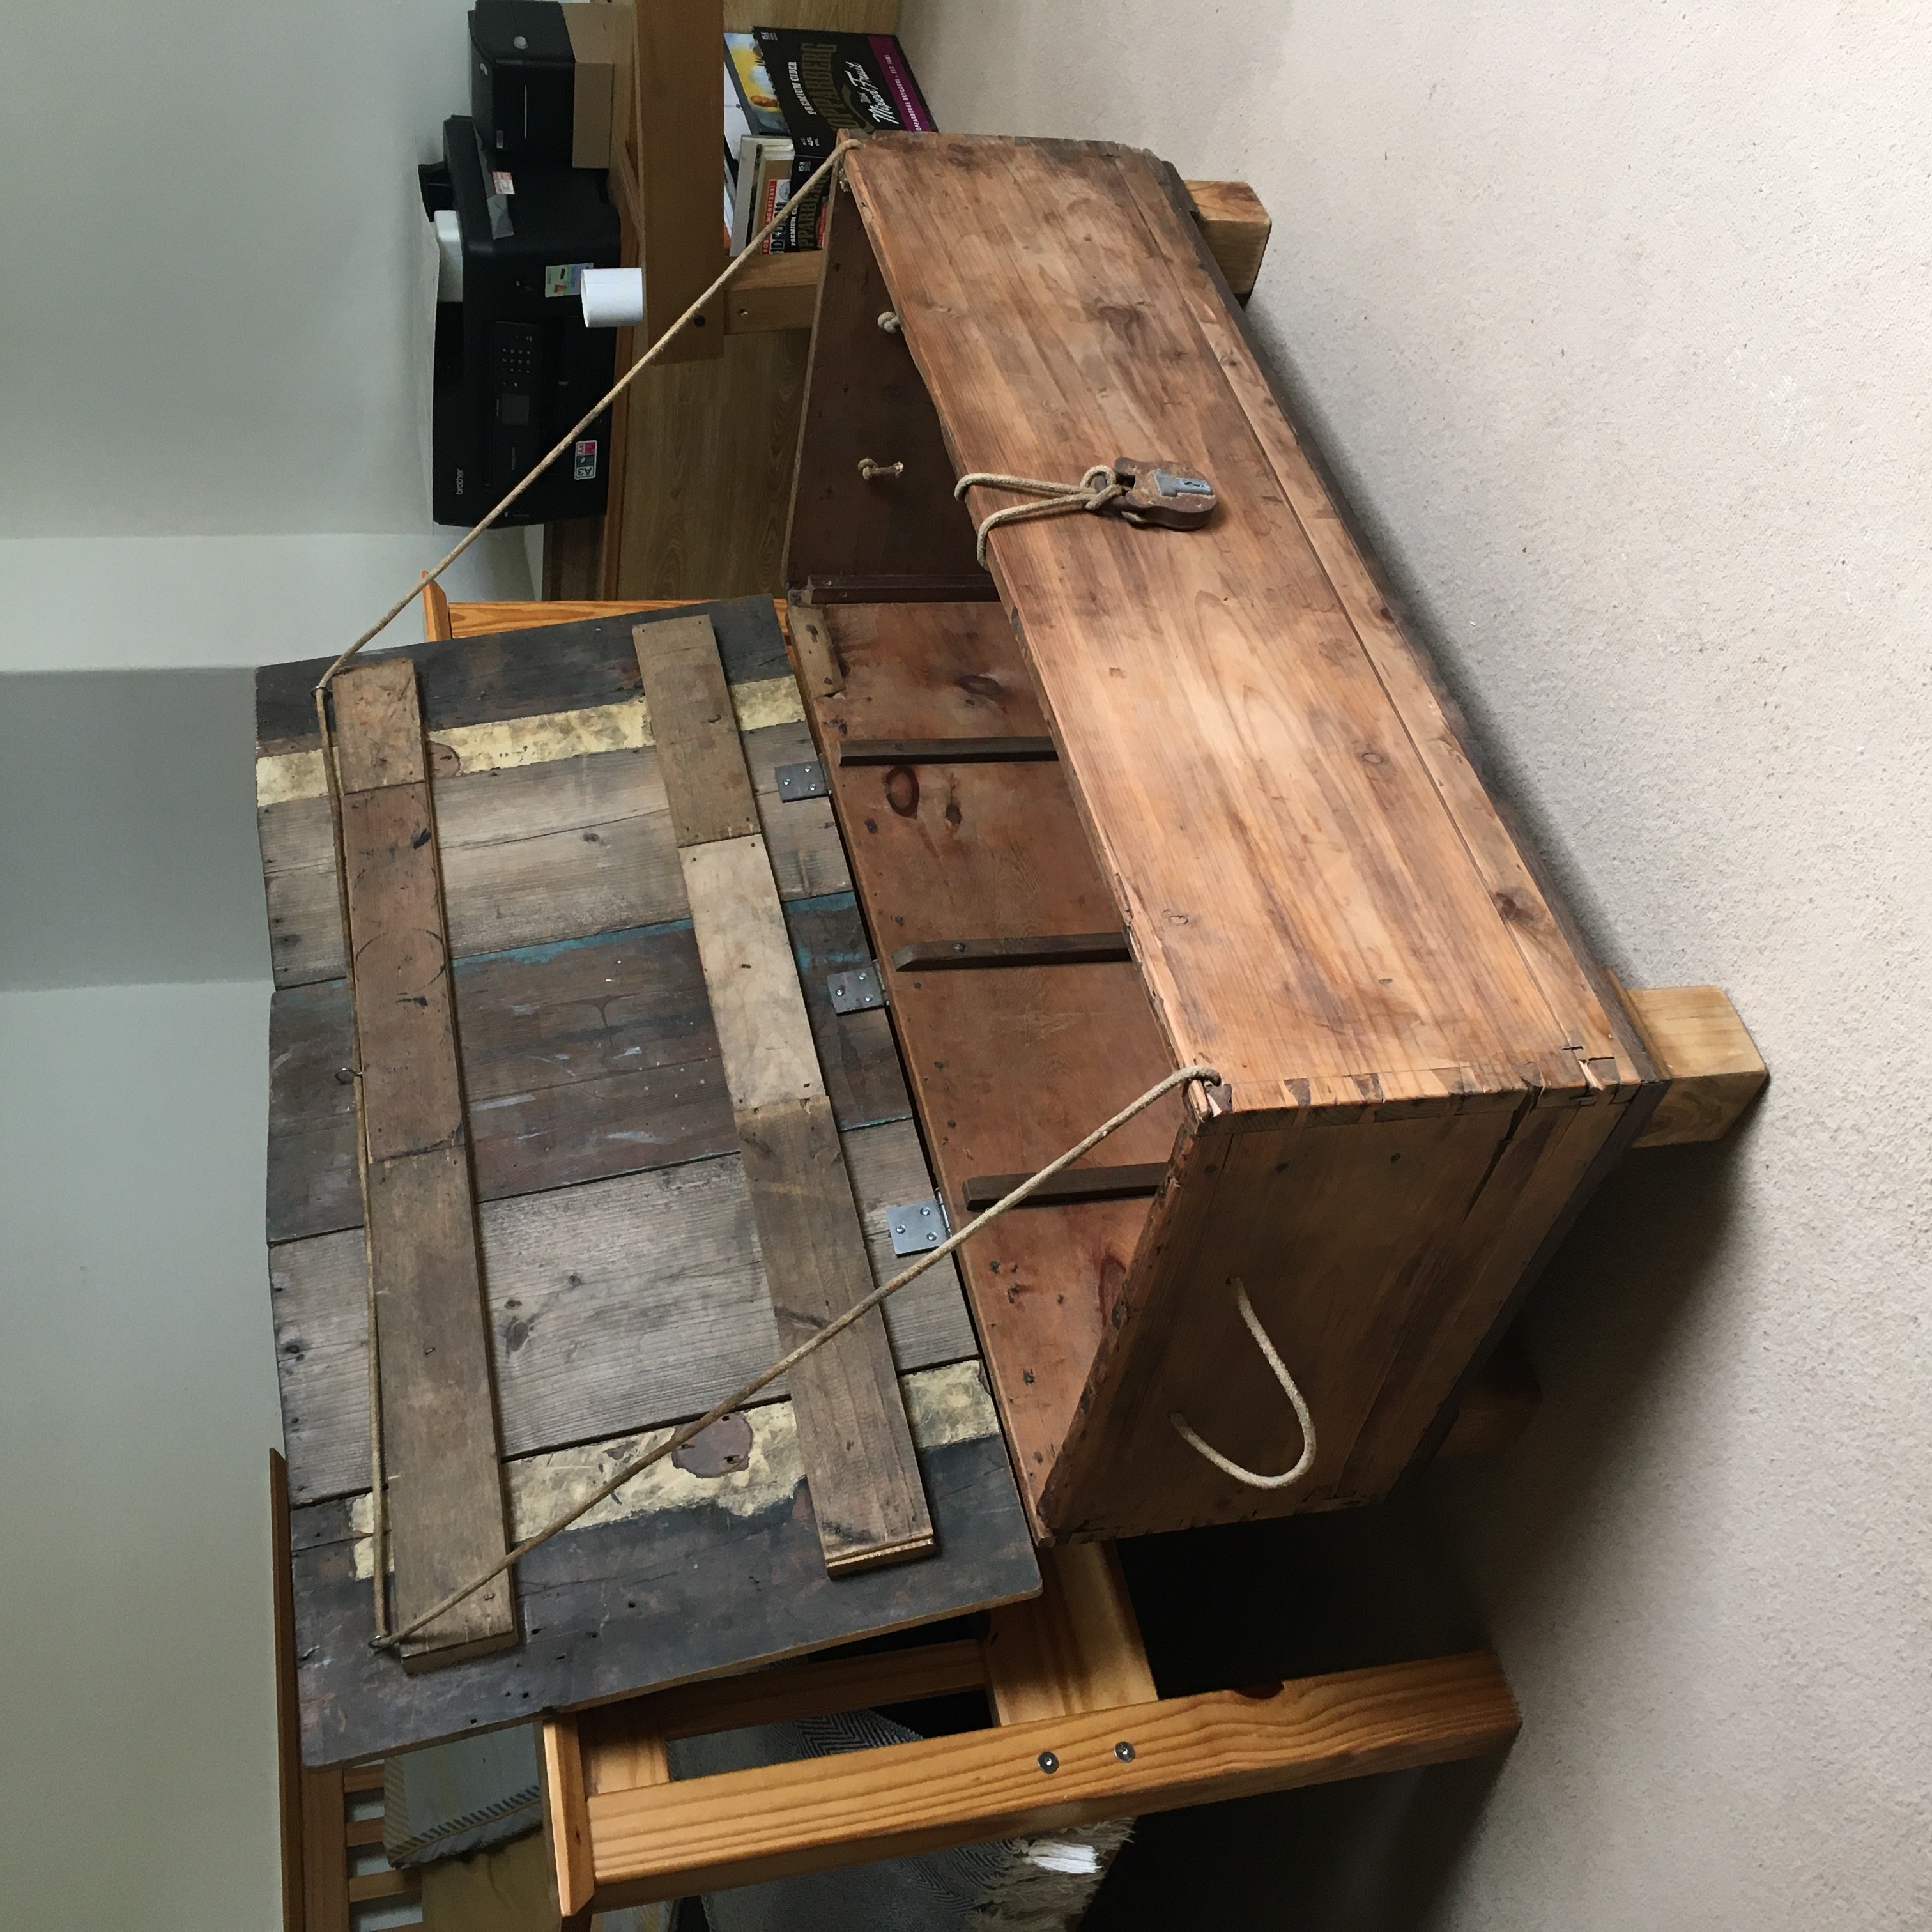
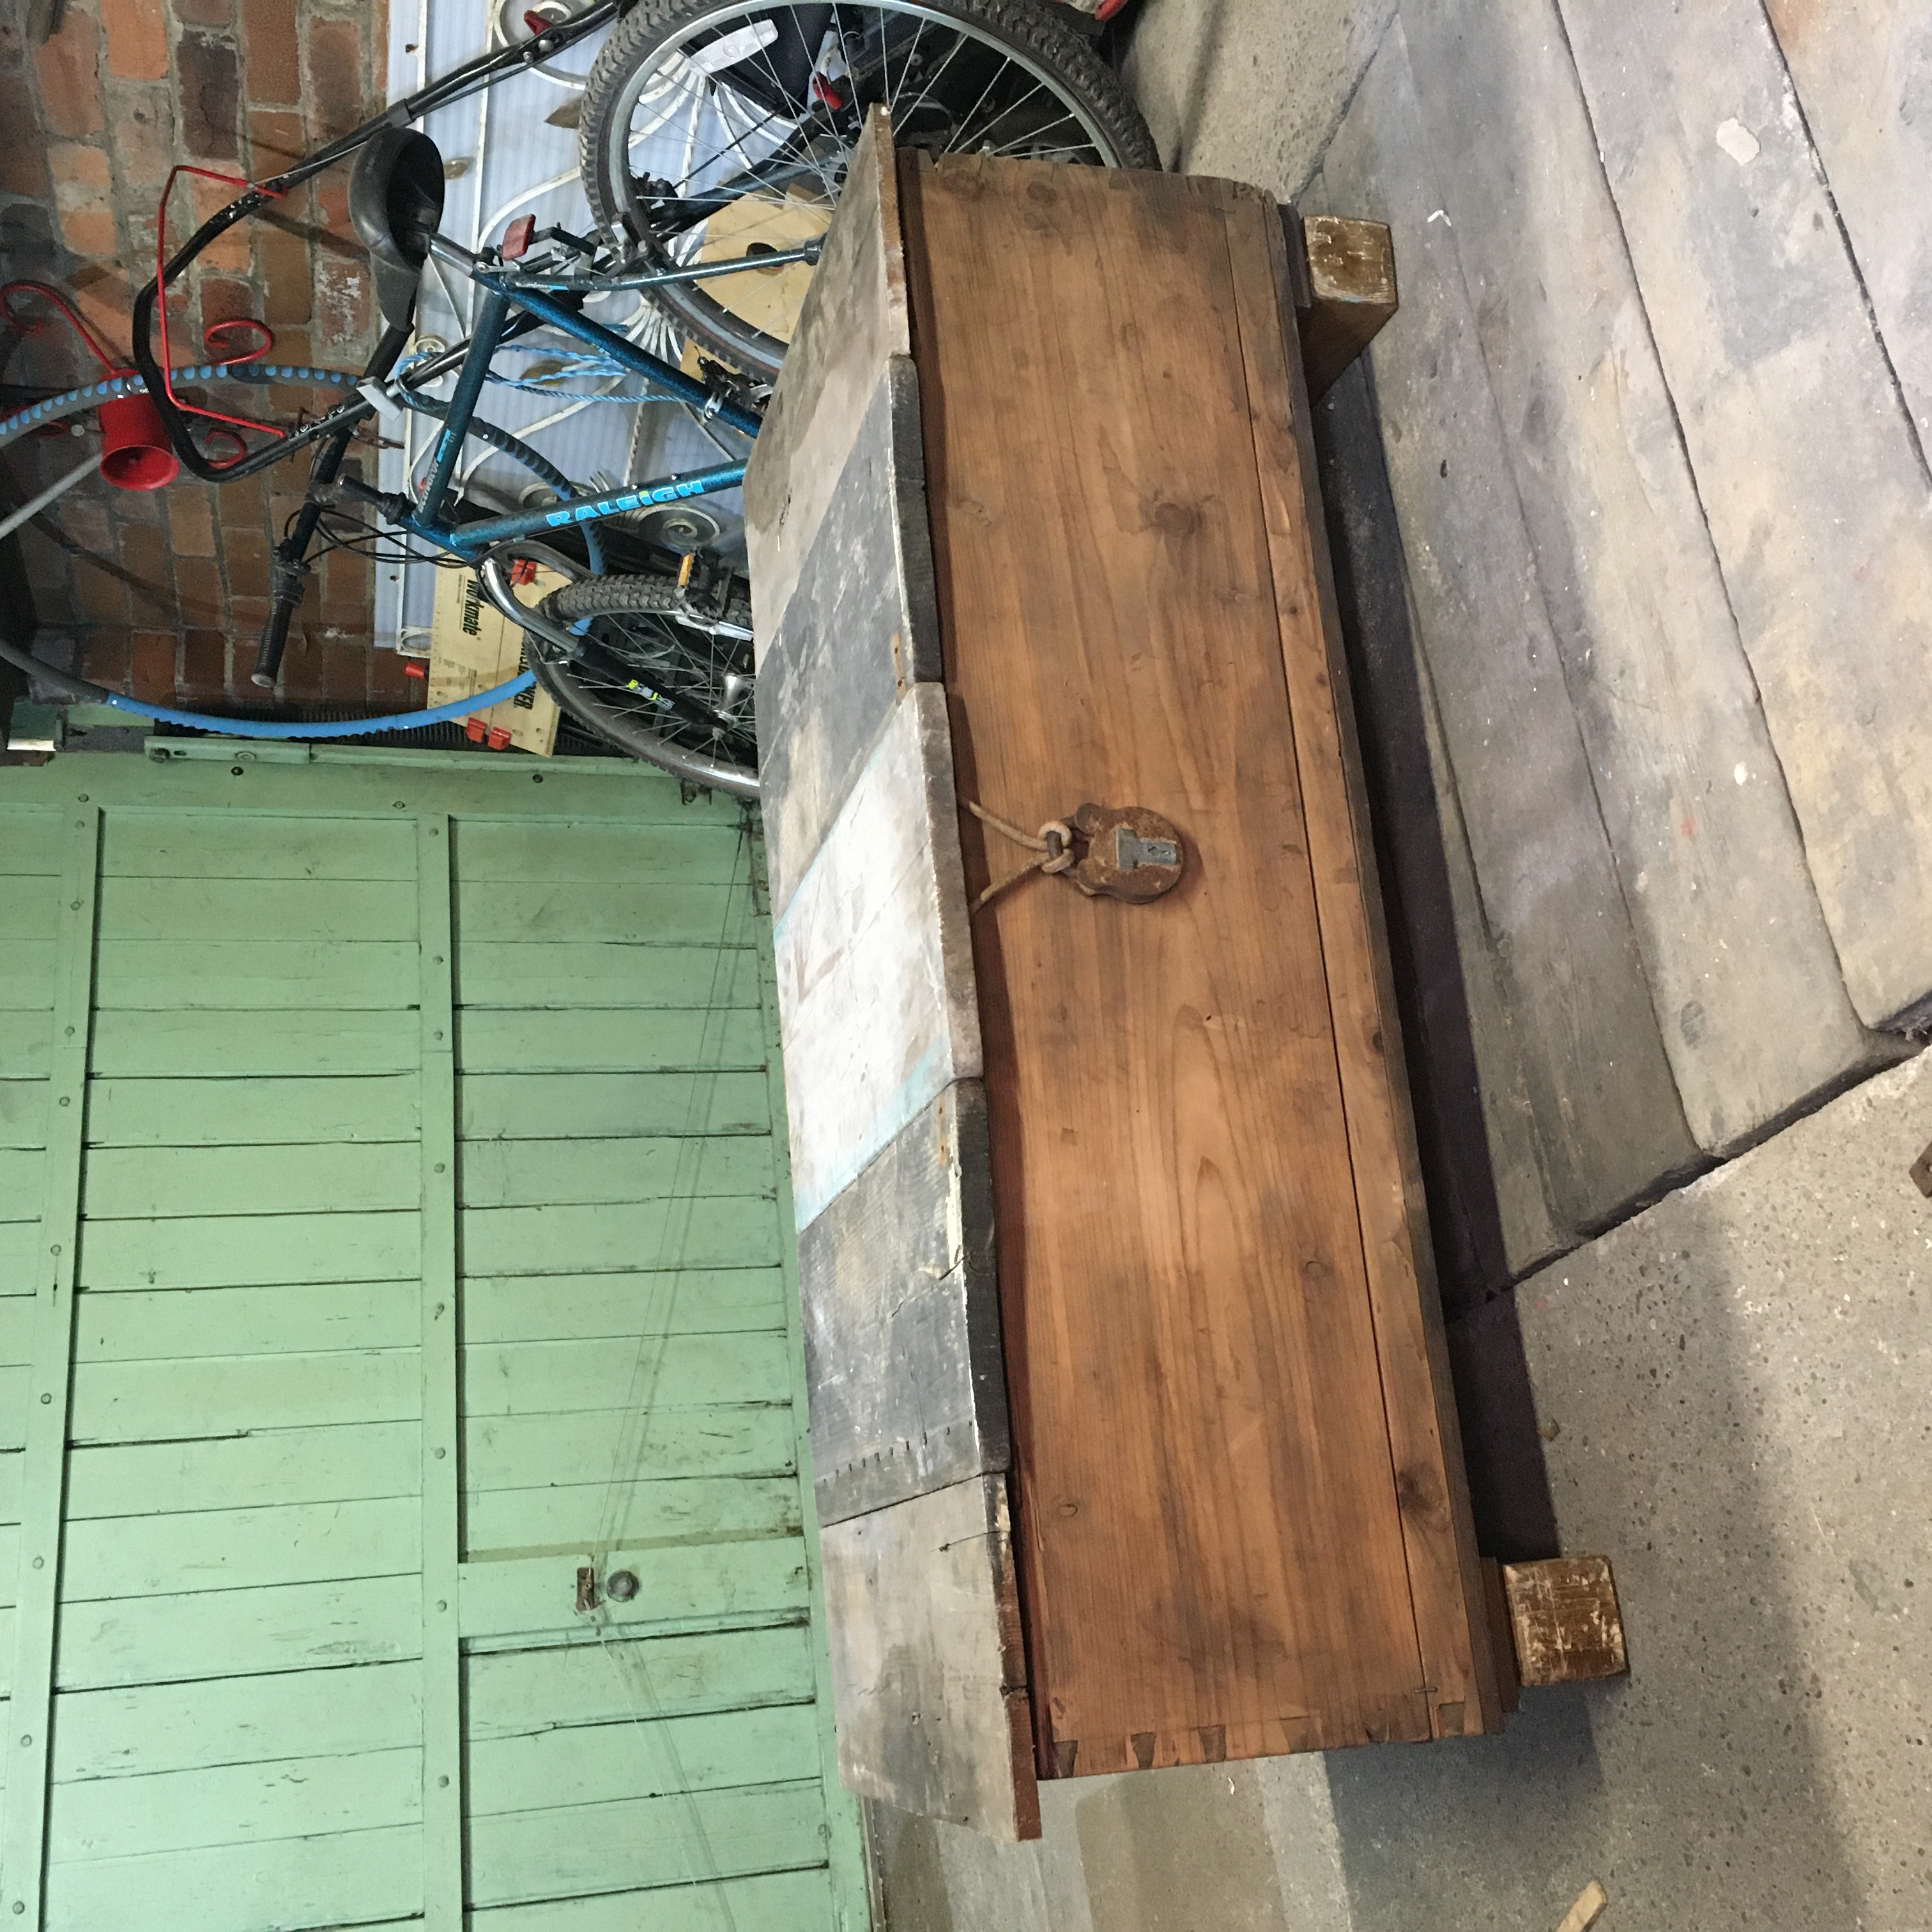
I only did 1 coat on it, because I really didn’t have the desire to do anymore. If I work up the motivation in the future then perhaps I’ll come back to it, but for now it looks amazing! Really really happy with how it came out, and I loved spending a few days bringing it to life. Here are some final hero shots of it, as well as pictures of it at it’s new location at the end of the bed!
![]()
![]()
![]()
![]()
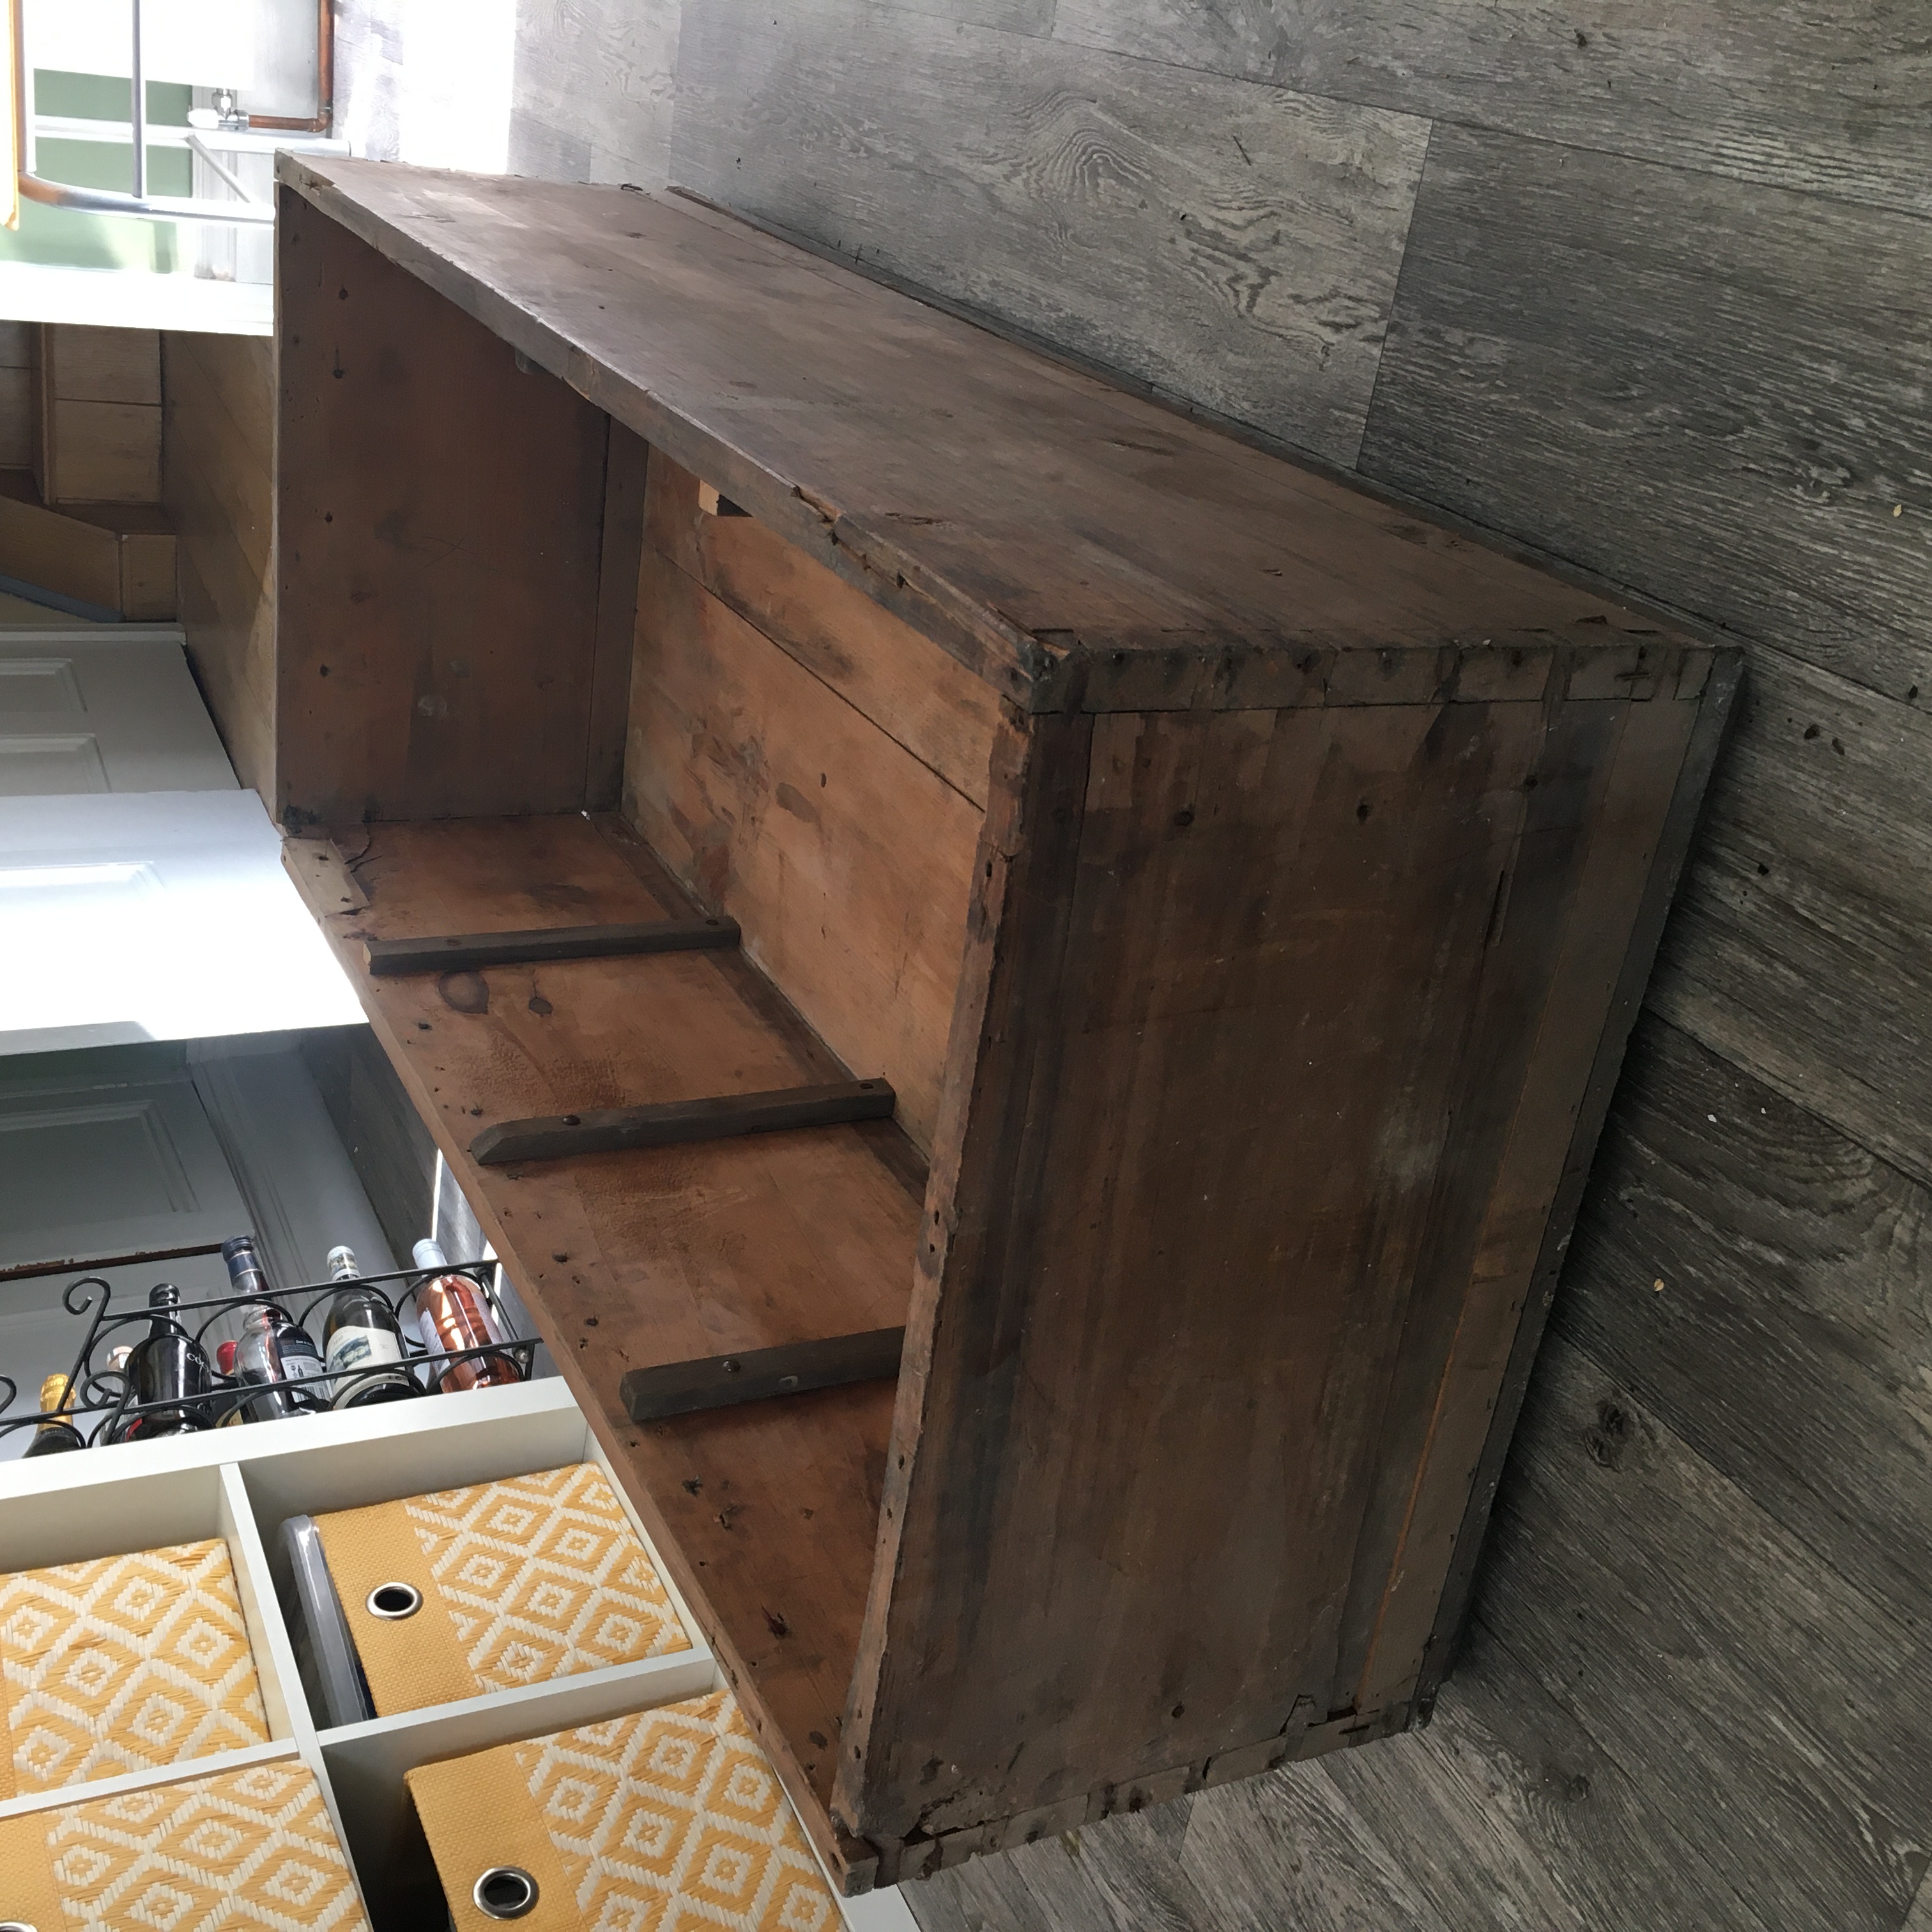
I’m not really sure what the crate/box was originally used for, but it was surprisingly sturdy. All 4 corners had a number of dovetail joints holding the faces together, and the 2 base pieces were doweled together so that the middle wouldn’t fall through. I didn’t know exactly what I was going to do with it, but it was in such a nice condition that I knew it would be a shame to do anything to change or hide the wood, so I wanted to keep it as natural as possible (this included the few cracks, splits and chips that were in it - they add character!).
As a preface, I’m delighted with how well this project came together. It was nice to have a break for a few days where I could focus my energy into building something rather than drawing, and in this case that ‘something’ was turning the old crate we found into a wooden trunk!
PREPARING THE CRATE
The first thing I did was clean the crate with a hoover and then some warm water and a brush, removing all the grime, dirt and cobwebs that had accumulated on it over however long it had been in our cellar. I then sanded the outside using an electric sander just to neaten up any rough patches.
After cleaning the crate up, I strengthened the crate. Even though it was in already in pretty good condition we thought it’d be a good idea if I added some extra support just in case. In the image of the original crate you can see that on the inside of the long edges there are 6 wood strips (3 on either side). I decided to find wood as close to this as possible so that I could cut 4 more stips and put them in the 4 corners of the crate, giving each side extra rigidity. Conviently, there was also a lot of spare pieces of wood left behind in the cellar too, so I didn’t have to look particularly far to find some that matched. I didn’t take a picture of these when I made them, but I’m sure you’ll see them crop up in other photos.
I also went over some of the bigger splits in the wood and glued/nailed them down just so that they weren’t majorly peeling away and nicking anyone in the fingers.
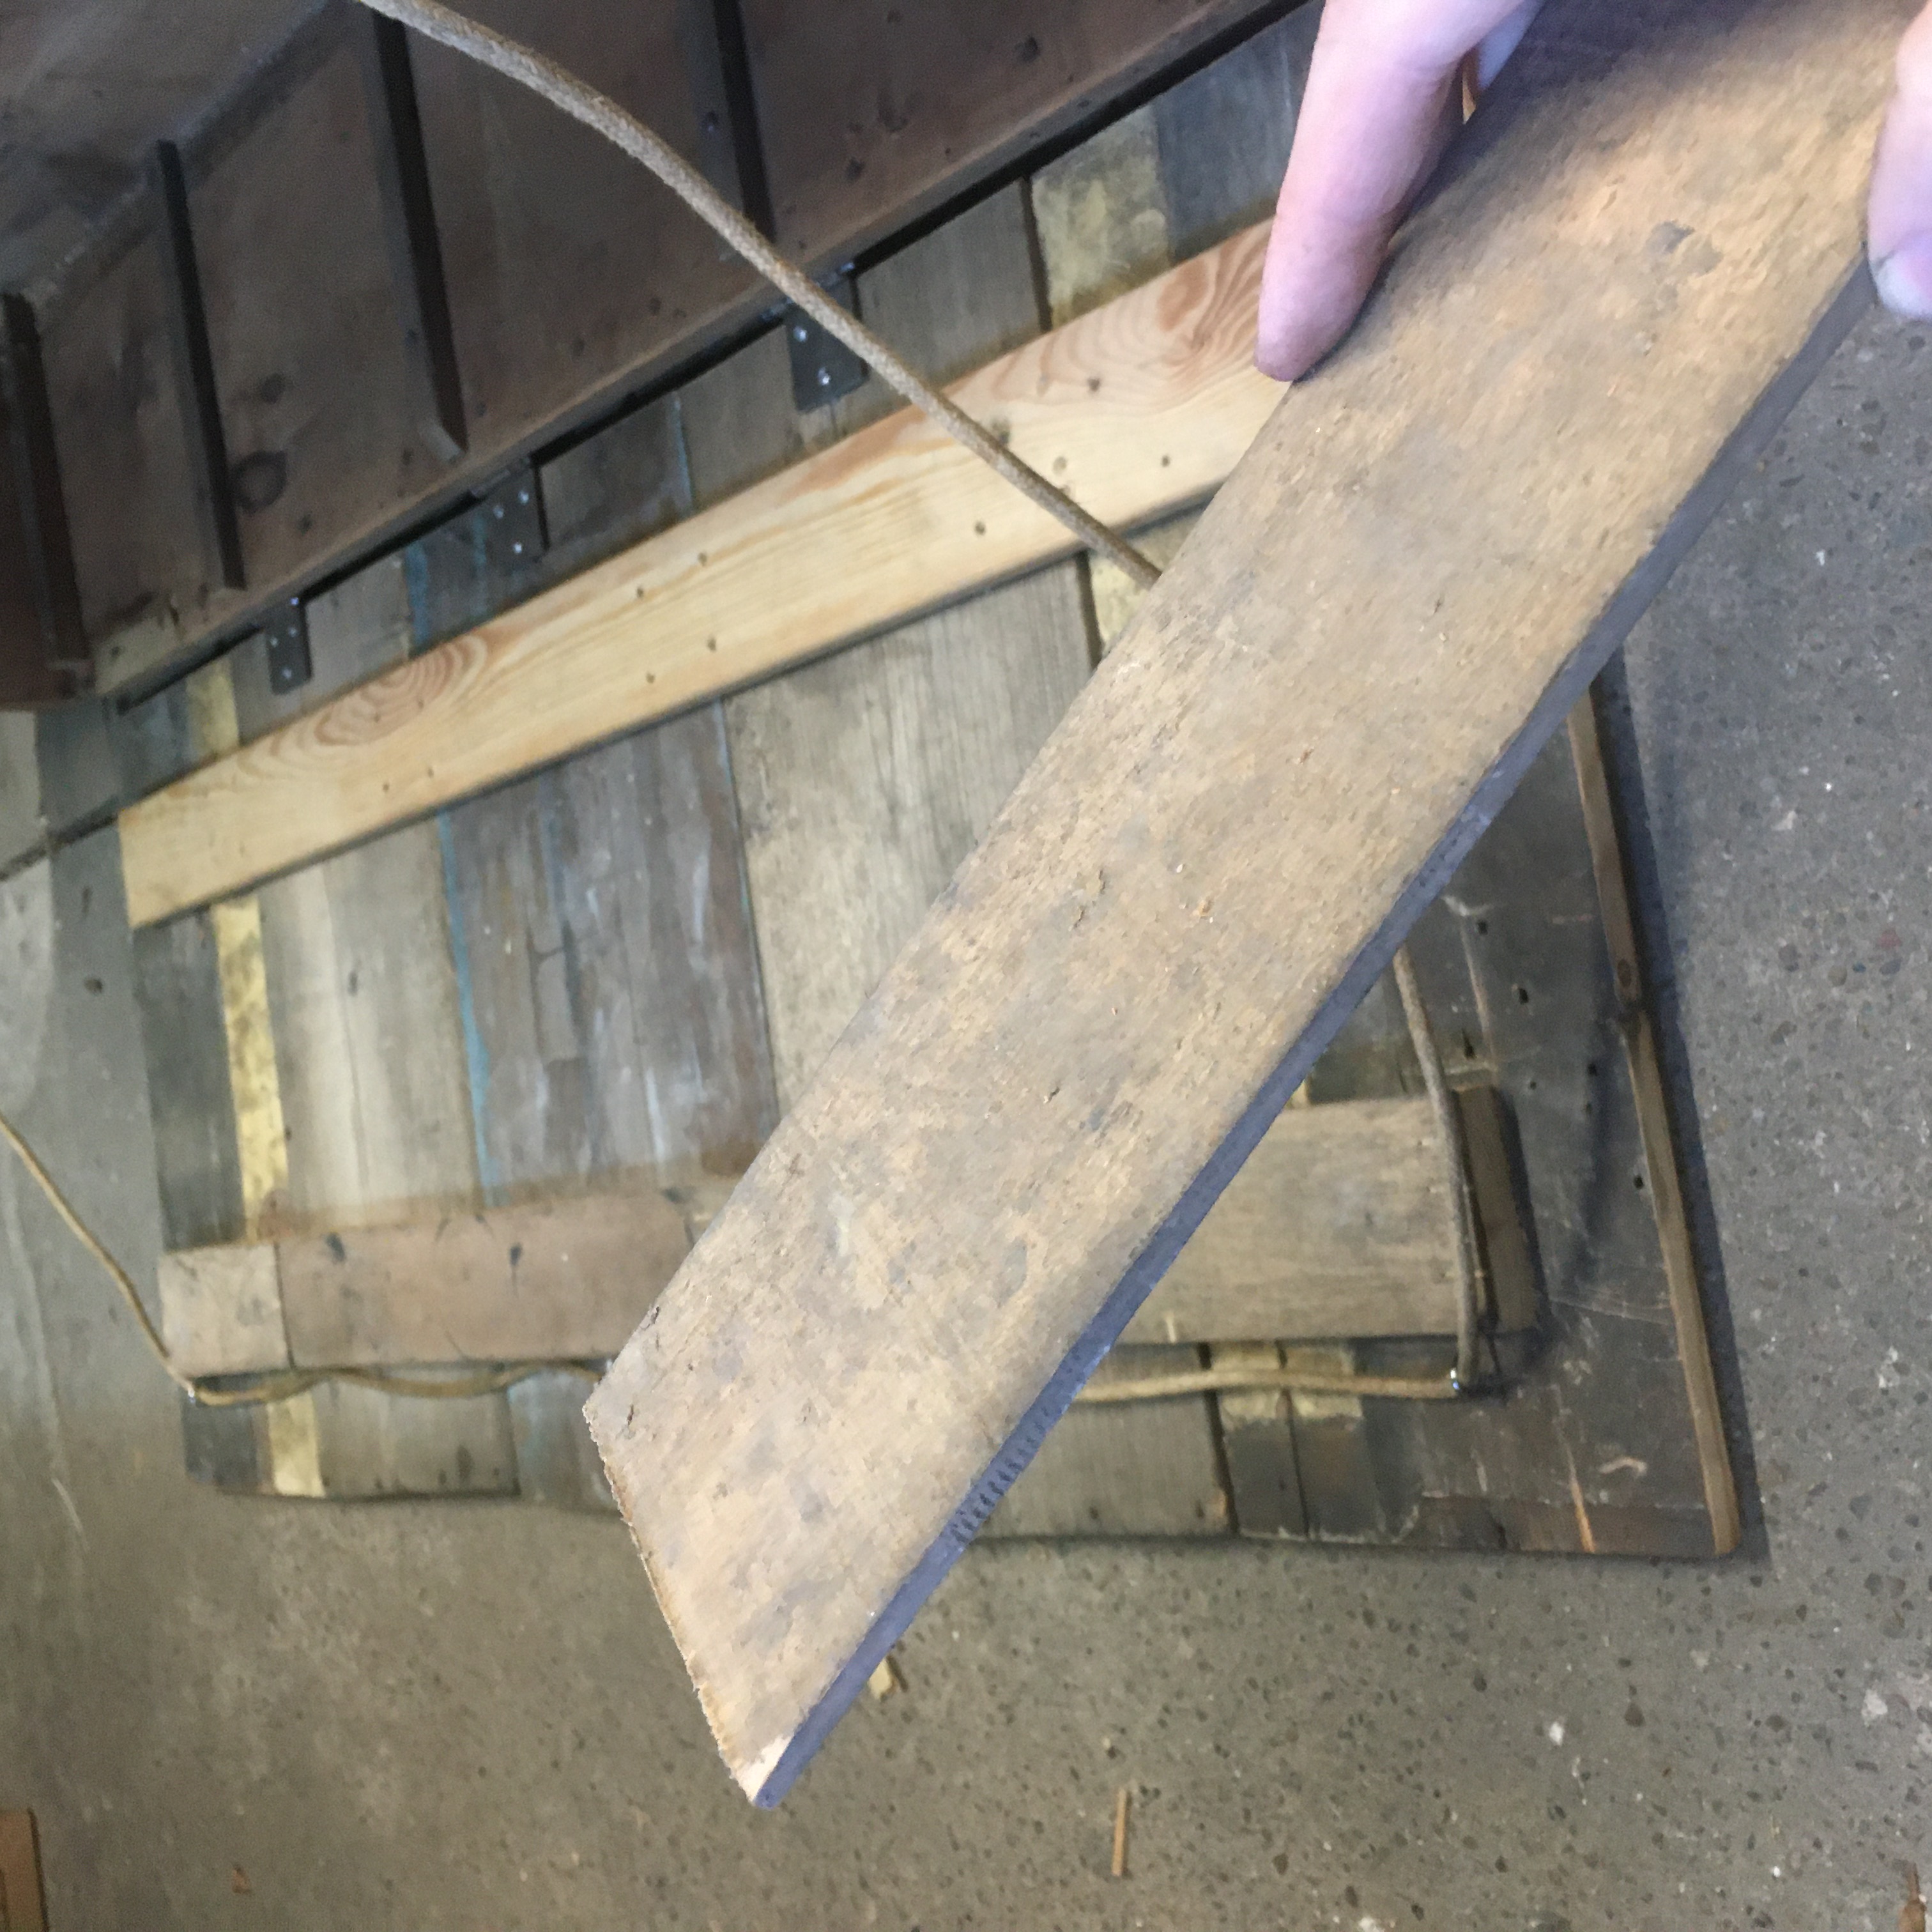
CREATING THE LID
All praise to the magical cellar that beholds many gifts! When it came to creating the lid, I felt the best thing to do was to just have a rummage around the wood that was left behind and see what I could scrap together. And with the amount of stuff that was left, it honestly didn’t take long to find 4 bits of wood that were of similar heights and suitable lengths. (The lid was going to be 5 planks wide, but the fourth piece I found was twice as long as need be, and so was split in 2!).
All the pieces of wood were quite old and rough, and I quite liked them that way. I think it would have felt odd having a fresh new lid on a quite-weathered crate, so you might as well make the lid a feature too, right? With that in mind, I decided to keep the wobbly edge for the front lip of the trunk. None of the planks I’d chosen were particularly clean cuts at 90 degree angles, and I quite liked that. So I played around and explored different ways to line them up so that the front lip was wonky but also continuous:
I then marked the back edges of the planks so that I could cut them down to size individually. During this process it was said to me:
“It probably would have been quicker for you to fix the planks together first - and then cut the back edge of all 5 in one go, rather than marking out each one individually”
And yeah that was probably true...but in typical Morgan fashion I’d committed to my method so I might as well finish it. I fixed the planks together via 2 bed slats I found (in the magic cellar) on the underside. Next up was the hinges, and keeping in spirit of reusing materials we went on the hunt for some in the magic cellar! But alas, we didn’t find any. At least not any matching ones. And we felt if we were going to do the trunk properly then we might as well take the time to get matching hinges.
That said...it still didn’t stop us from coming up with a bonafide bodger solution. I noticed that there were remnants of hinges on our shed/garage door. Clearly someone had put fresh hinges on and had been too lazy to take off the old ones. Happy days for me! Unfortunately they didn’t have any pins in them...but again that didn’t stop our bodgering ways - and I searched for some loose nails that I could hammer in as replacement pins!
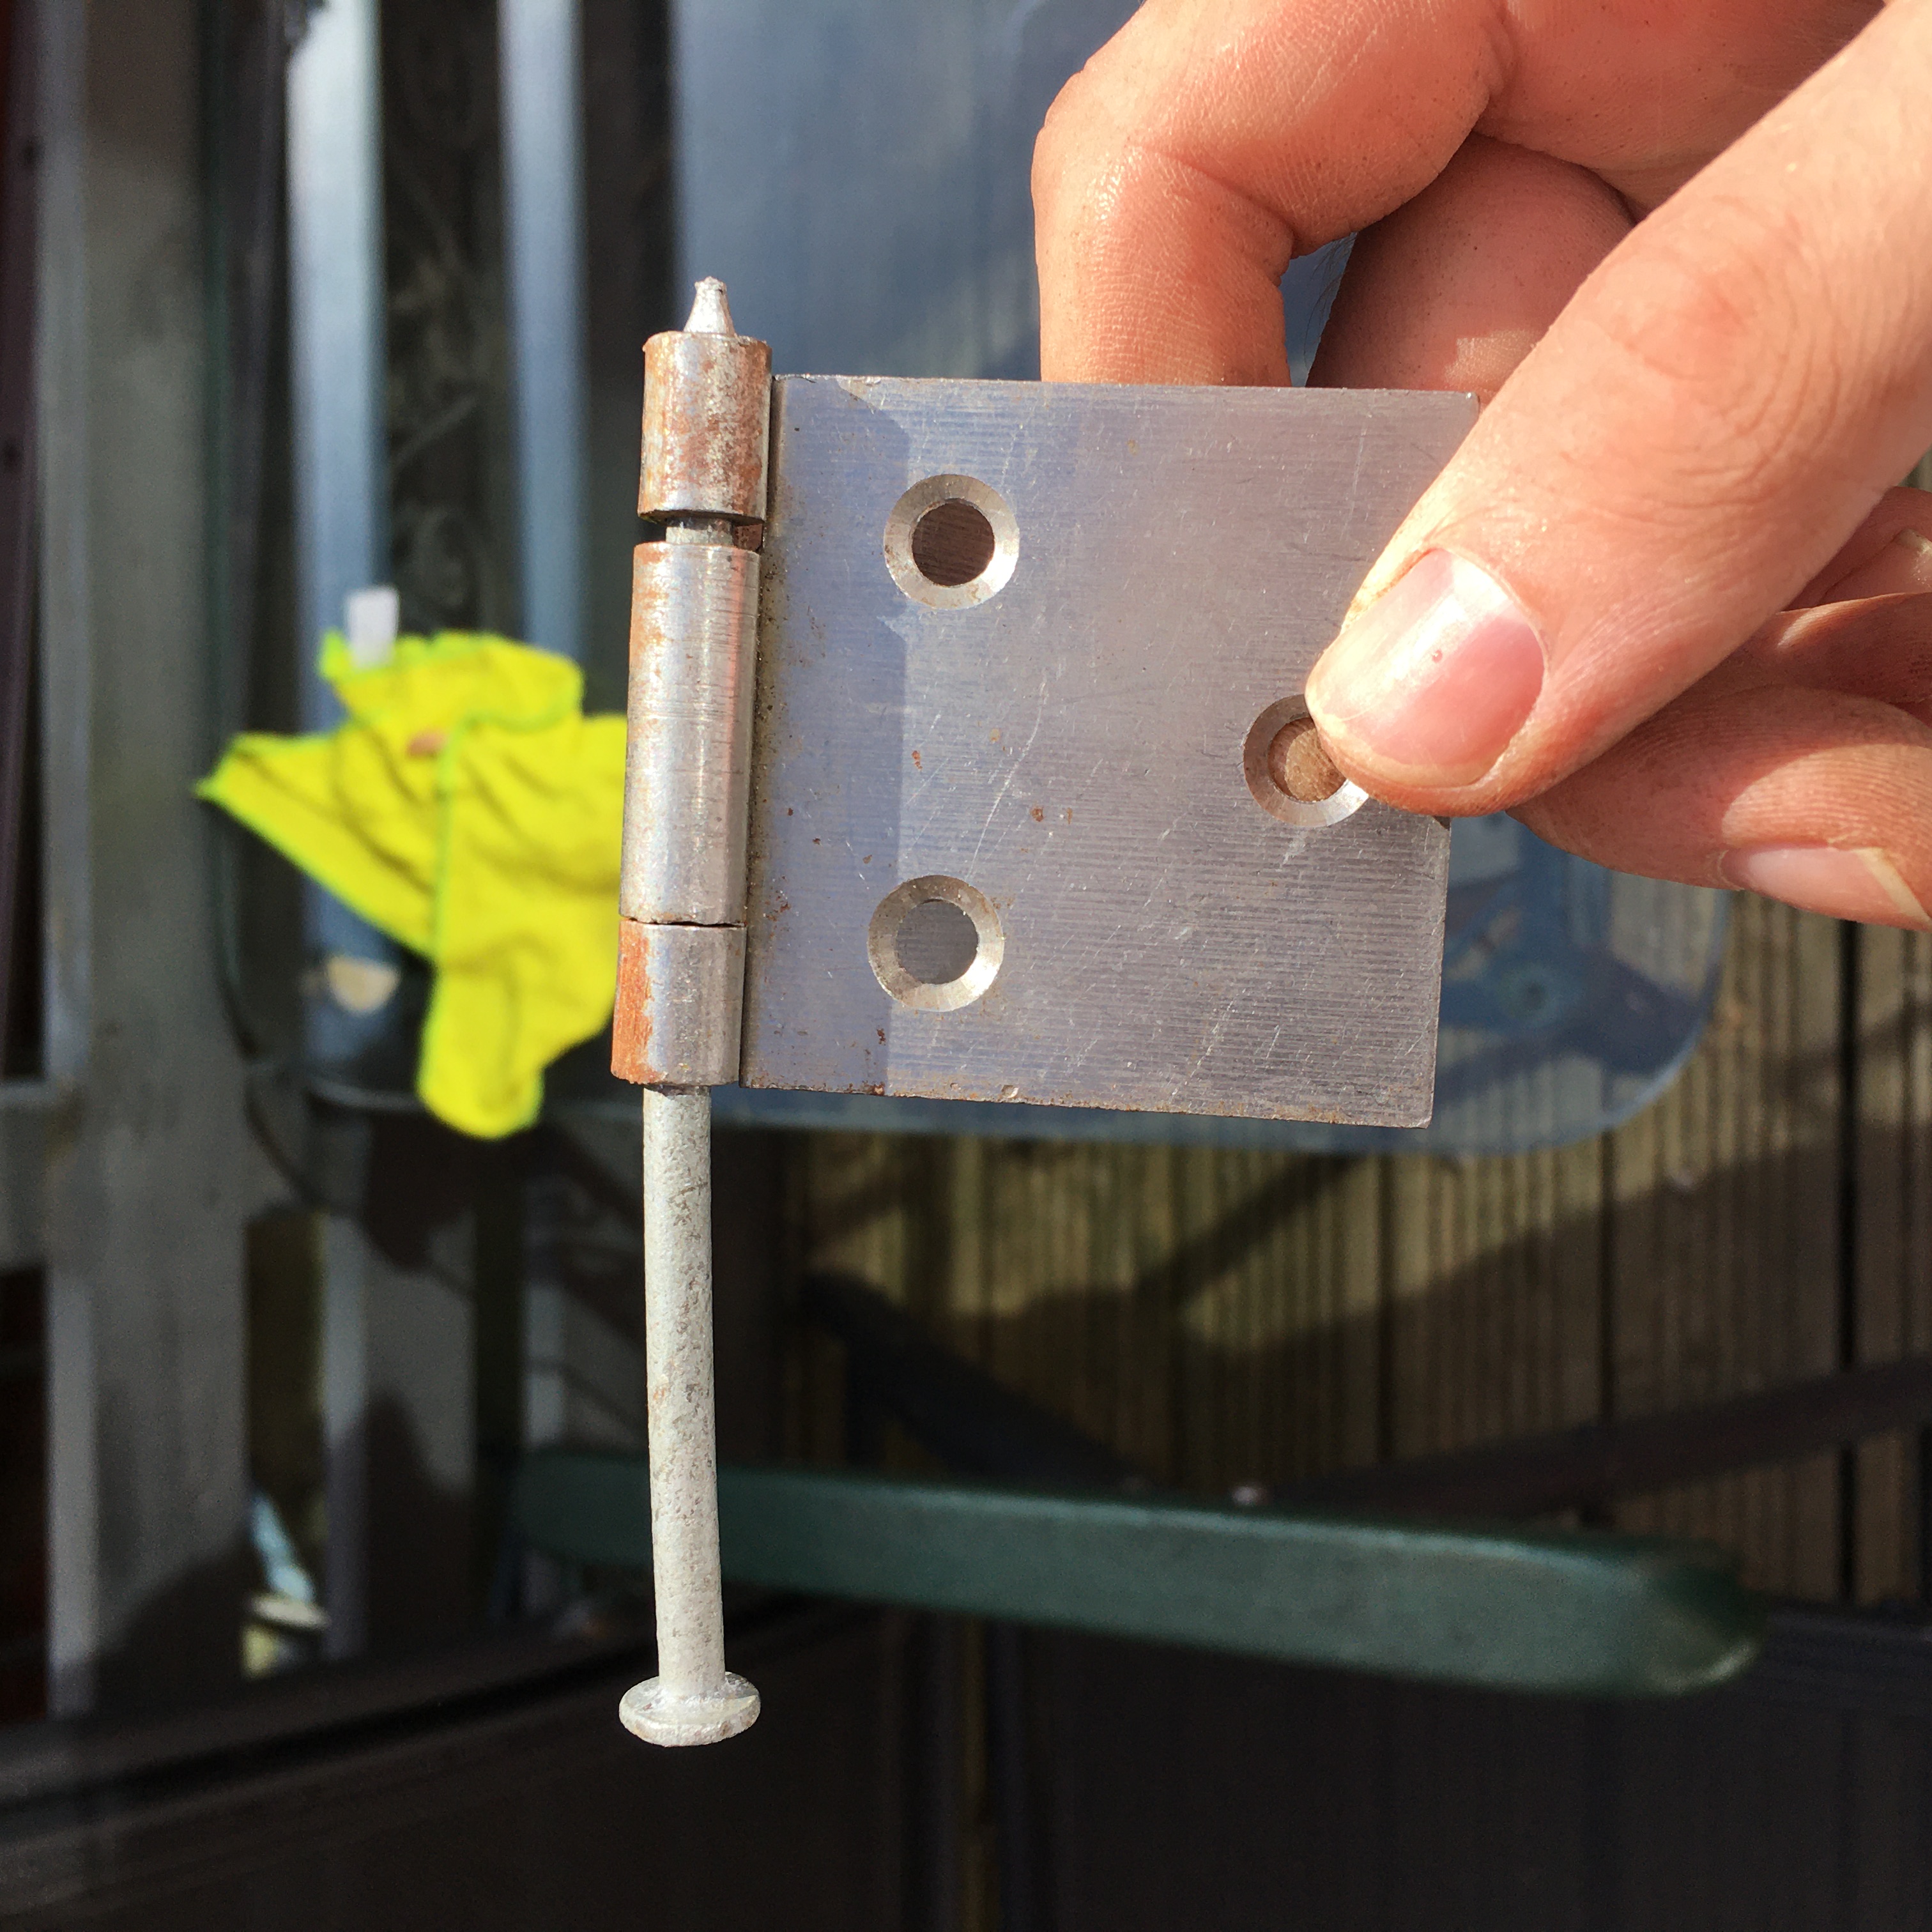
Surprisingly enough, this worked an absolute treat! I knocked the nails all the way through until the head met the hinges, and then I took an angle grinder to the other end and cut off the excess. Et voilà! Whether I’m a cheapskate, environmentally conscious or just too lazy to go out and buy some brand new hinges, this is a level of bodgery that would make my mum proud!*
*she once tried to paint our living room curtains in lieu of buying new ones...
ROPE!
Now, since I was sort of working things out as I went along, I knew the next step was to add something that would stop the lid from opening too much. I also wanted to add some handles to the sides, some form of ‘dampener’ under the lid that would make closing it a tad bit softer and I also had an old padlock that I wanted to add to the front as a decoration.
When I was last down in the magic cellar (looking for hinges), I noticed there was some old, strong rope. And now it came to tackling these additions I thought: “Well the rope would make good handles...and a nice way to attach the padlock...and a good way to hold open the lid...and maybe it’ll even soften the closure of the lid!” I hadn’t just killed 2 birds with 1 stone, I felt like I’d fortuitously annihilated the whole flock (that is if annihilating a whole family of birds were ever fortuitous).
The first thing I mucked around with was the padlock, a nice easy task after having the biggest task of faffing with the lid. I just ended up running the rope through the latch and I think (other than one family member saying “it looks like a vulva” - ???) it turned out quite well!
The next thing I did was the rope for the lid. I knew I’d have to tie it from the front face of the trunk to the lid, but beyond that I hadn’t thought much about how I was going to implement it. However, I’d realised that the lid now closed on the rope that was holding in place the padlock. This was great, as it meant the closing of the lid was slightly dampened, and wasn’t as harsh as wood hitting wood. But also, it meant that the centre of the lid was raised slightly, and led to either end rocking slightly.
To solve this I decided that the rope that was going to hold the lid open would also have to run over the top edge, so that the gap at the front was even all the way along. To do this I drilled a hole through the front face of the wood, threaded the rope through and tied a knot on the inside.
Next step was how I was going to attach it to the lid. I didn’t really fancy my chances at cutting a piece of rope for either end of the trunk and then tying them at the exact same length, so instead I decided that I would use one continuous piece of rope and just run it along the top of the lid. I had some hooks that I’d previously bought for other things, and so I screwed 3 of them into the top slat of the lid and ran the rope behind them.
Really happy with this solution, as any uneveness in the rope length will just balance itself out when the lid is opened, and I think it would have saved a lot of ball ache if I’d tried to tie two length of rope to be the same.
Although I was applauding myself for my rope-lid solution, it dawned on me after that I only had a small amount of rope left to do the hand,es. God forbid I was going out to buy some more, so I prayed that it was going to be enough. I cut what rope I had left in two, tied a knot as close to the end of the rope as I could and threaded it through the holes. Thankfully it was enough. All praise the magic cellar rope!
LEGS
The penultimate step was that I was going to add some small, chunky legs. And let me blow your mind when I tell you the wood I used for these was not from the magic cellar. I know, it’s quite the revelatory experience...I’ll give you time to gather your thoughts before progressing.
Unfortunately the truth isn’t quite as shocking as me going out and buying new wood, no. Instead, I used the legs off my old bed! Perhaps not as fantastical as wood from the magic cellar, but nevertheless still committed to spending no money.
For context, the bed in question was something I had already cut apart and stuck together in order to fit in my previous bedroom. My mattress fit lengthwise exactly wall to wall, and as such I got rid of the headboard, footboard and then cut/reassembled the remaining bed frame down to size so it would fit. When we were moving I got a number of:
“I can’t believe you’re bringing that old bed with you..!”
But I knew that eventually I’d be able to reuse the wood for something else. And lo and behold I have! The frame and 2 of the legs went towards a desk that I made, whilst the other 2 legs were cut down and used for this wooden trunk! Morgan Girvin: 50% hoarder, 50% repurposer.

I cut the 2 bed legs down into 4 legs of the same size, which would be screwed on to the existing ‘legs’ that the crate had, and then I cut one extra (and slightly taller) fifth leg which would sit in the centre. This was just to give it extra support in case I put something heavy inside the trunk and the middle decided to fall through.
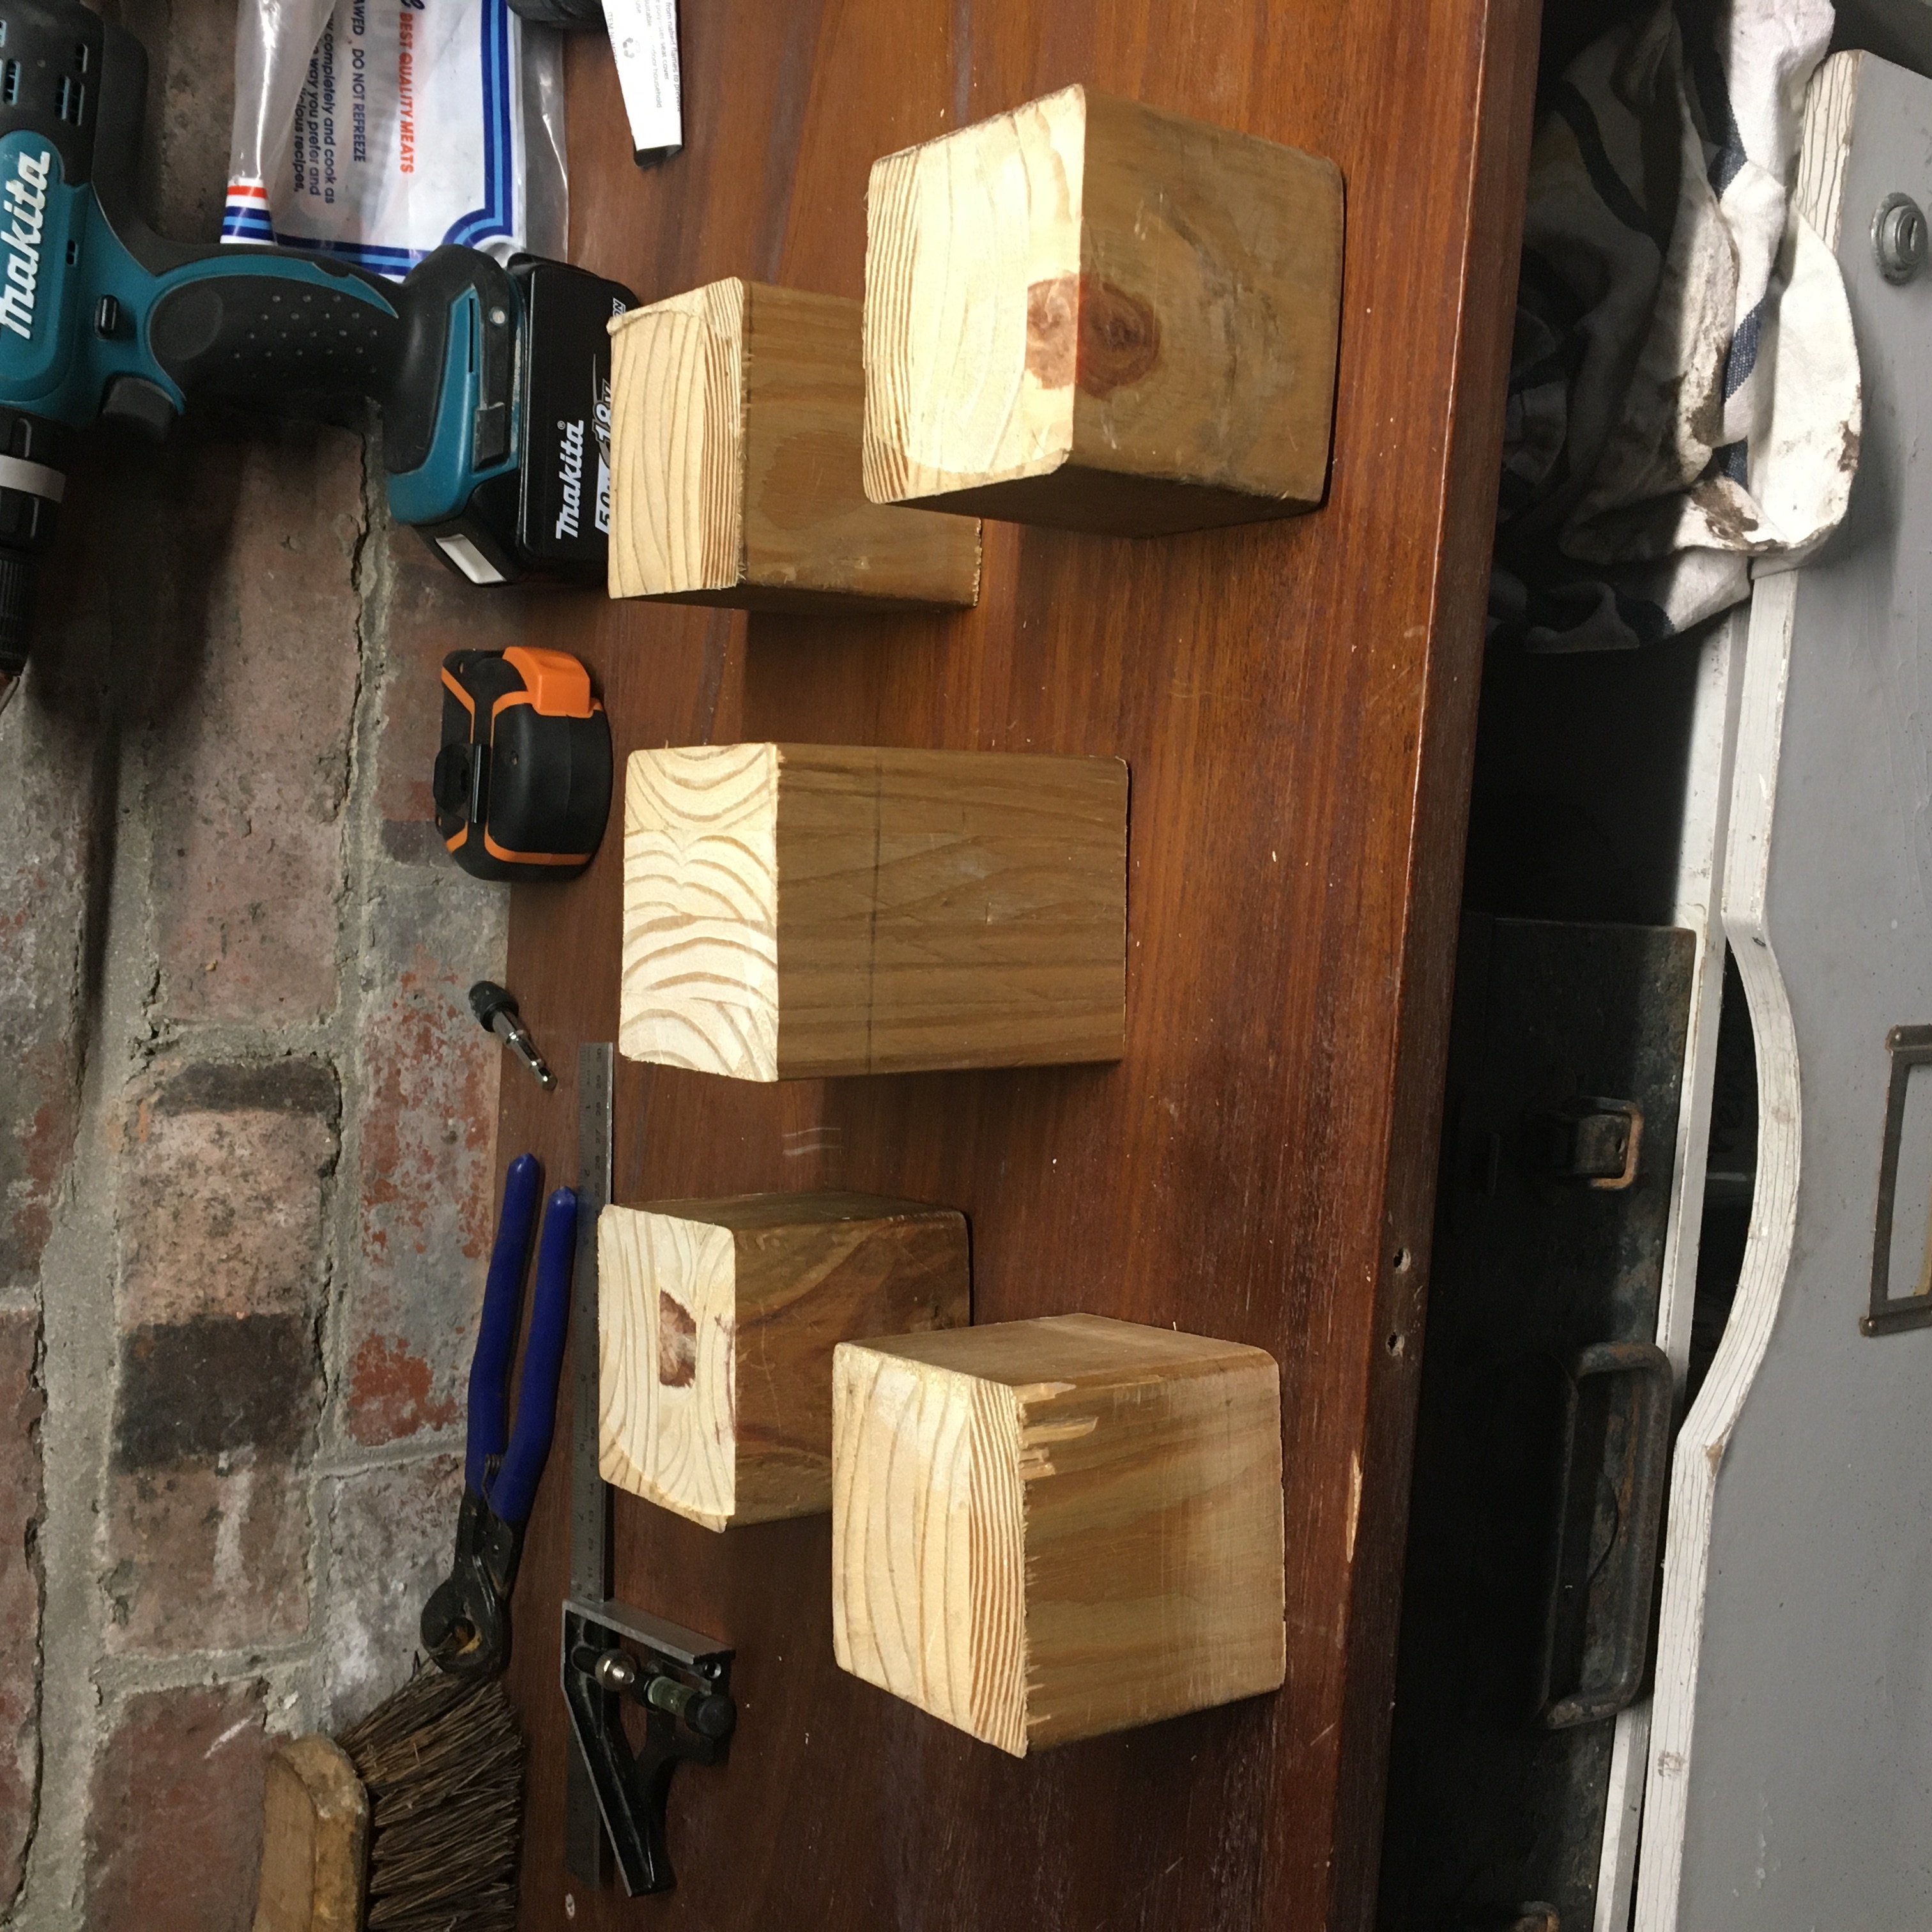
I then just screwed them all in from the top down. They were just added onto the old legs that were holding the crate about 15mm off the floor. I could have thought about taking these off, but I quite liked how they look. And also the screw heads that were holding them in place had started to crumble, so that seemed like it would be a huge faff to even think about tackling. And hooray! The Trunk is almost finished! Time to give it one more clean and then I can wax it. Hang on... I’ve just realised how much I HATE the look of those...
STUPID STUPID BED SLATS YOU STUPID BOY

Annoyingly, I don’t think they stand out as garishly in the photo as they do in real life. But I still think the photo shows just how different they look. Yuck.
In a sort of annoyed panic I started exploring and talking through the different options I had. It quickly crossed my mind to replace them with older bits of wood from the magic cellar, but that would mean taking the lid off the hinges and rope, taking the bed slats off, realigning the wooden top, screwing in new pieces and attaching the lid again. And with 48 screws in the slats and another 9 in the hinges I didn’t fancy it. The thought quickly left my head again.
I then moved on to the prospect of painting them. I grabbed another slat from the cellar that I could test things on. I took out a tin of stain from my room that I’d been given and tried that. The wood came out looking like the sauce from a tin of Spaghetti Hoops, so that was straight off the cards. I tried a few shades of brown outdoor paint we had leftover, but nope. They all looked arguably worse, like I was trying to cover something up. I then contemplated painting them a standout colour, like white, blue or black. Maybe if I embraced them looking different then I could own it. But I quickly vetoed that idea too. I was just annoyed at myself for overlooking this earlier in the project. Oh well, live and learn.
But then, like a smiling angel coming up from underneath me, the magic cellar saved the day, again. A few days prior to this I’d sifted through all of the wood that was down there and sorted it out into piles. Chunky bits over hit, planks over there. I thought it would help to know what we had so I could plan out how I’d approach these types of projects. And now I suddenly remembed that when I was down there I’d found quite a few thin strips of would that I could perhaps use as cladding. And let me tell you, when I brought those bad boys upstairs and out into the garage I almost cried with relief. They looked marvelous!
In the photo above you can see where I positioned some cladding on the left slat vs nothing on the right one. A couple of nails later and it was such a night and day difference to how it looked. Not only did it hide the ugly freshness of the bed slats, but it also covered the 48 screws and it tied the whole thing together.
I was so relieved that it had worked out that if human/cellar relations were an accepted form of societal relationship then I think me and that Cellar might have eloped and romped our way through a honeymoon.
WAX ON, AND ON AGAIN, AND ON, AND ON...
I thought I’d be excited whilst I was waxing it, with this being the final step and all. But I really hated it. It was like rubbing vaseline into the hole thing with your fingers. It was just tediously time consuming. It also used up a lot of wax, which I don’t think is particularly cheap (reliably as ever, I was using a half opened tin we already had).
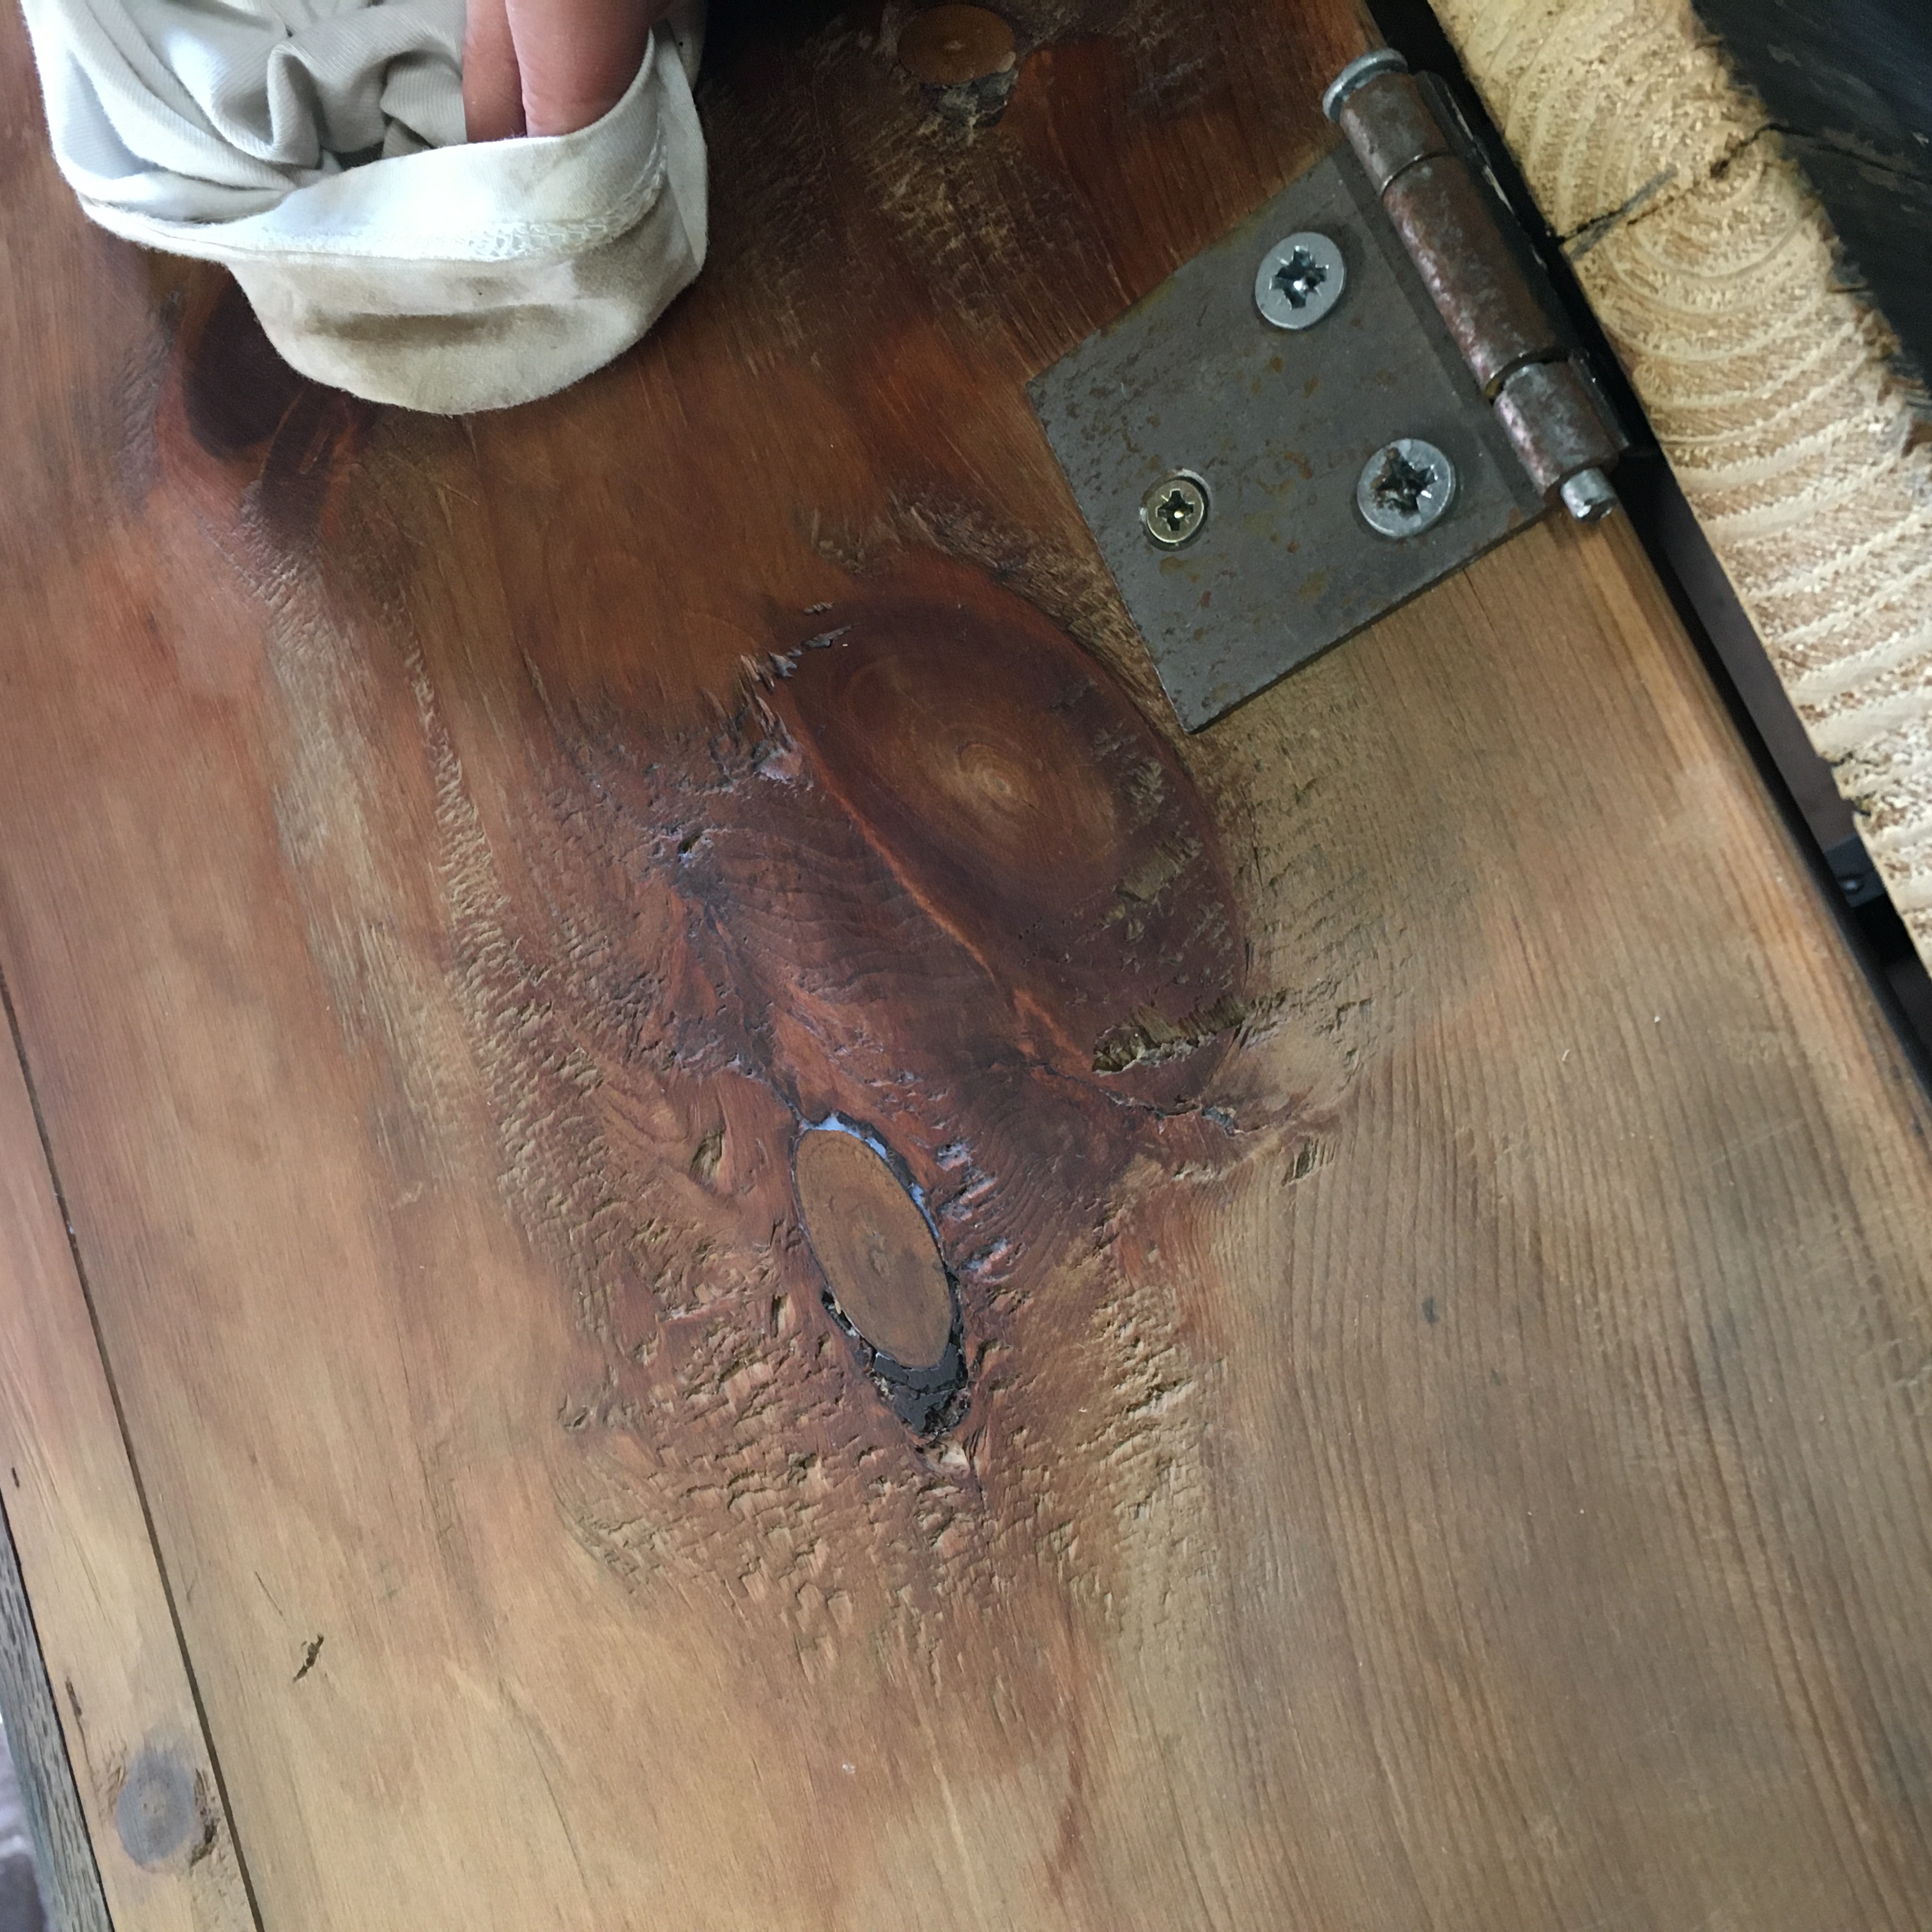
I only did 1 coat on it, because I really didn’t have the desire to do anymore. If I work up the motivation in the future then perhaps I’ll come back to it, but for now it looks amazing! Really really happy with how it came out, and I loved spending a few days bringing it to life. Here are some final hero shots of it, as well as pictures of it at it’s new location at the end of the bed!